Set up your Nautica step by step
Upload your company logo. Try to upload the file in PNG format if possible, or make sure the image has a white background so it looks clean and without edges of a different background tone on invoices.
Fill out all the details of your nautical company.
When creating or configuring the series, we can edit the following details of your company.
Company Logo
Legal Name
Tax ID
Address
Phone
Website
We can have one series with a LOGO, for example, and the next series with other data and a different LOGO so we can choose through the series we are going to use.
Data Protection Law Clause: in this section, we can add the data protection clause, which will be developed in the last page of the document.
Commercial Registry Information: Current legislation requires invoices to display information about the Commercial Registry. We've adapted this section to make it visible on every invoice document to comply with current regulations.

Budgets, Delivery Notes, work orders, proformas, invoices:
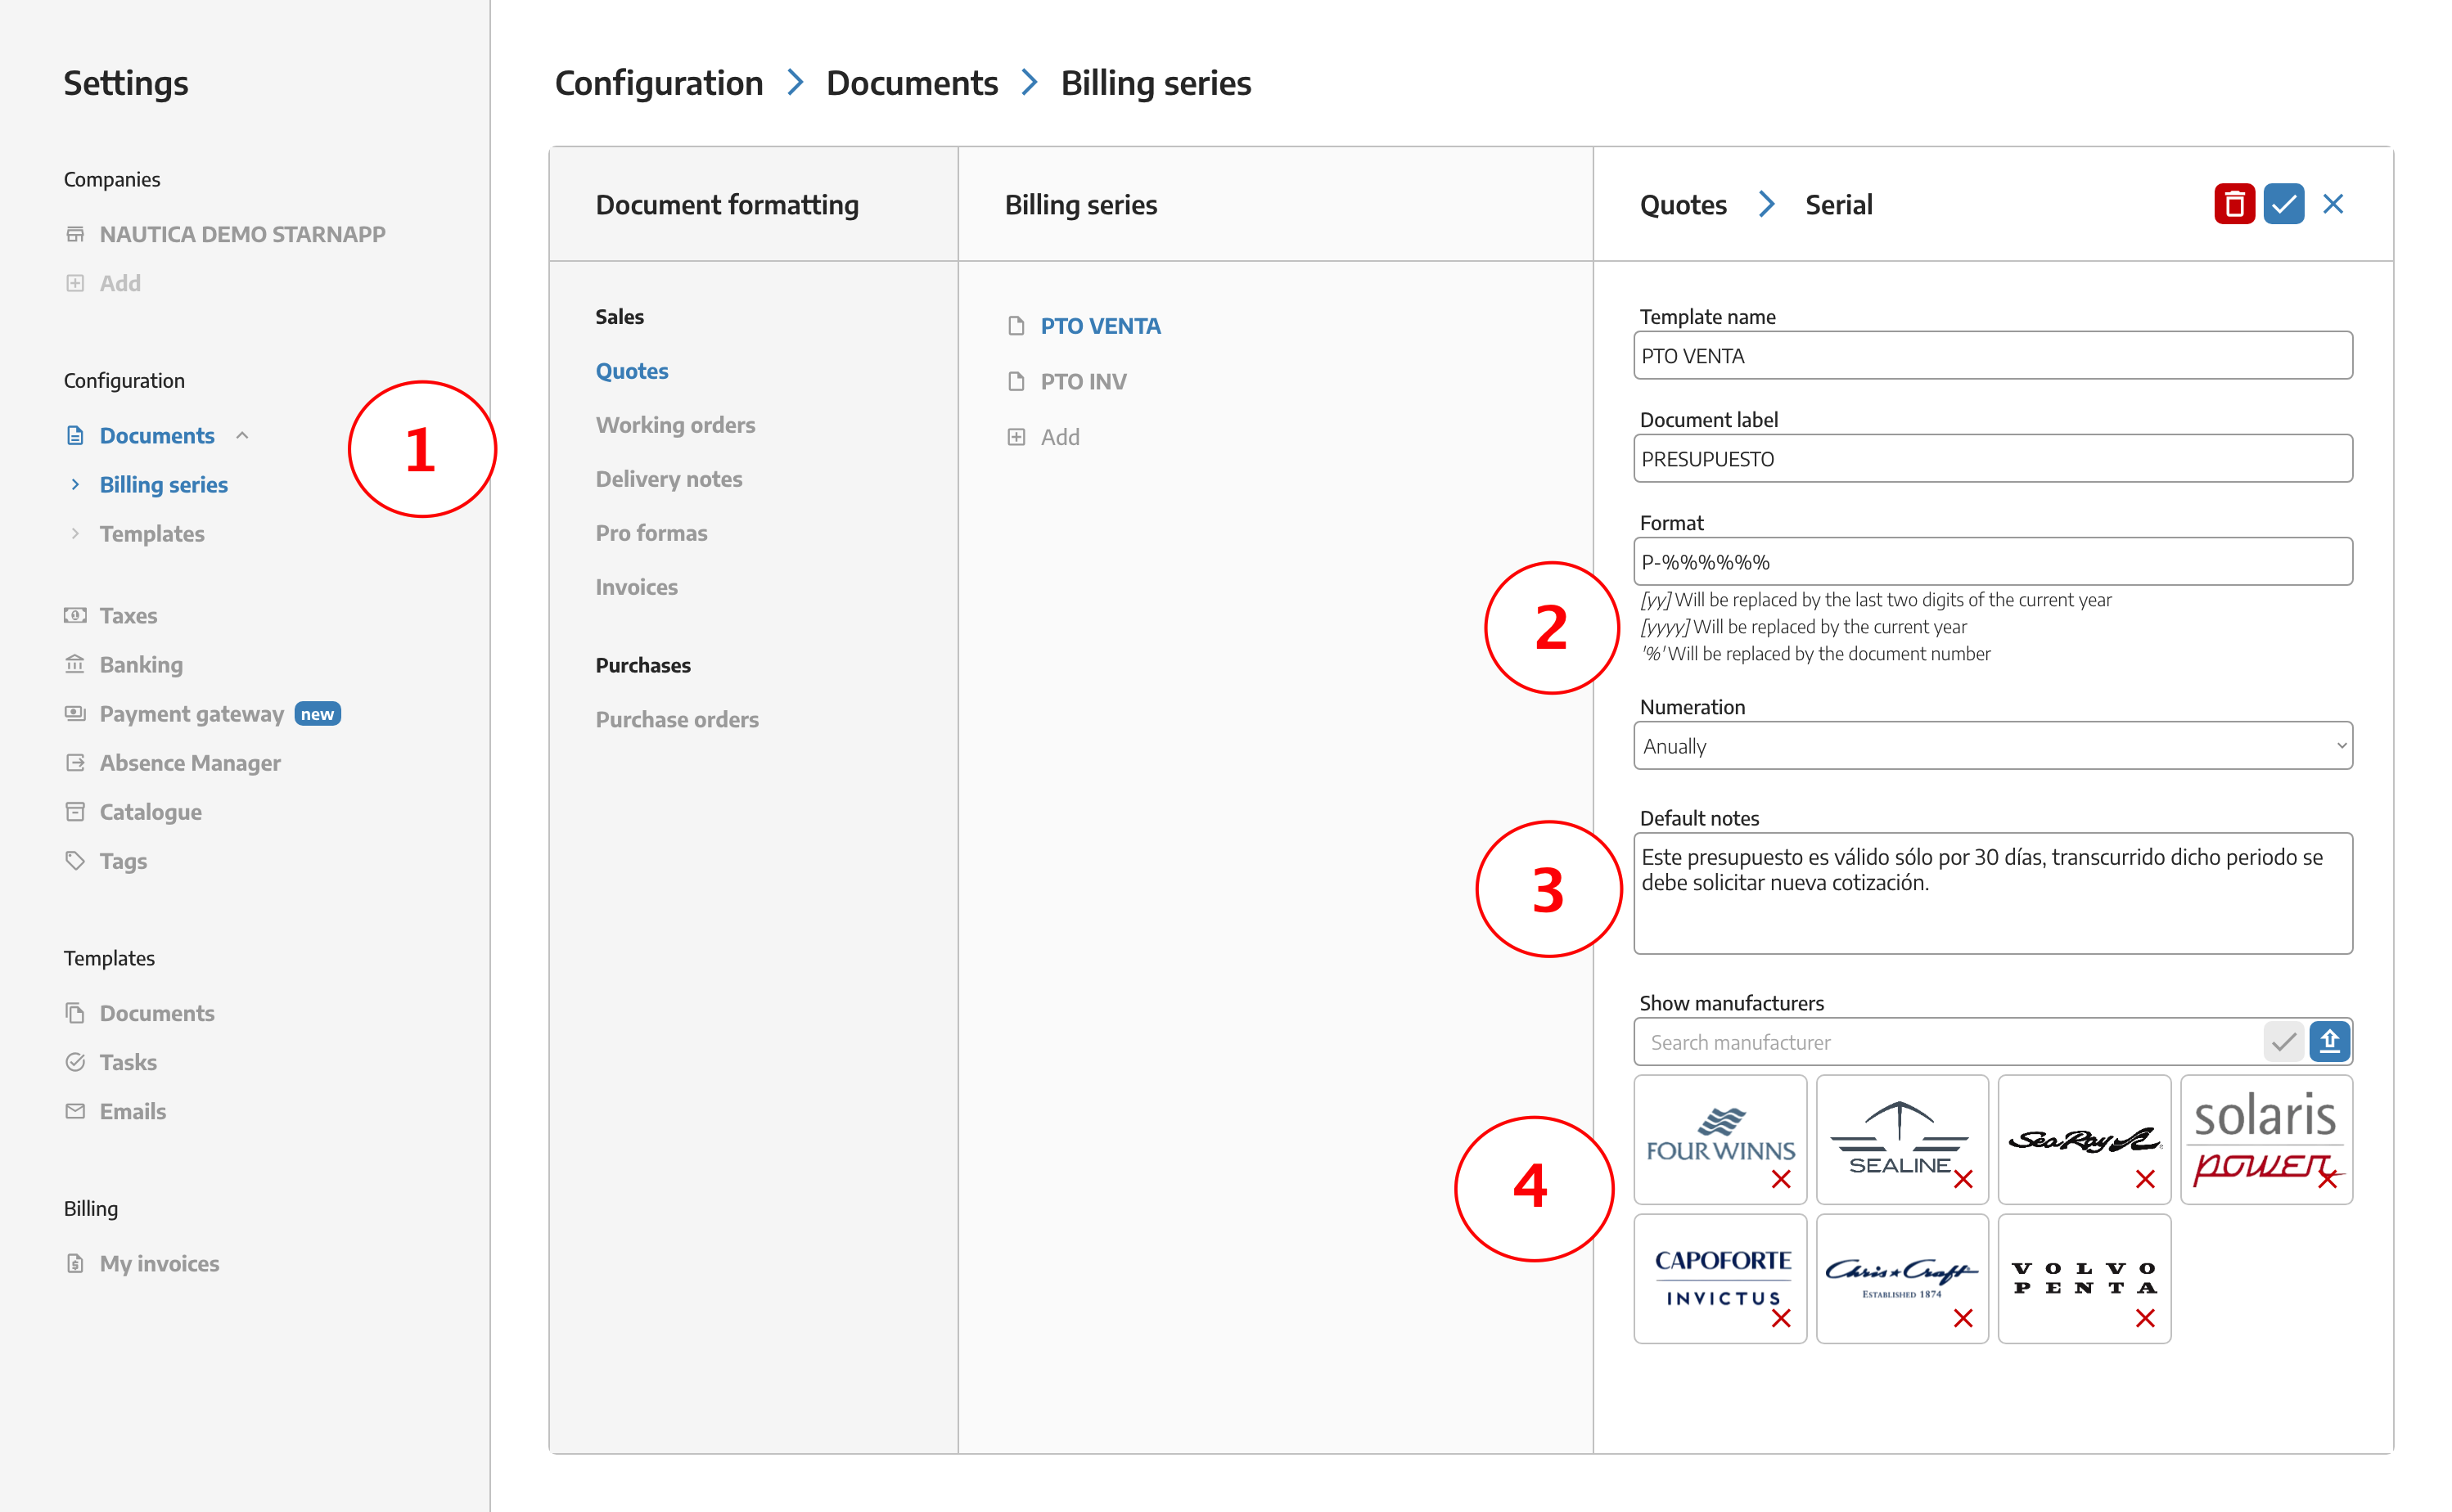
we’ll select the option Documents/Billing Series, here we choose the option we want to configure or we can add new billing series.
Format and Numbering: The format we provide for each document is determined by the digits we want to include. In this case, the prefix will be P-, and each % corresponds to a number. For example, we would have P-000000. If we want to include the year in the budget number, we’ll use the following configuration P-%%%[yyyy], where the result will be P-0002025. If we want to use only the year’s digits, we’ll use P-%%%[25], P-00025.
Default Notes: Default notes are those you want to include in your budgets, such as, this budget must be paid 50% upfront before starting the work, the issued budget may be subject to changes once repairs begin, etc.
Our budget numbering can be CONTINUOUS or ANNUAL.
Company Logos: you can also add, edit, or delete logos for different companies in any series of documents. There can be different companies for document series.
In the bottom right corner, we’ll find this option to add manufacturers’ logos. There’s a large selection of companies available, if you need to add a logo that isn’t listed, send it to us, and we’ll incorporate it so you can use it. Make sure the logo has the correct format (transparent background, png, svg, or similar so the logo doesn’t have borders). To remove a logo from the series, simply click the X next to it, and it will be deleted.
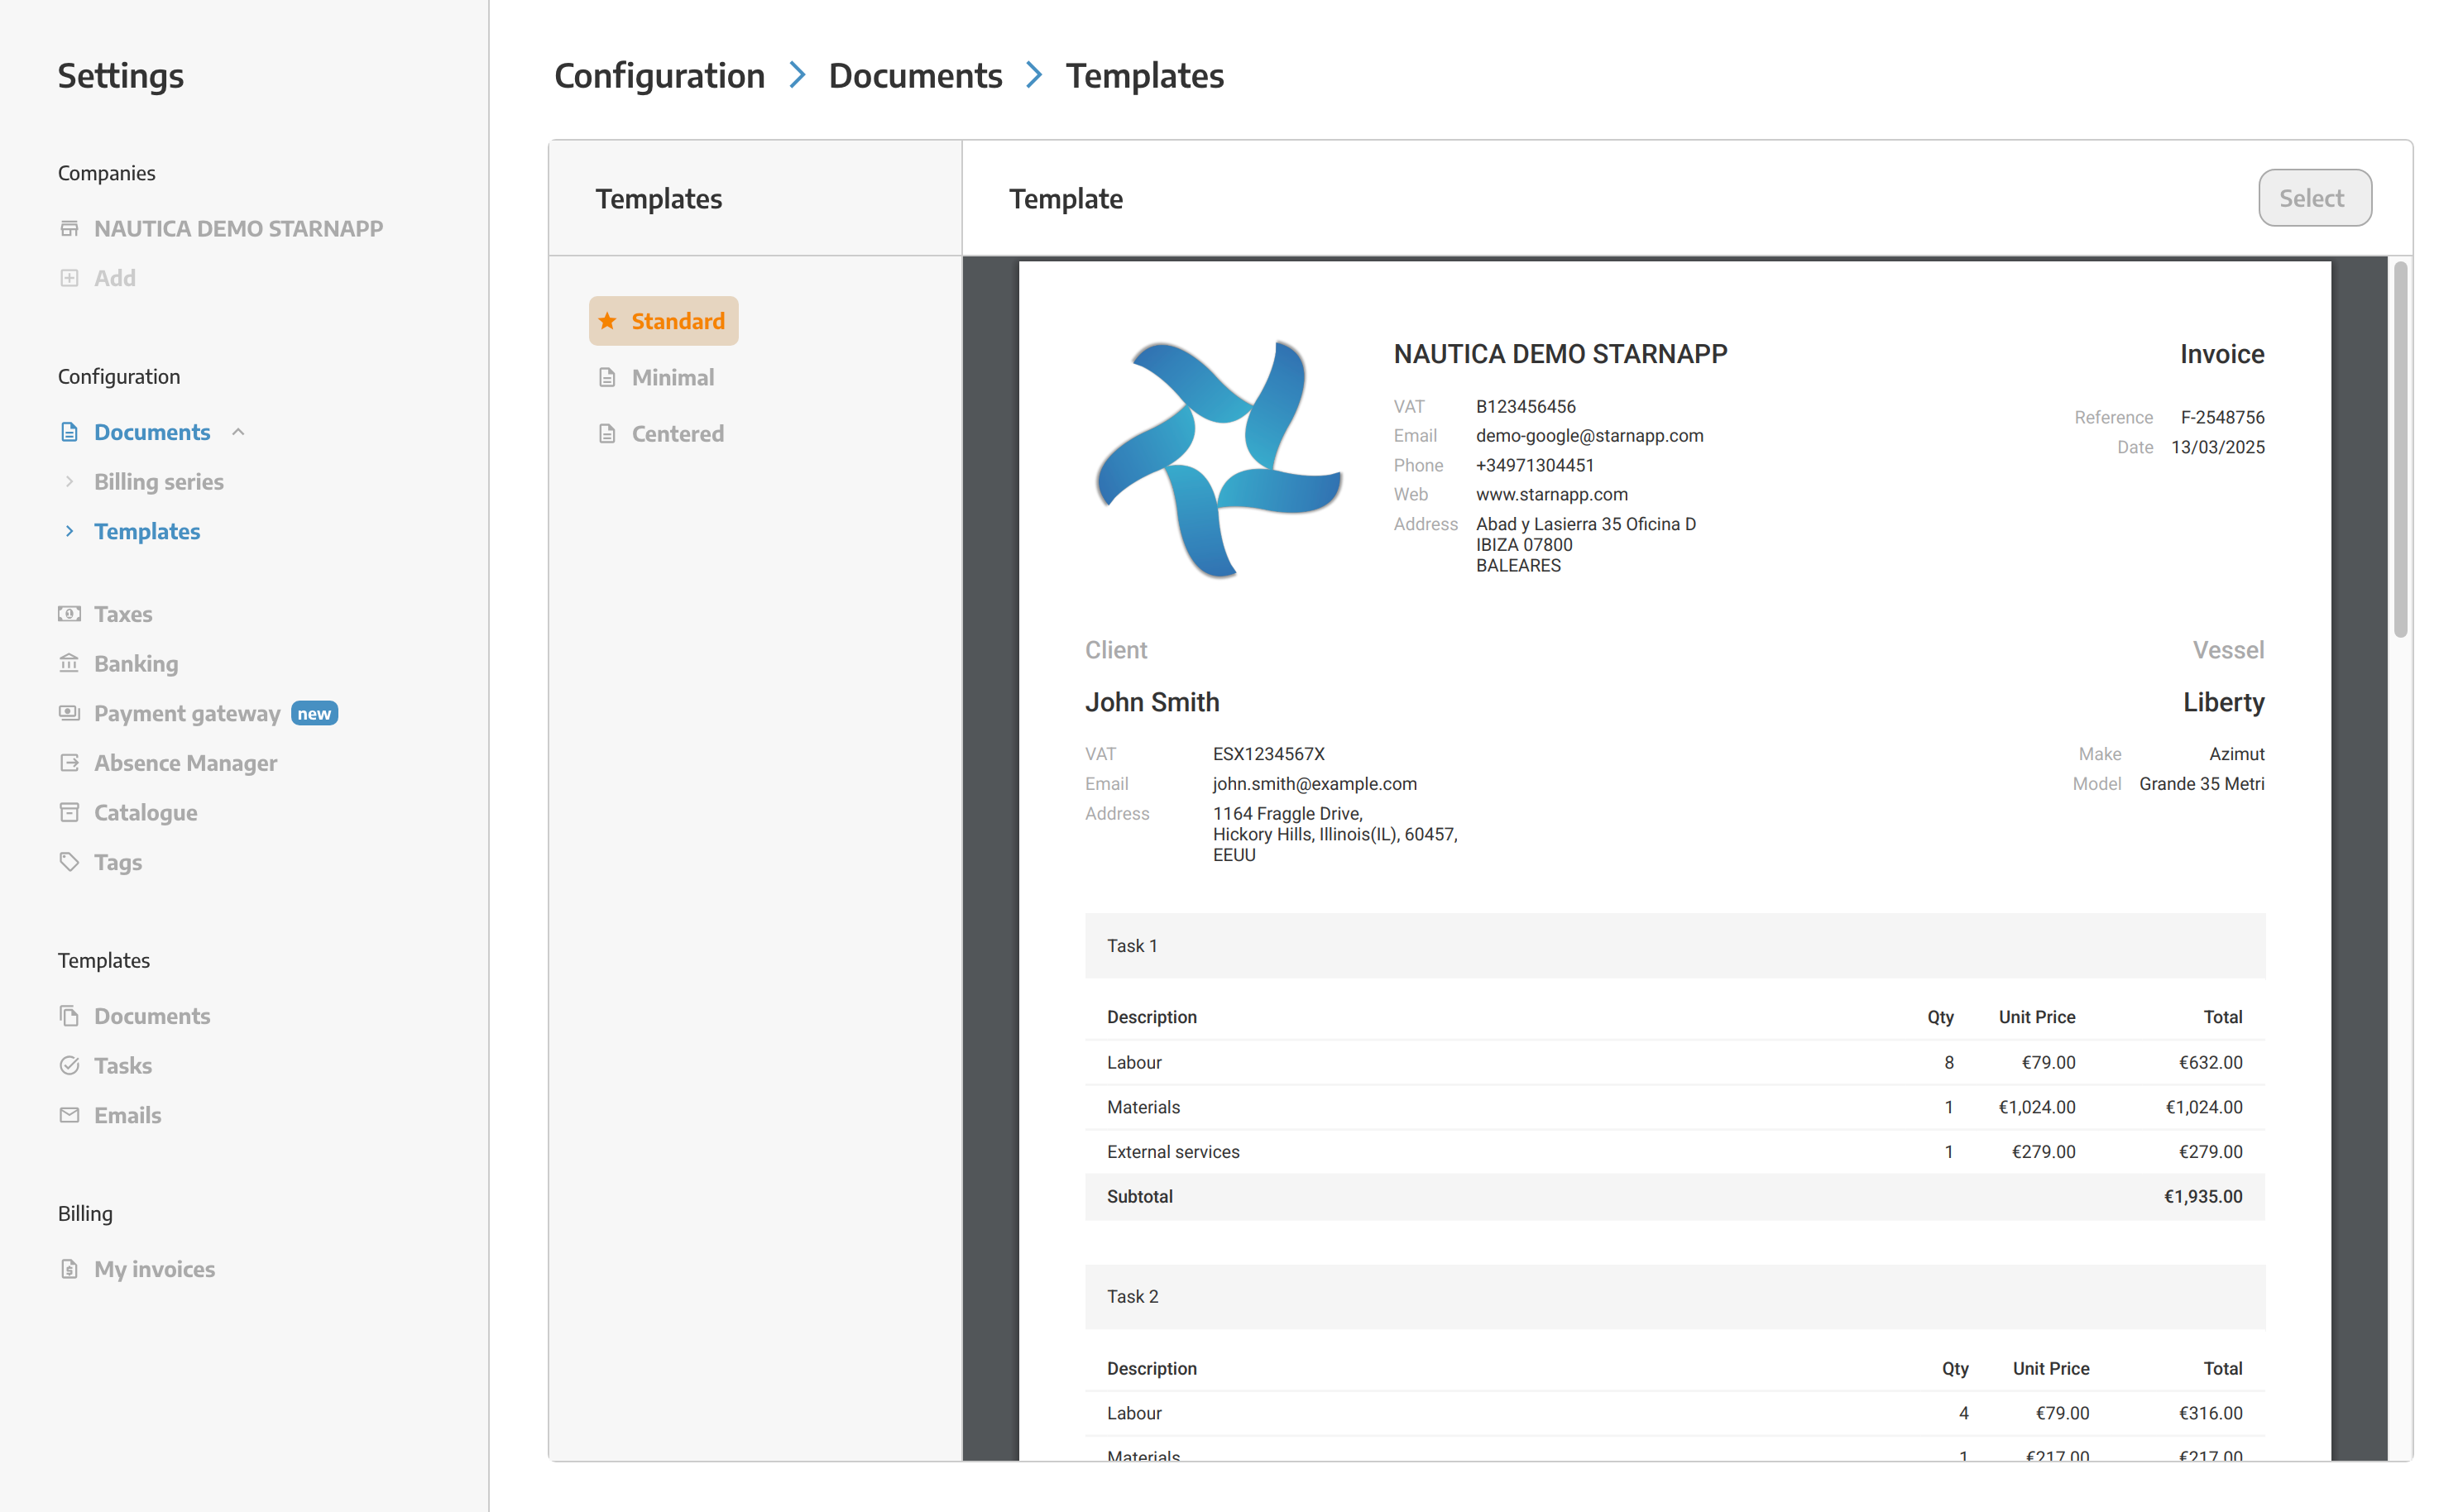
Preview your documents: In the section below this one, we’ll see the Templates section, where we can view the documents after the configuration is completed.
Once we’ve configured our series, we save it using the Check button in the upper right corner, or we can delete it with the adjacent button.
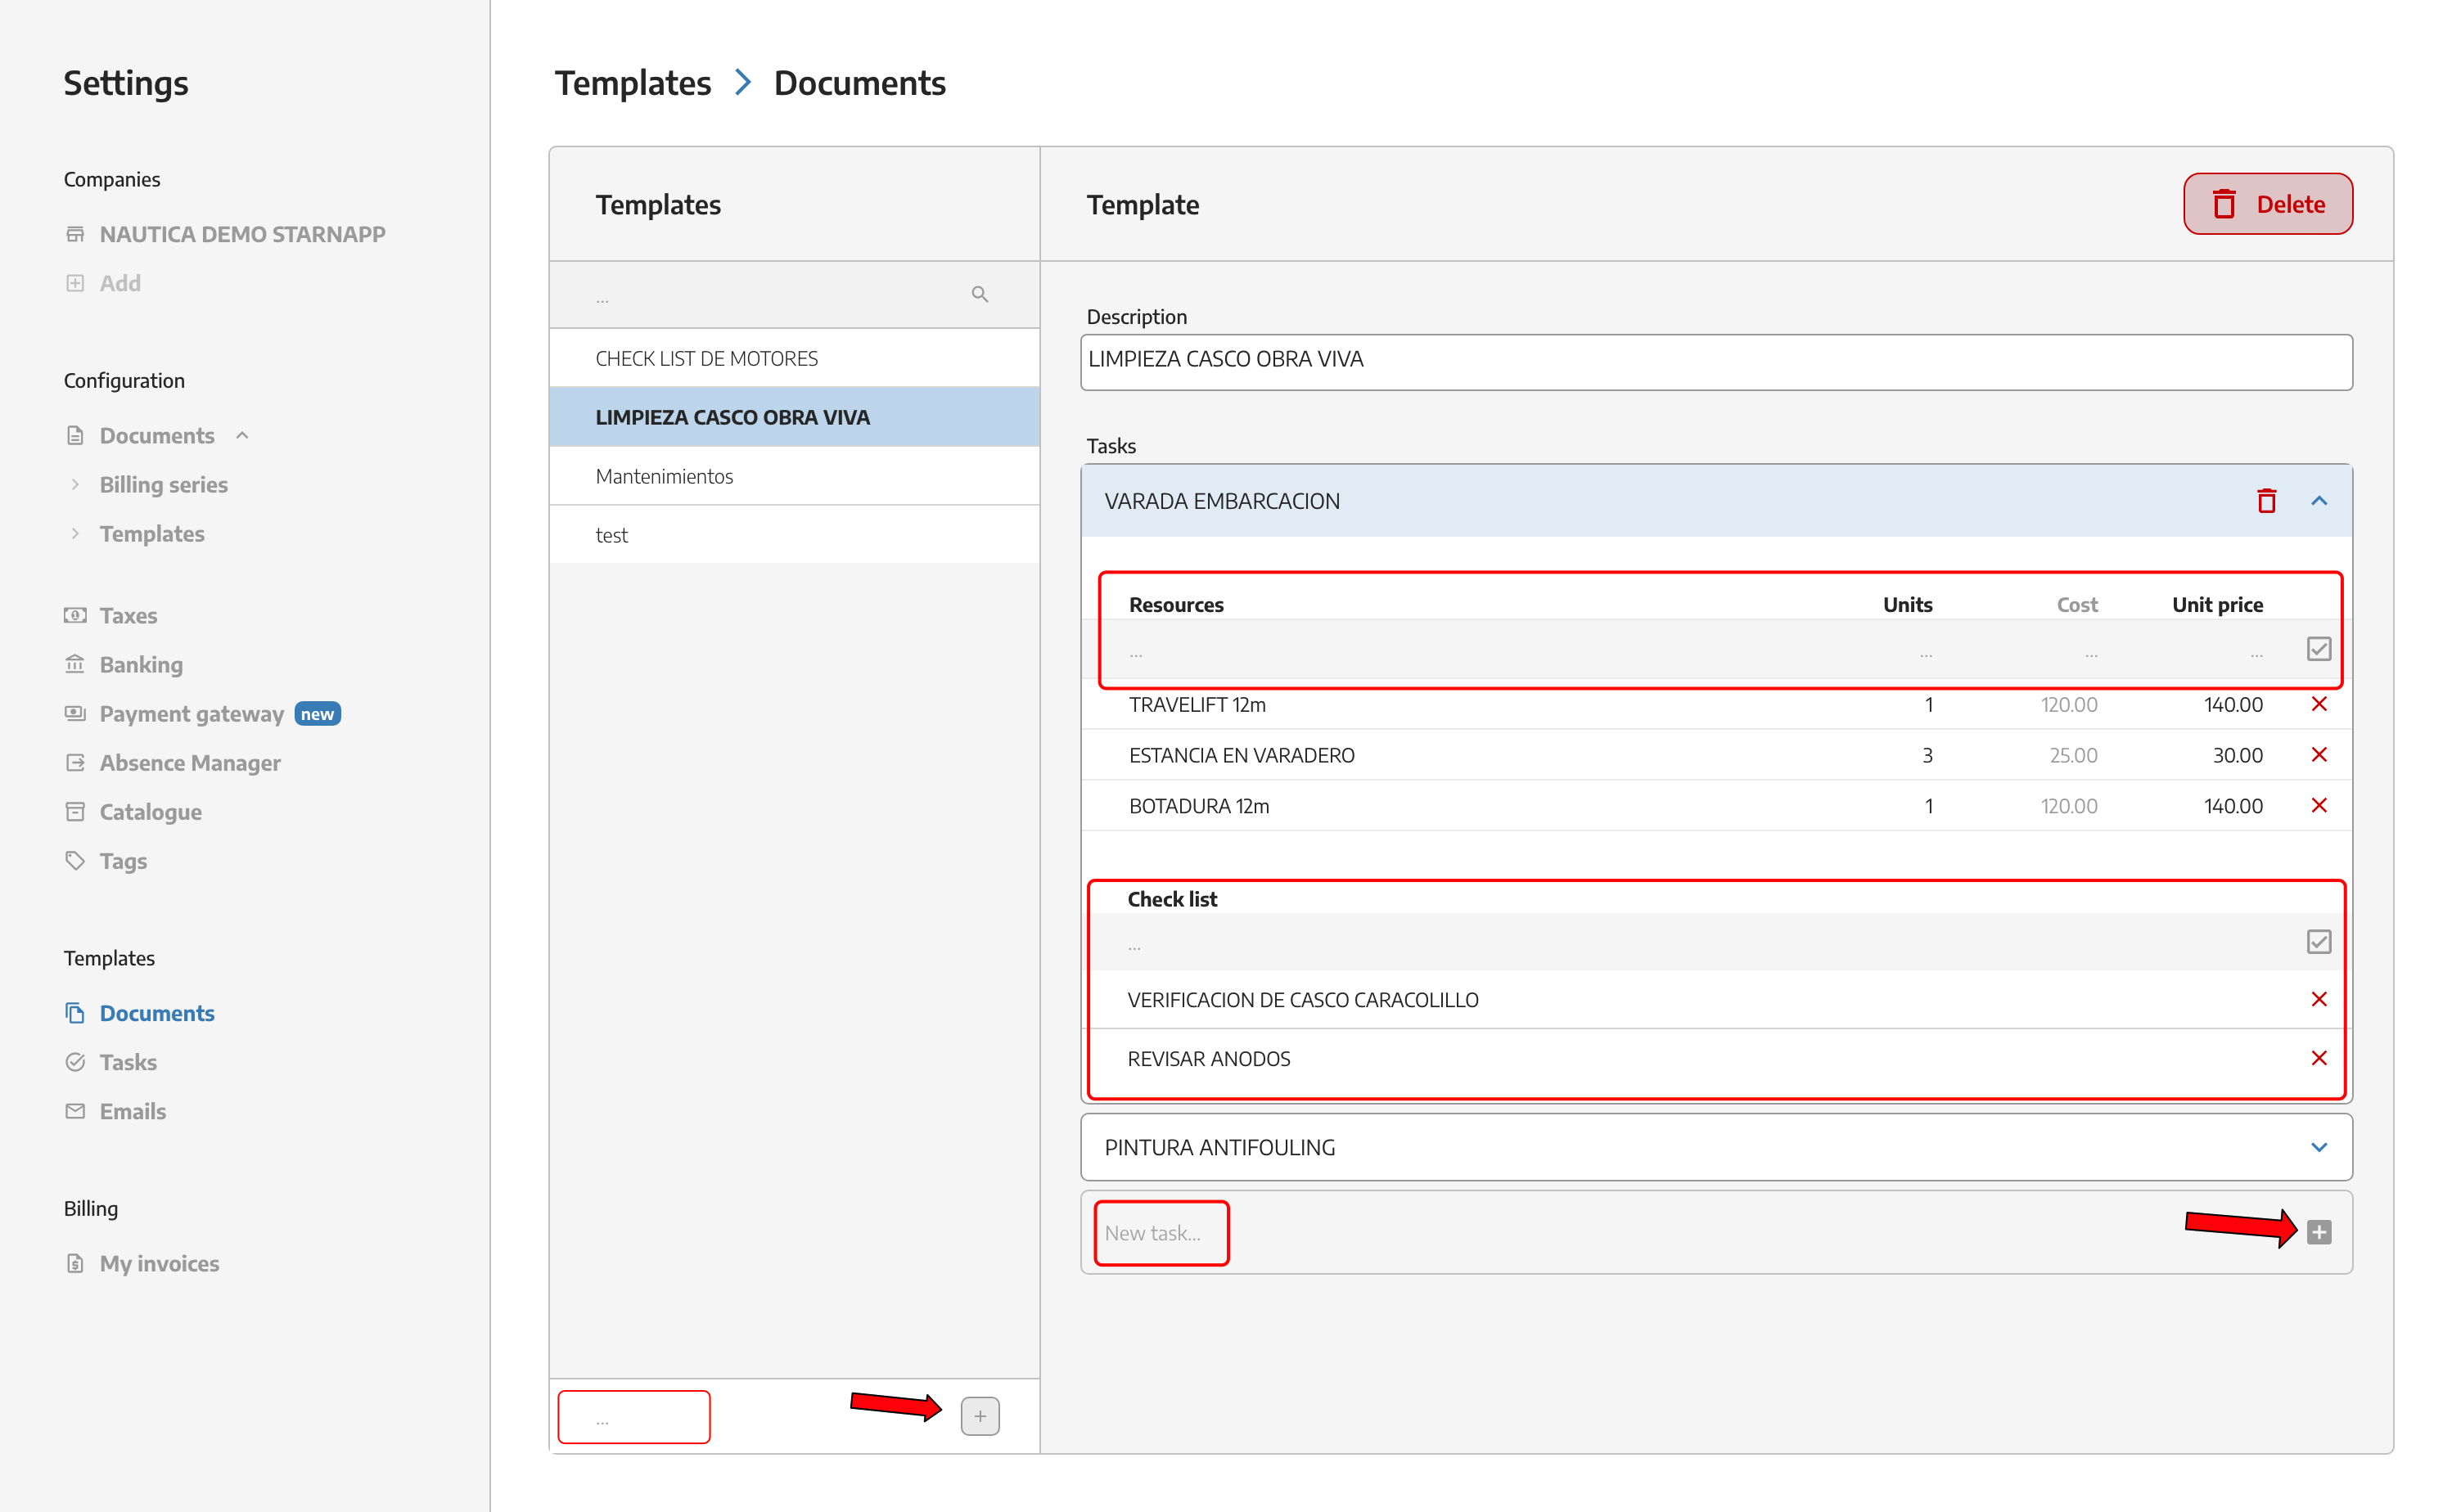
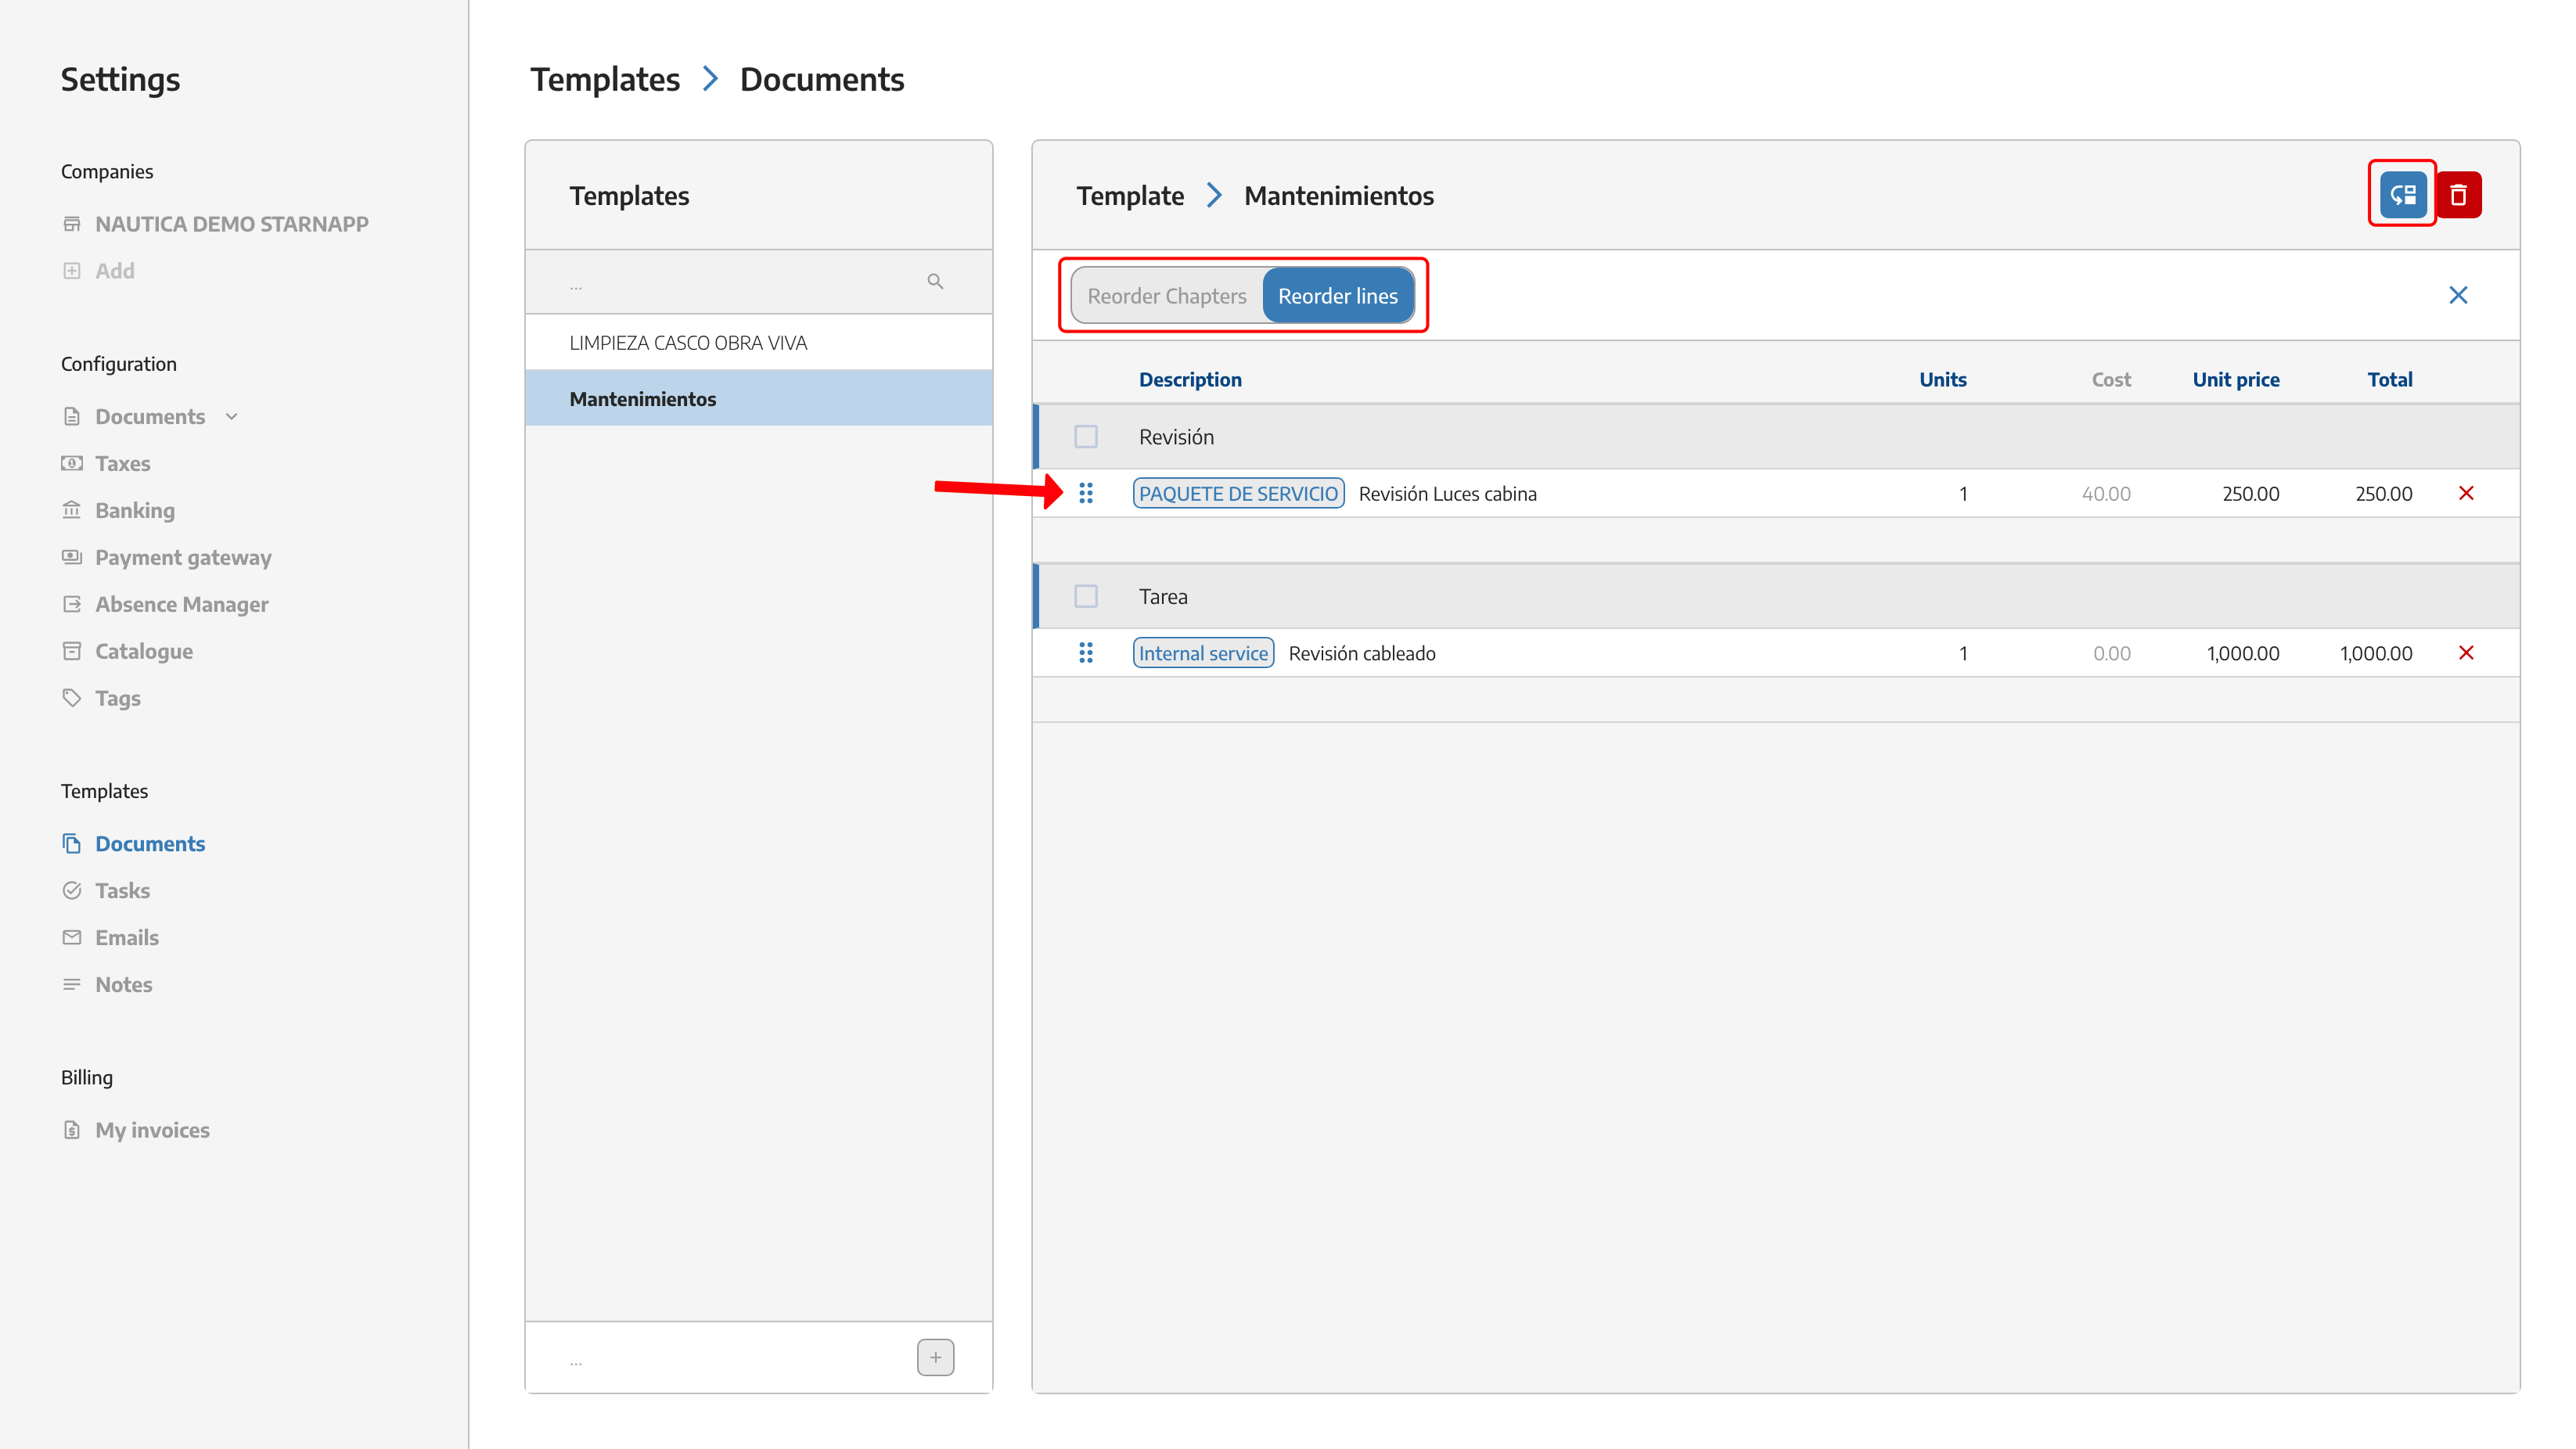
Here we can create different templates that we are going to use frequently. Inside, we can add tasks we have created with their respective resources.
Once the template has been created with the necessary chapter and lines, these can be reordered as desired with the button located at the top right.
We can create different tasks that we use regularly, so we don’t have to create them every time we’re making a document.
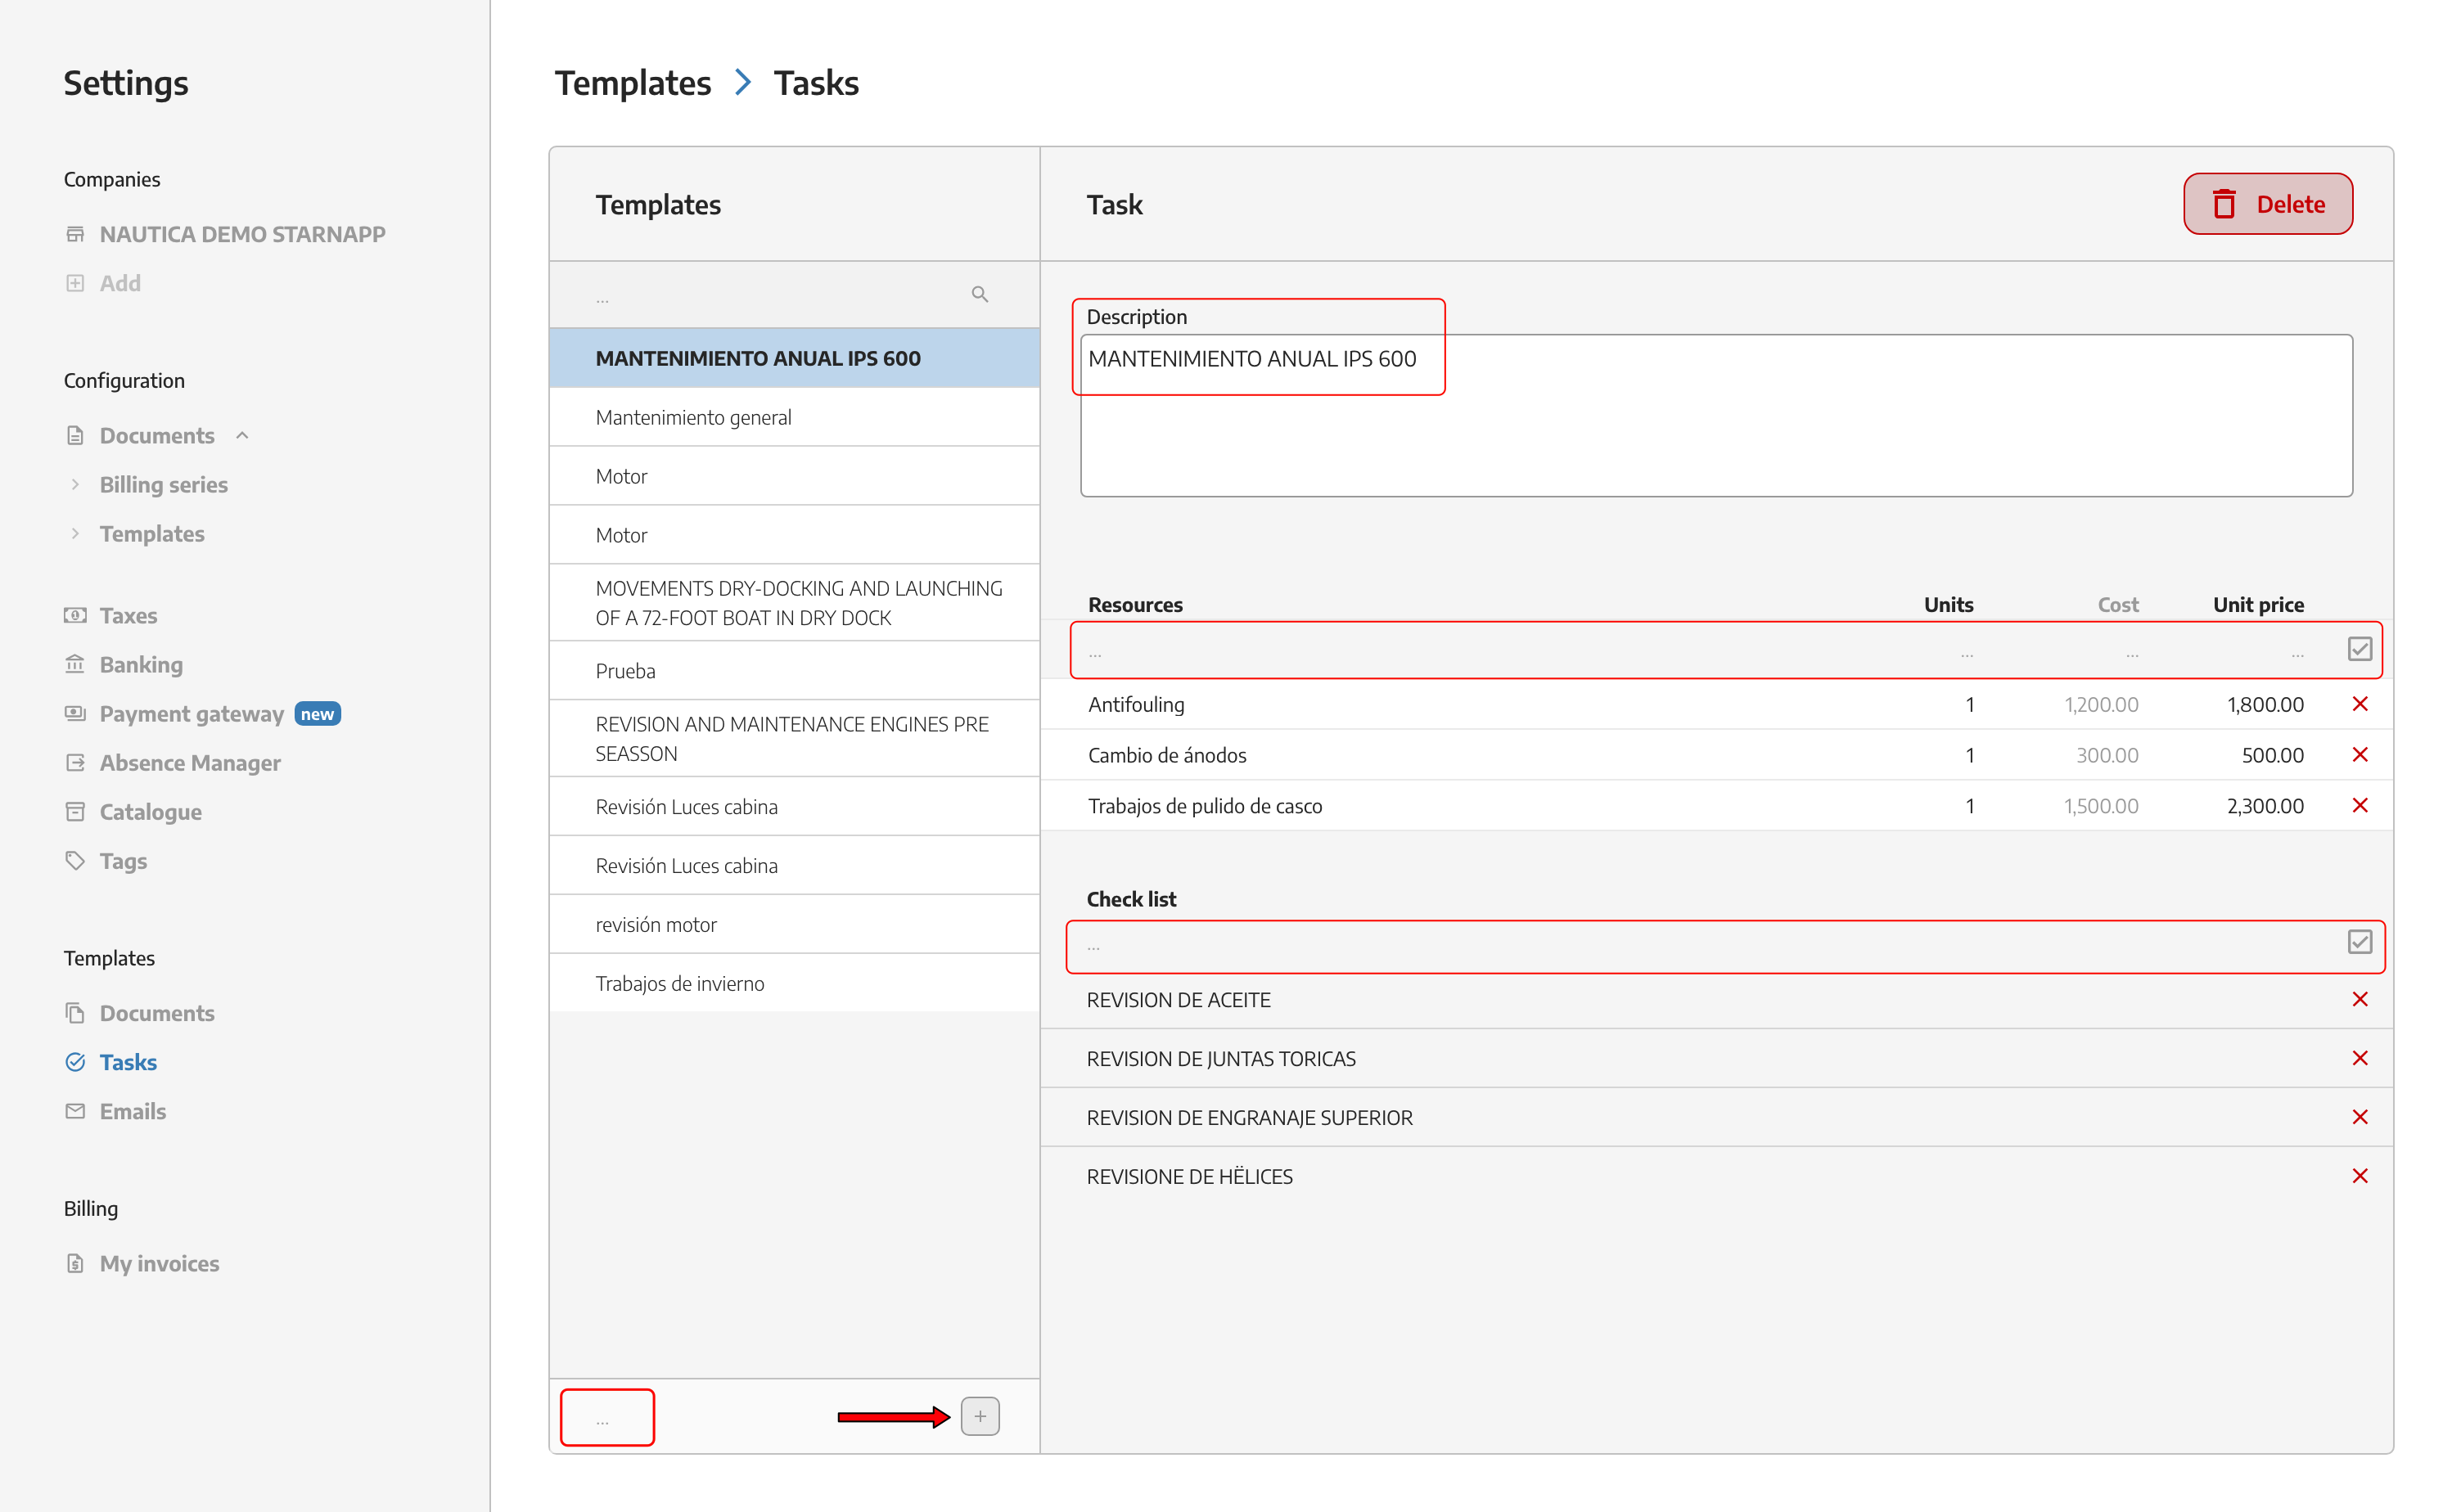
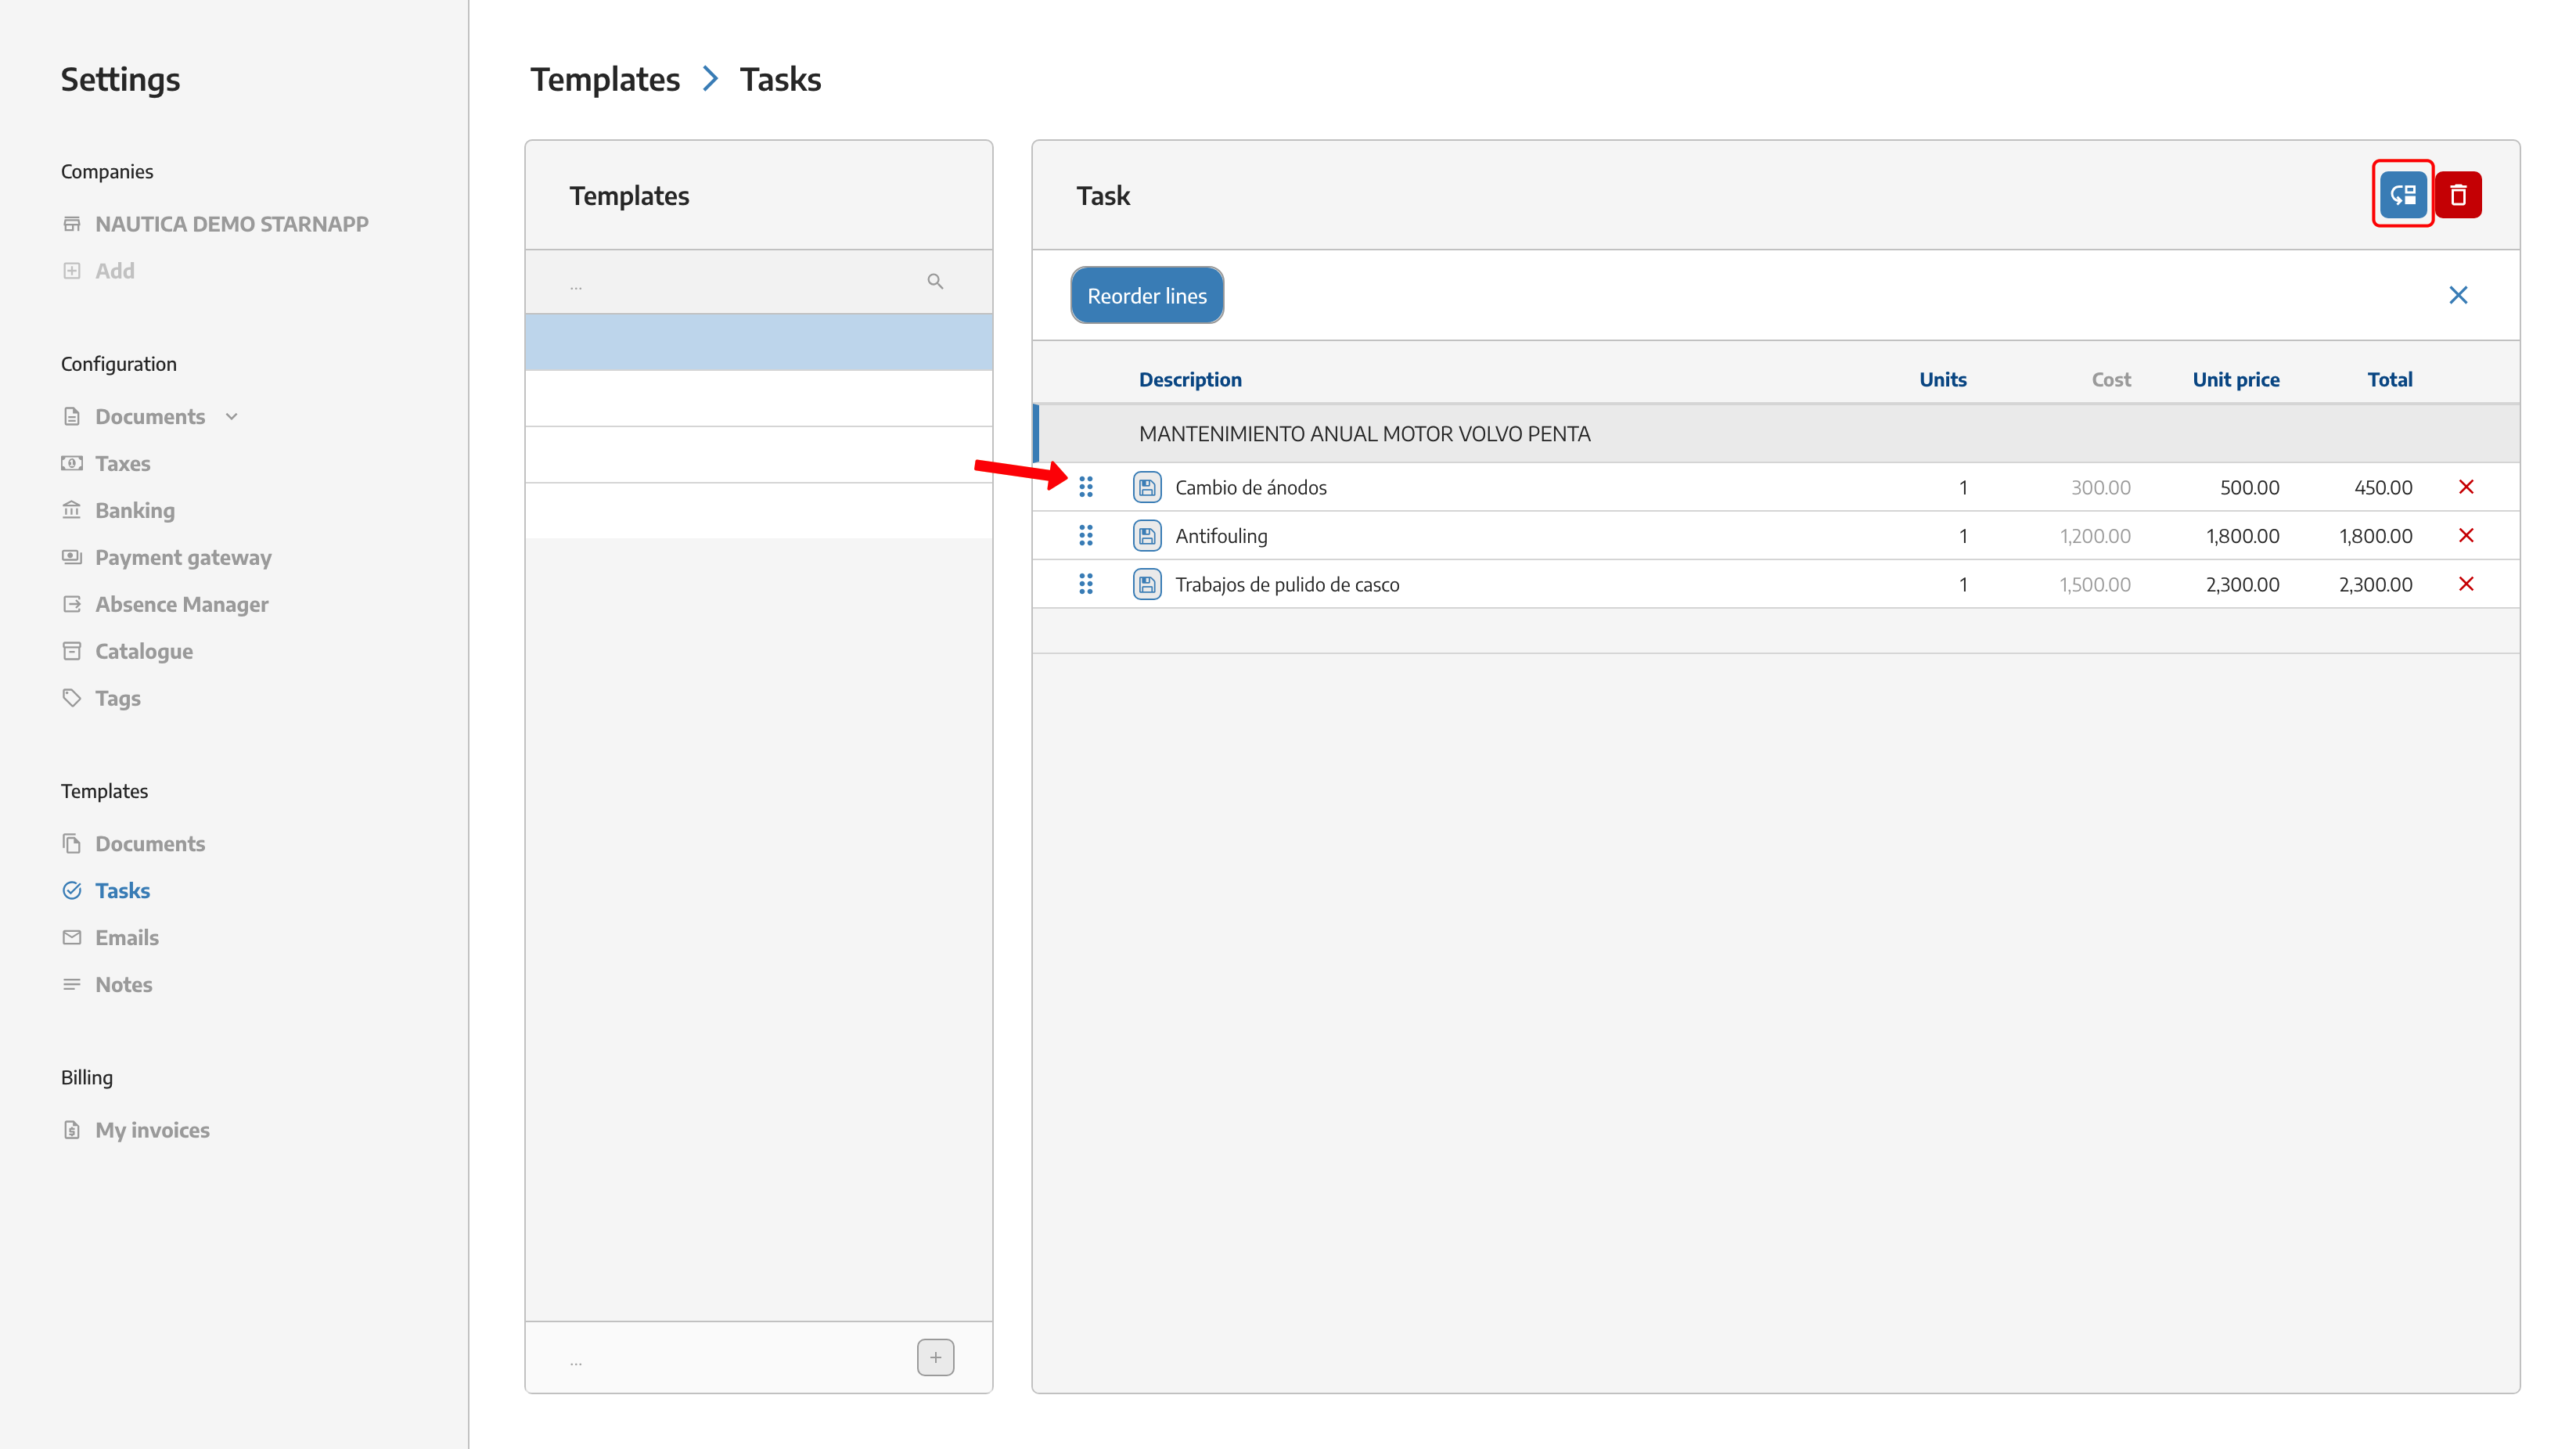
In the task templates we also have the option of being able to order the lines that we have previously created.
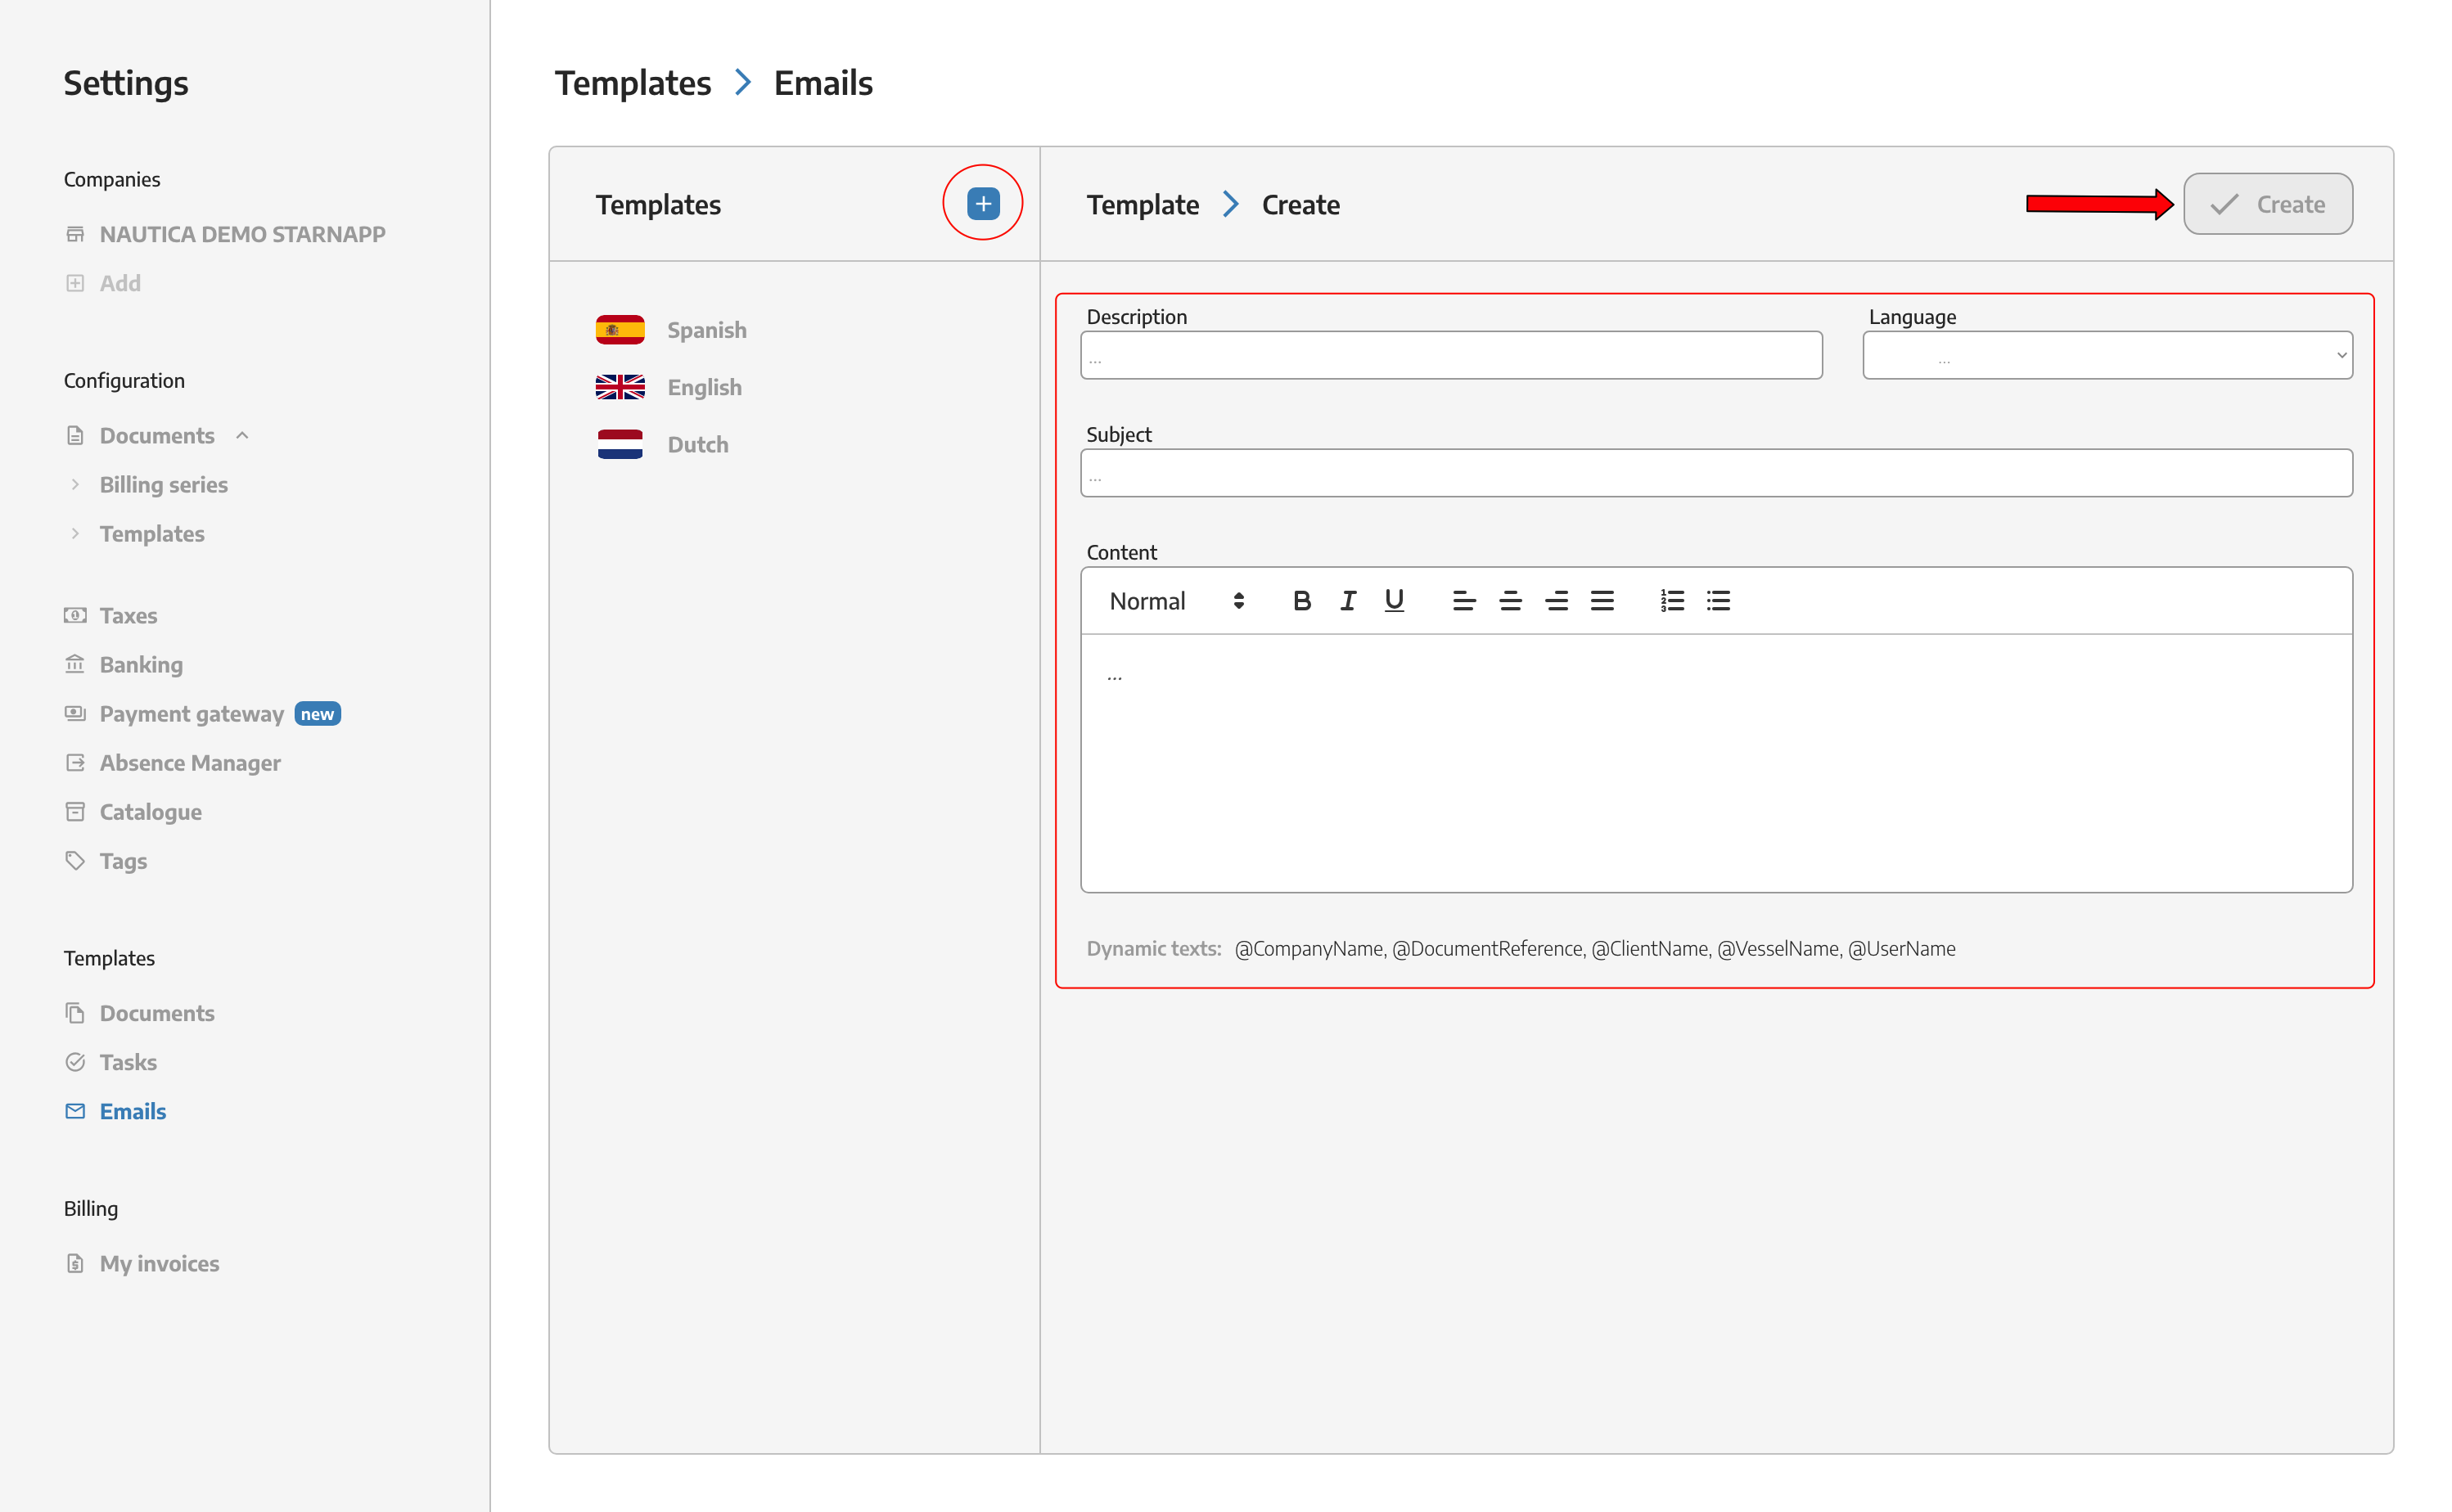
We can generate email templates as needed. We currently have six languages in StarNapp.
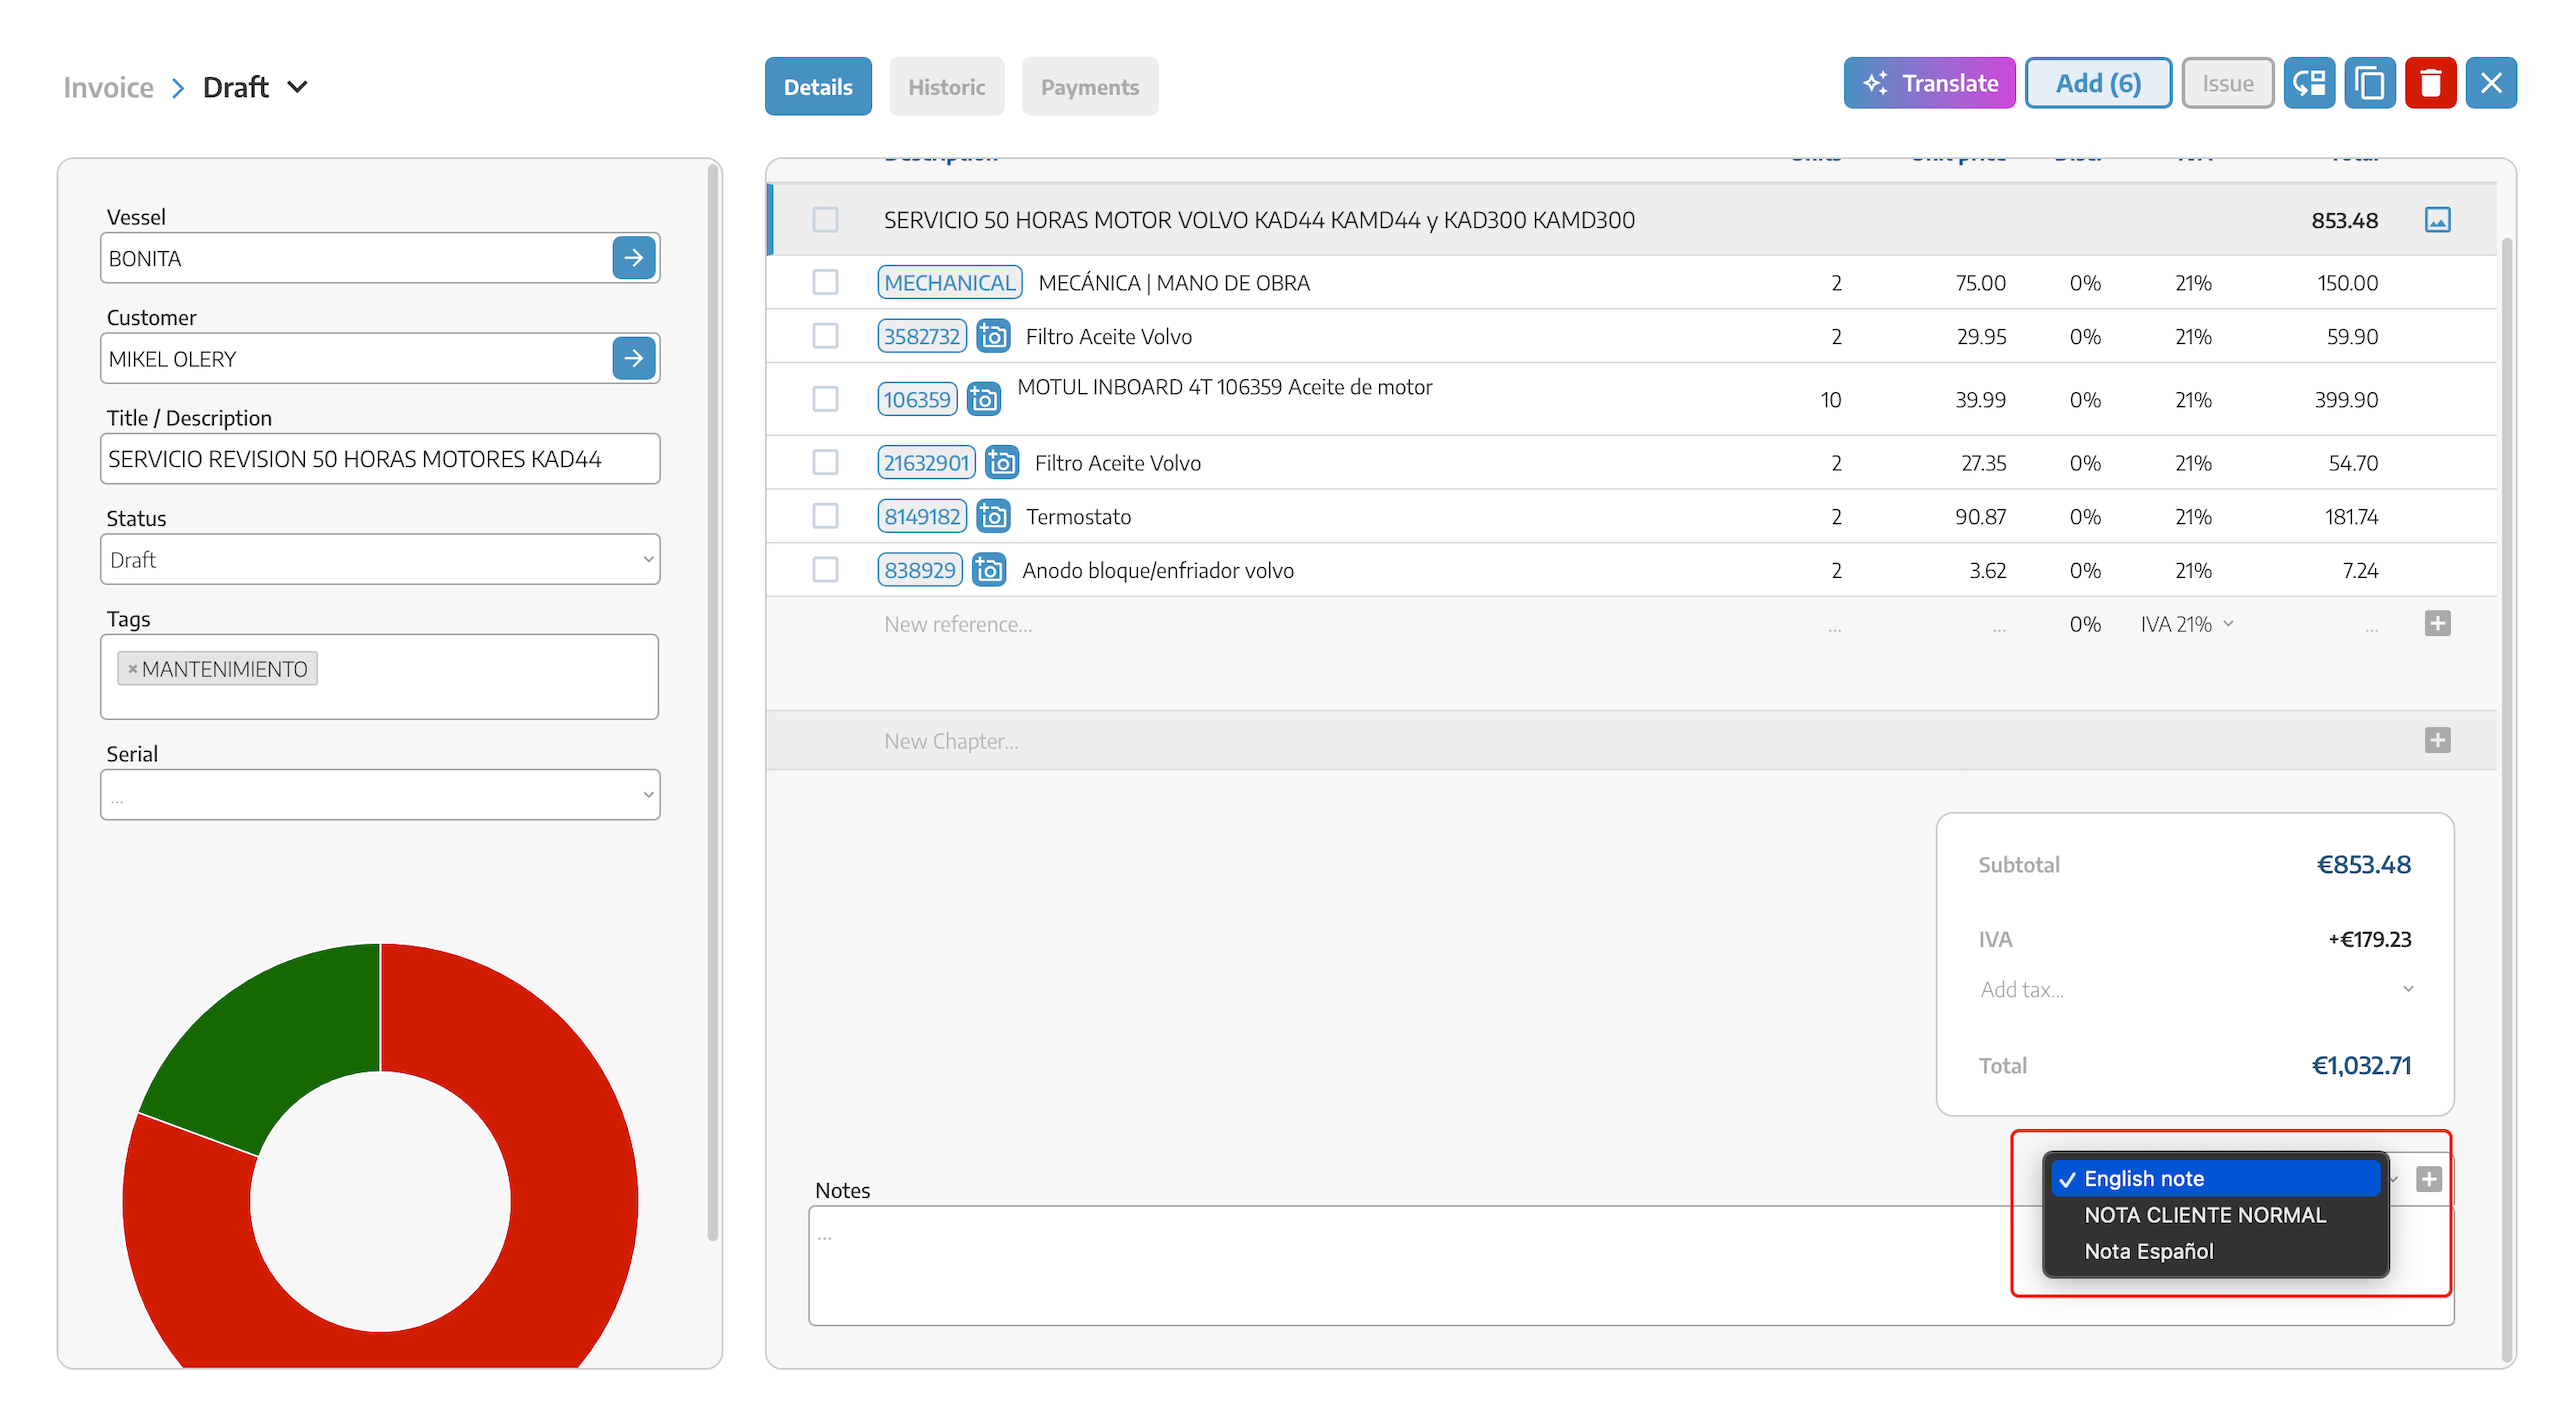
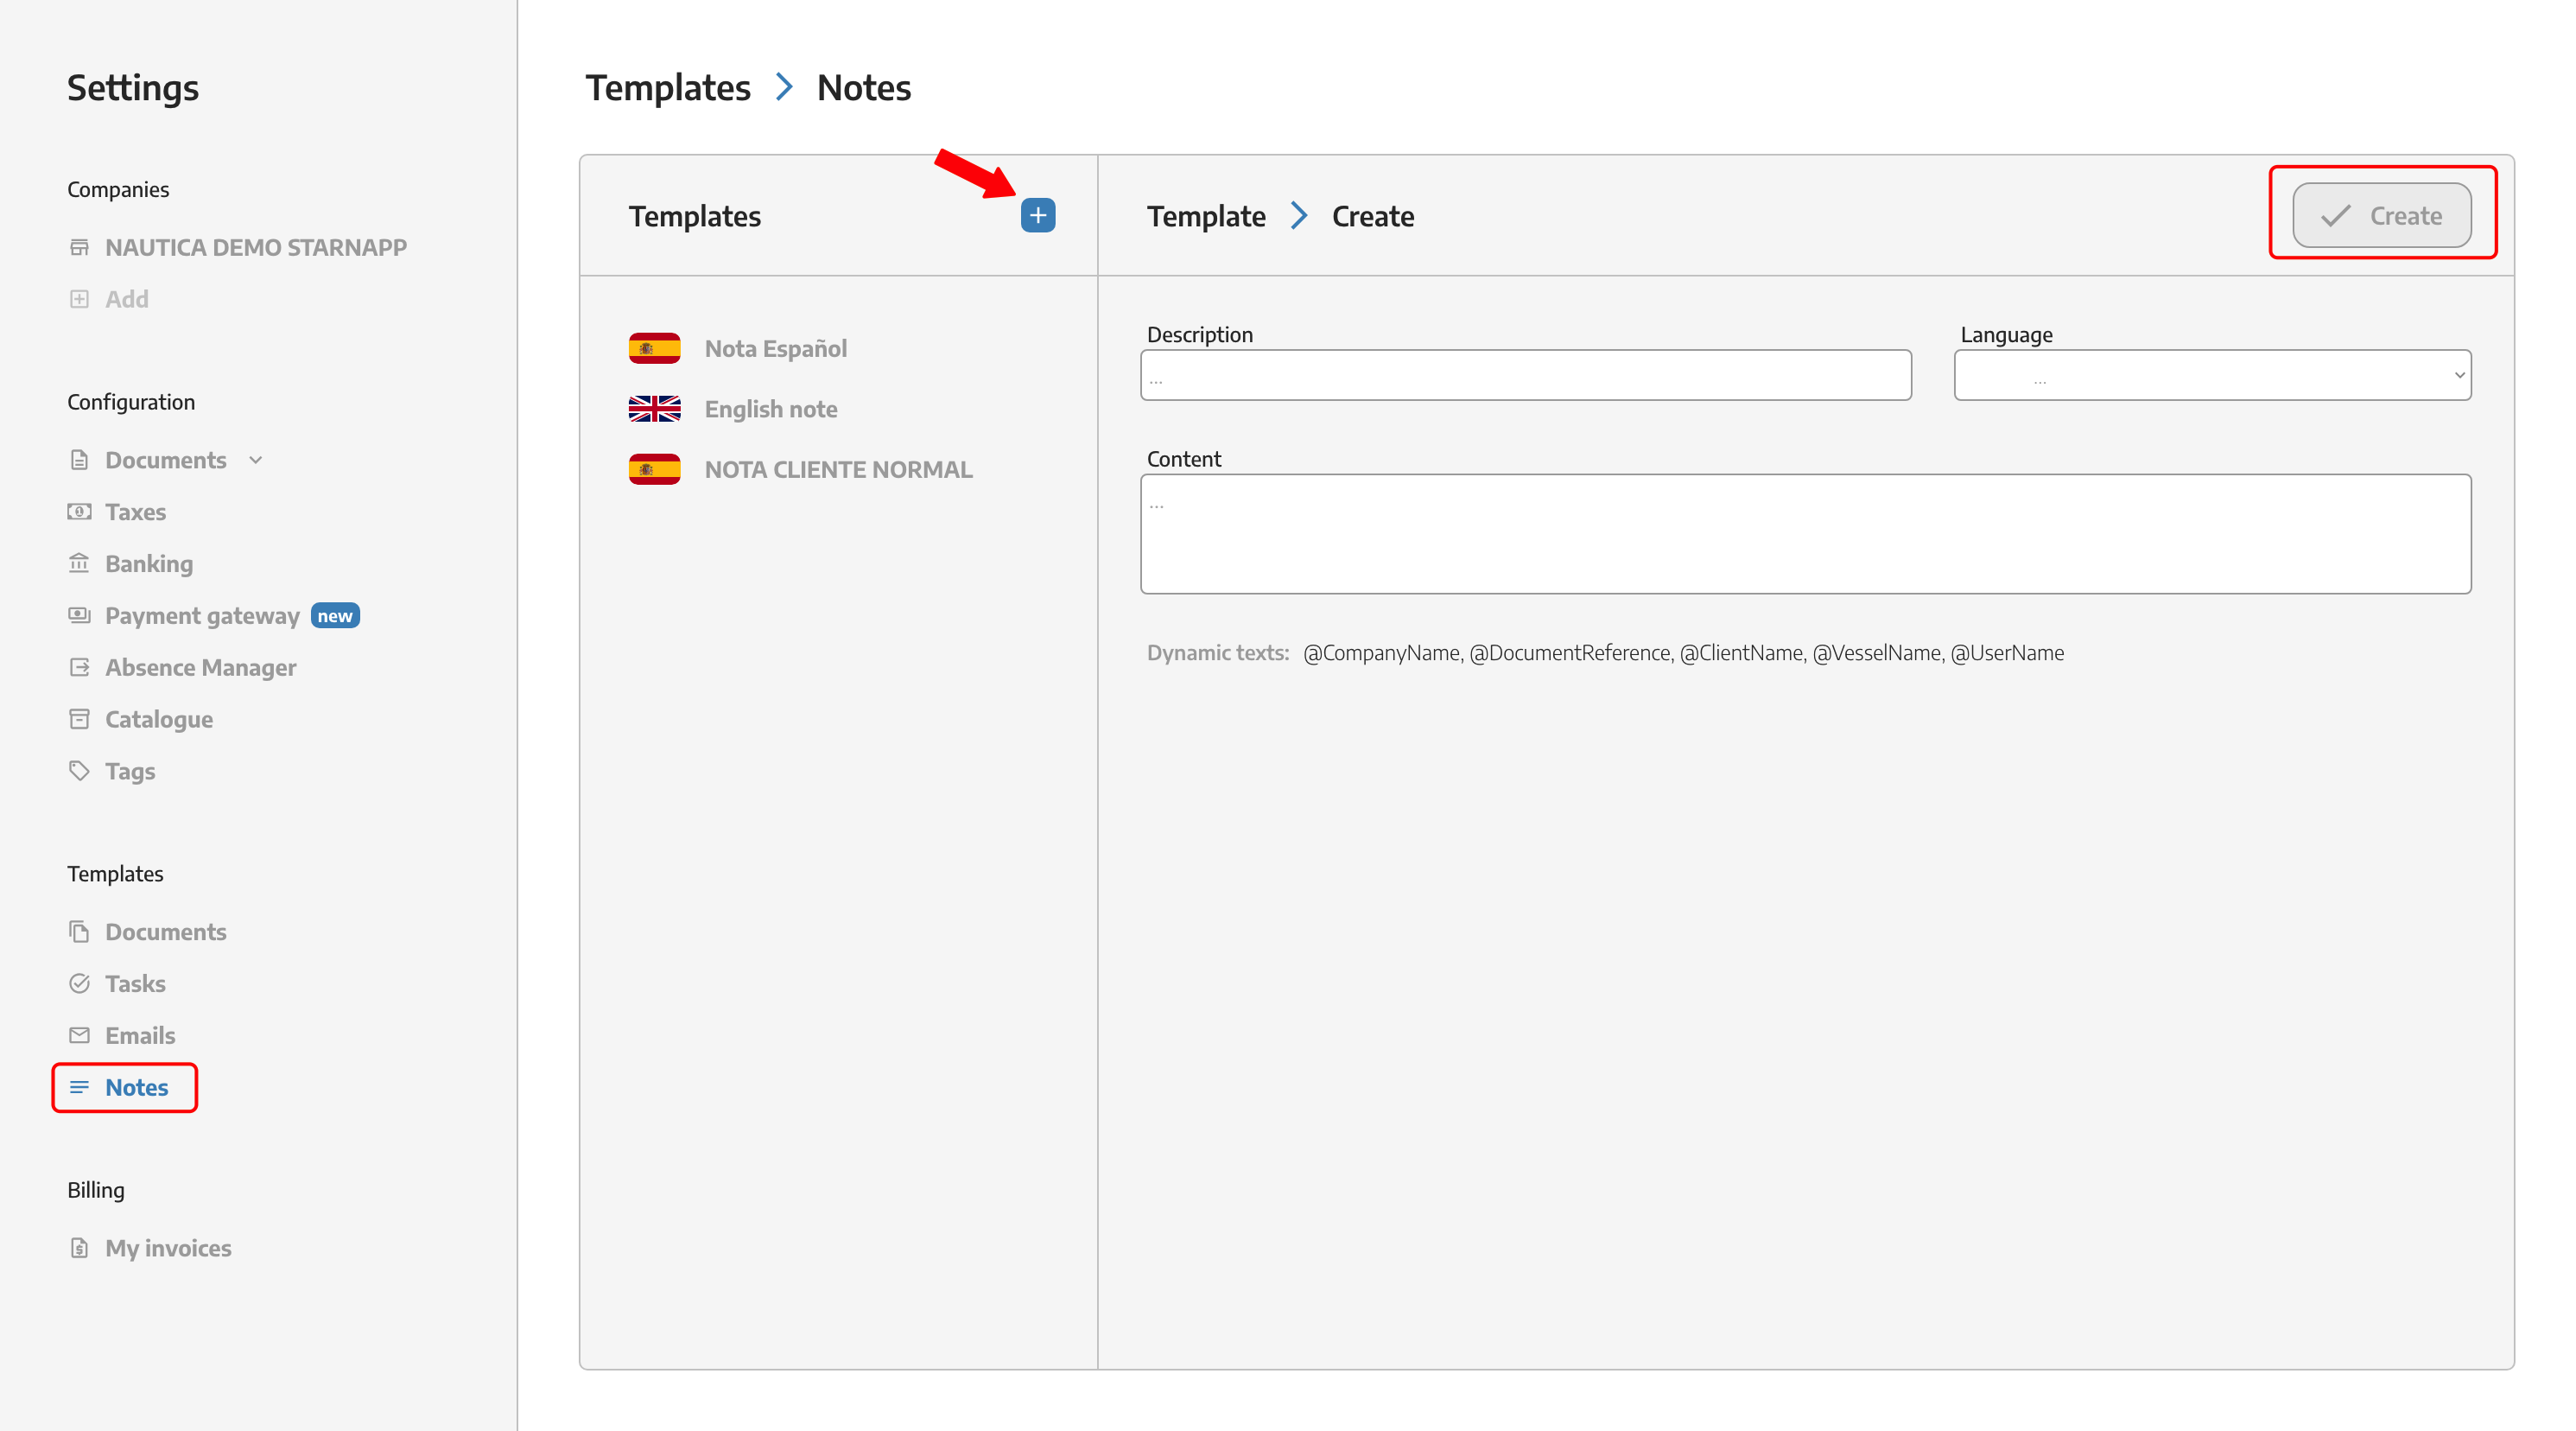
We can create templates for the notes of our documents in the languages we have configured within StarNapp. We have the possibility to create as many notes as we want.
To add the notes that we have created in the document, we have a button at the bottom right, when we click on it, all the notes that we have created will be displayed and we will be able to choose the one we need at that moment.