Set up your Nautica step by step
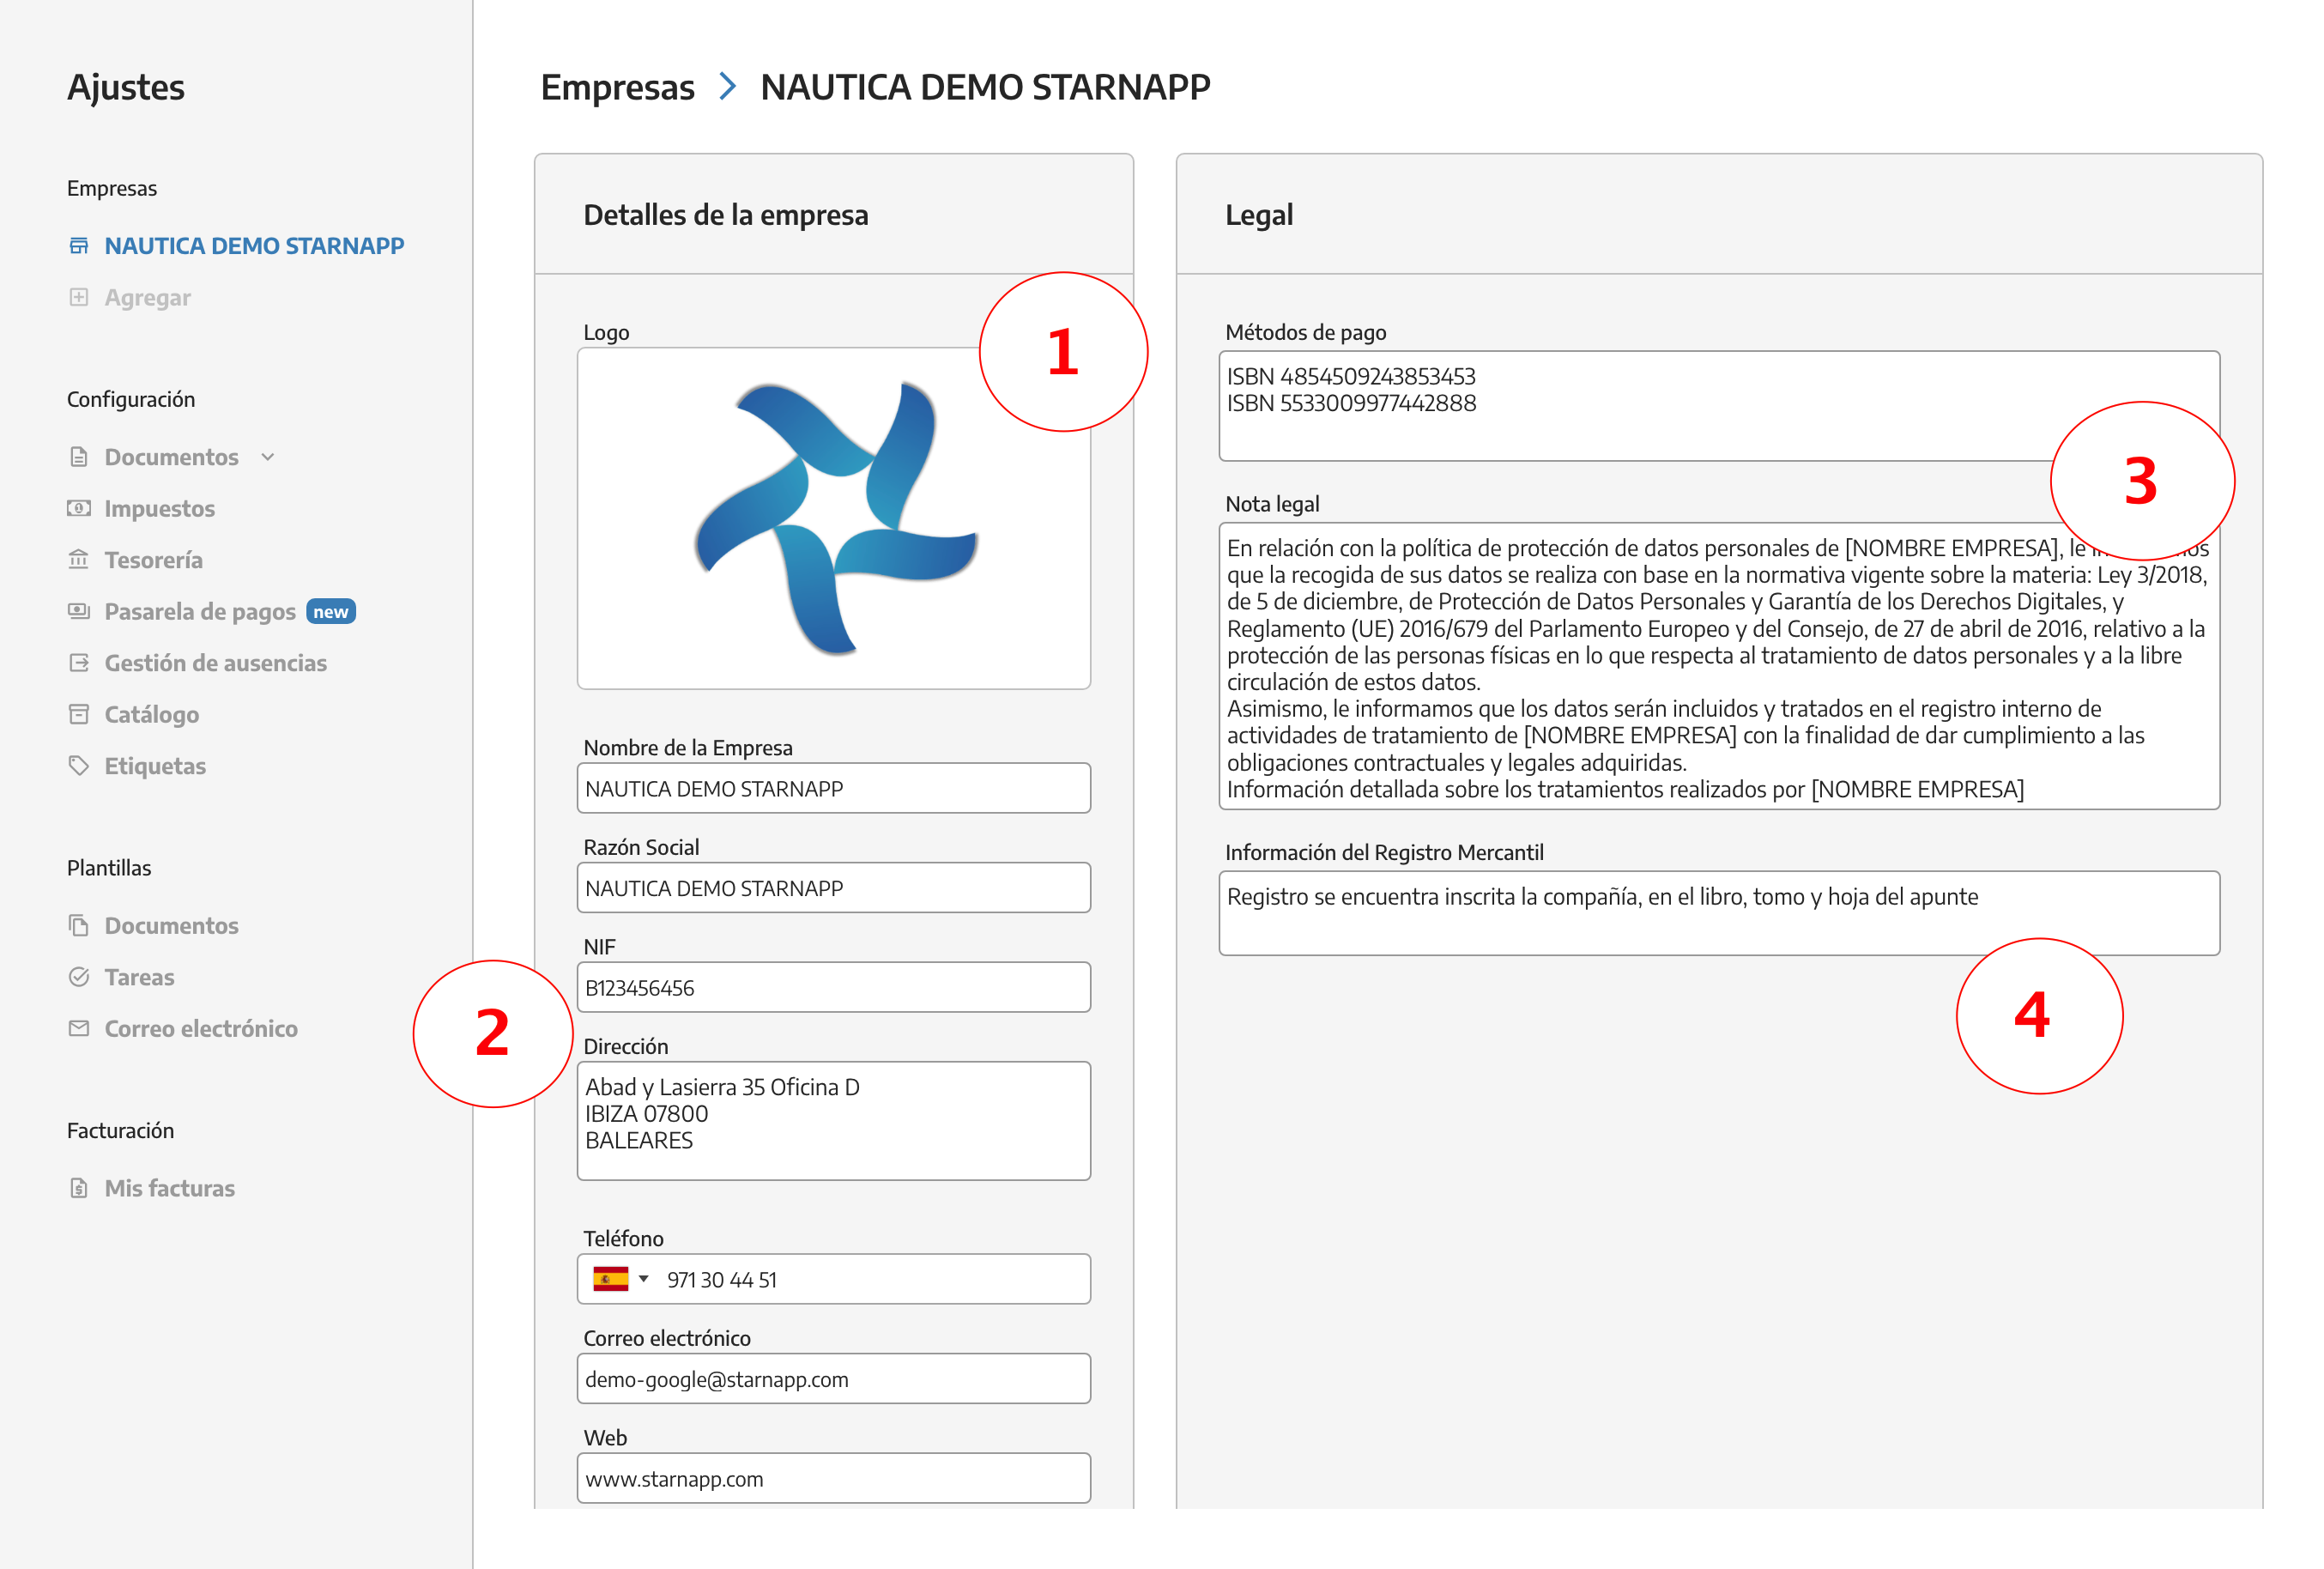
Upload your company logo. Try to upload it as a PNG file if you can, or make sure the image has a white background, because that way it’ll look clean on invoices and won’t have edges with different colored backgrounds.
Fill in all your boating company info.
When creating or setting up your series, you can edit these company details.
Company logo
Business name
NIF
Address
Phone
Website
You can have one series with a LOGO for example, and another series with different info and a different LOGO, so you can pick which one to use depending on the series.
Organic Data Protection Act Clause: In this section you can add the data protection law clause, which will show up on the last page of the document.
Commercial Registry Info: The current law says invoices must show Commercial Registry details, so we’ve set up a spot for that on your billing documents to keep things legal.
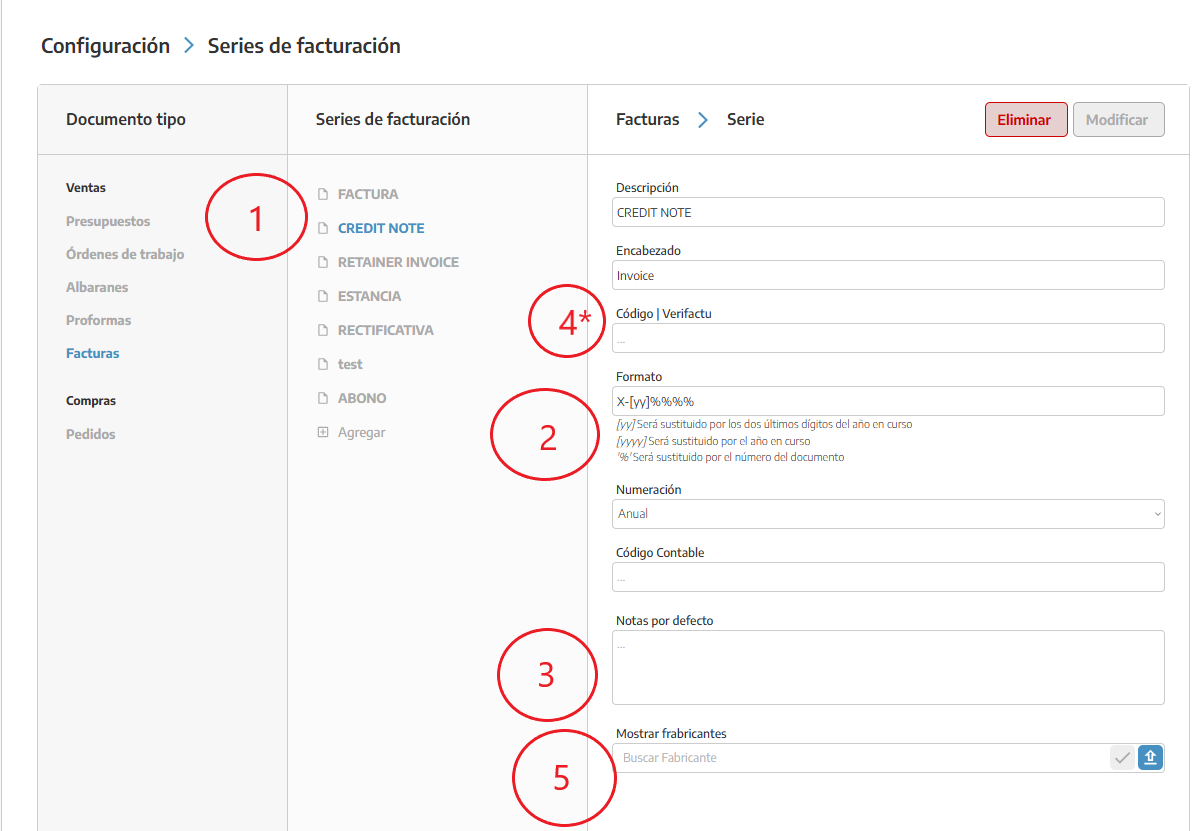
Quotes, delivery notes, work orders, proformas, invoices:
we’ll select the option Documents/Billing Series, here we choose the one we want to set up or we can add new billing series.
Format and Numbering: The format for each document will depend on the digits you want. In this case, the prefix will be P- and every % stands for a number. You’d get something like P-000000. If you want to include the year in the quote’s number, use this: P-%%%[yyyy], which will give you P-0002025. If you just want the year’s digits, use P-%%%[25], P-00025.
Default notes: Default notes are the ones you want to show up in your quotes, like this quote needs to be paid 50% upfront before starting work, the quote can change once the repairs start, and so on.
Our quote numbering can be CONTINUOUS or YEARLY.
Verifactu code*(only for invoices, corrective, credit, etc): The Verifactu code is needed so our software can tell which invoices get sent to the tax office. Just use the first part of the series setup you use for these docs. For example, FCT-00045, just put FCT. If it’s a corrective invoice, it'd be FCT-RECT.
Company logos: you can also add, change, or remove logos for the different companies you provide service for on any series. Different companies can exist for each document series.
On the bottom right, you’ll find the option to add manufacturer logos. We’ve got a ton of companies already loaded in. If you need to add a logo that’s not on the list, send it to us and we’ll add it for you. Try to send a logo with the right format (transparent background, png, svg, or similar, so it won’t have any borders). To remove a logo from the series, just click the X next to it and it’ll be deleted.
Check out your documents: In the section just below this one you’ll see Templates, where you can check them out once you’ve finished setting up.
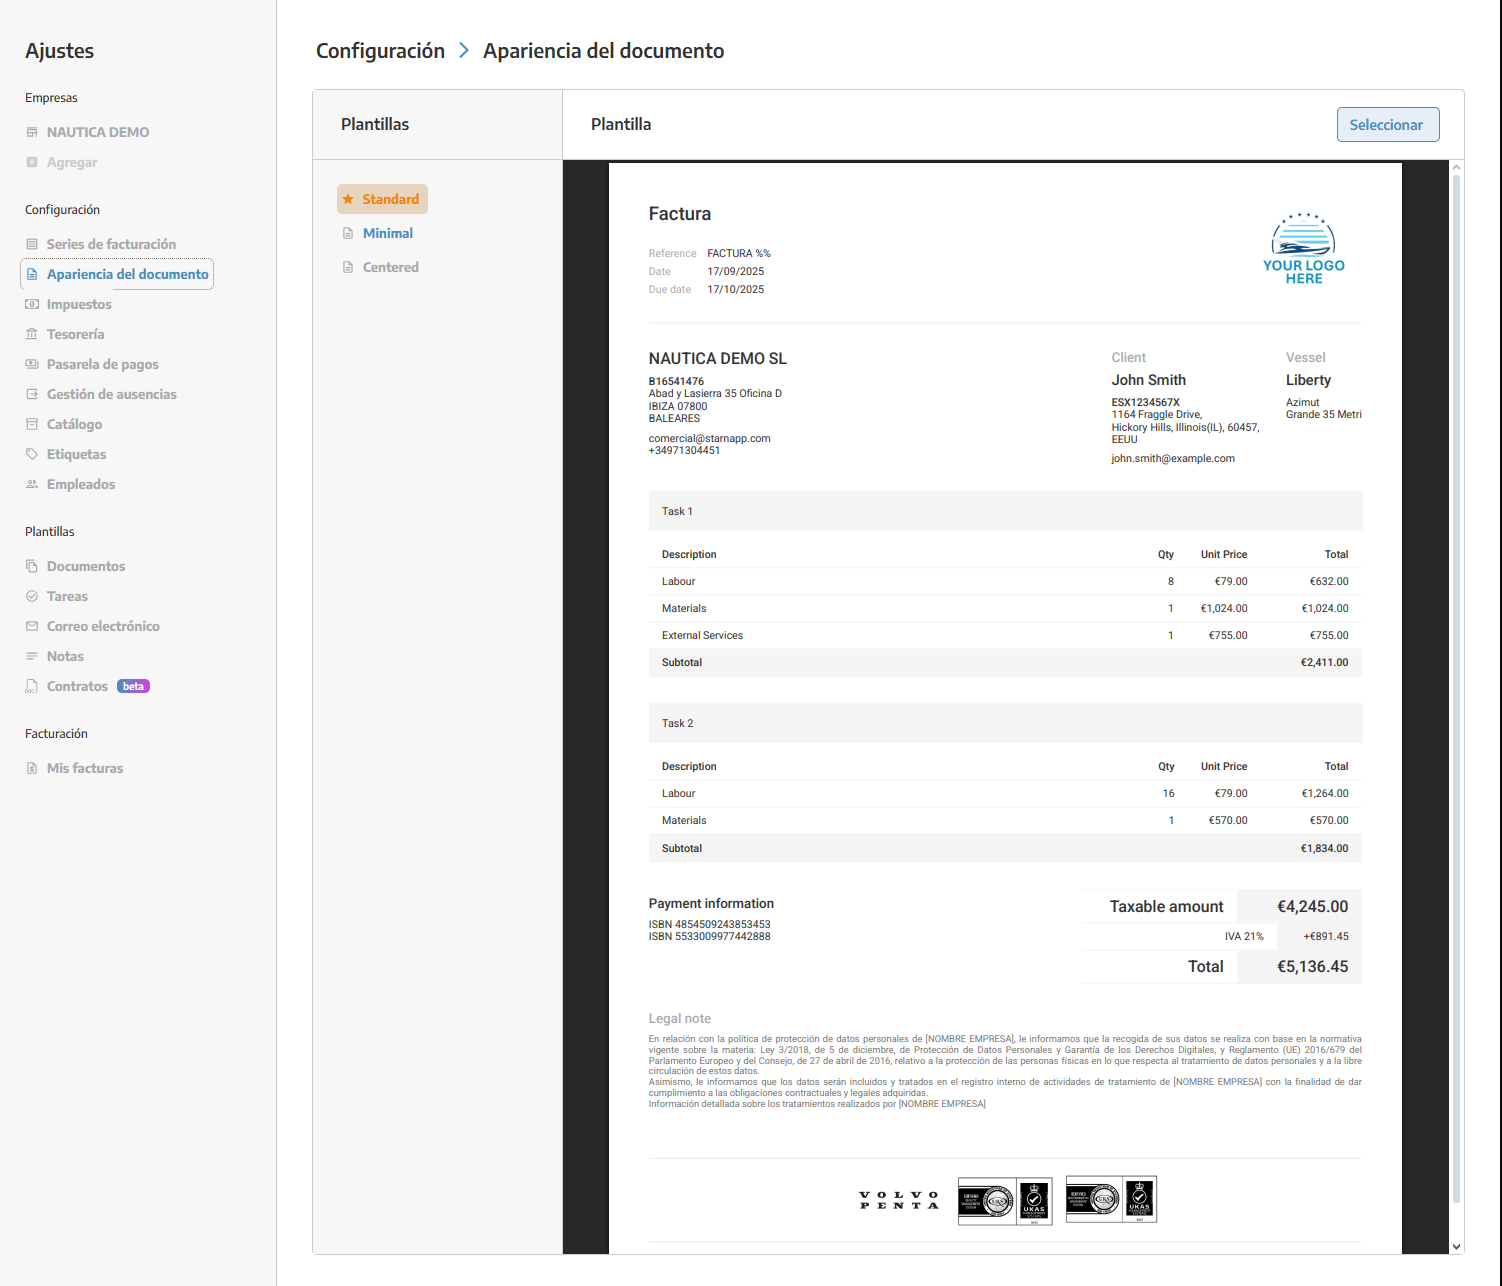
Once you’ve set up your series, save it with the Check up on the top right, or you can delete it with the button next to it.
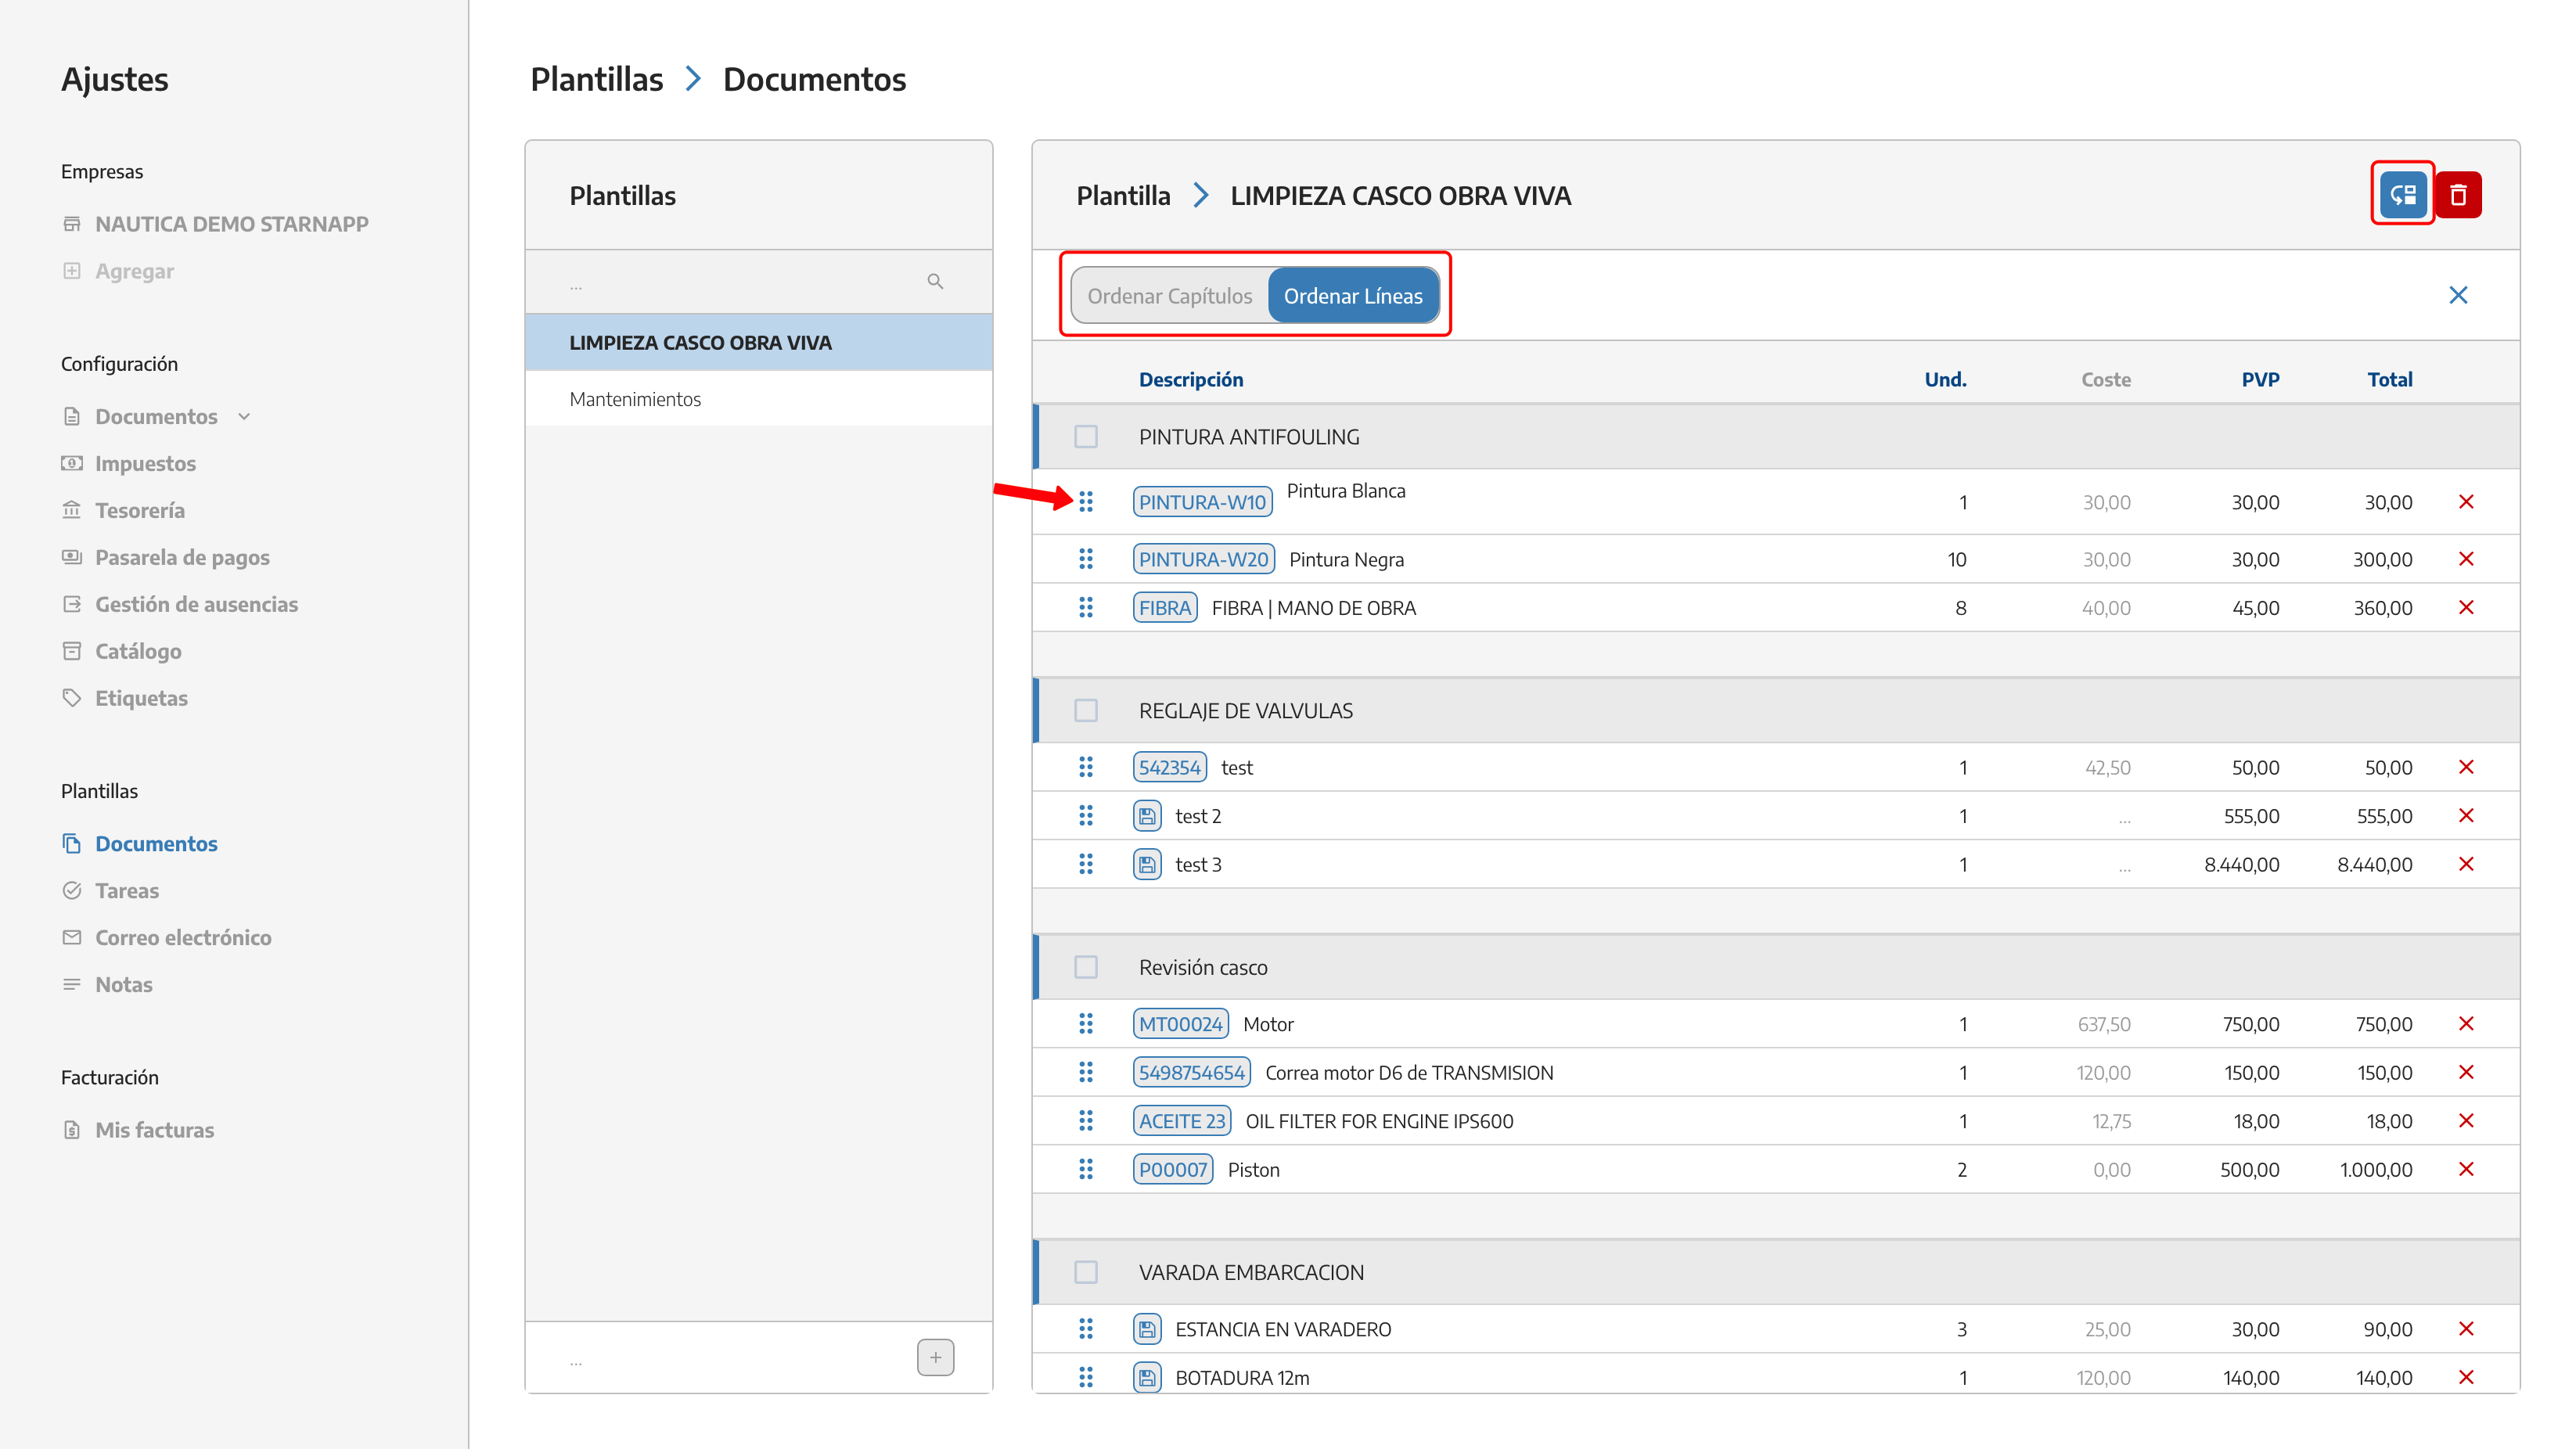
Here we can create different templates that we’re going to use often. Inside, we can add tasks we’ve already made along with their resources.
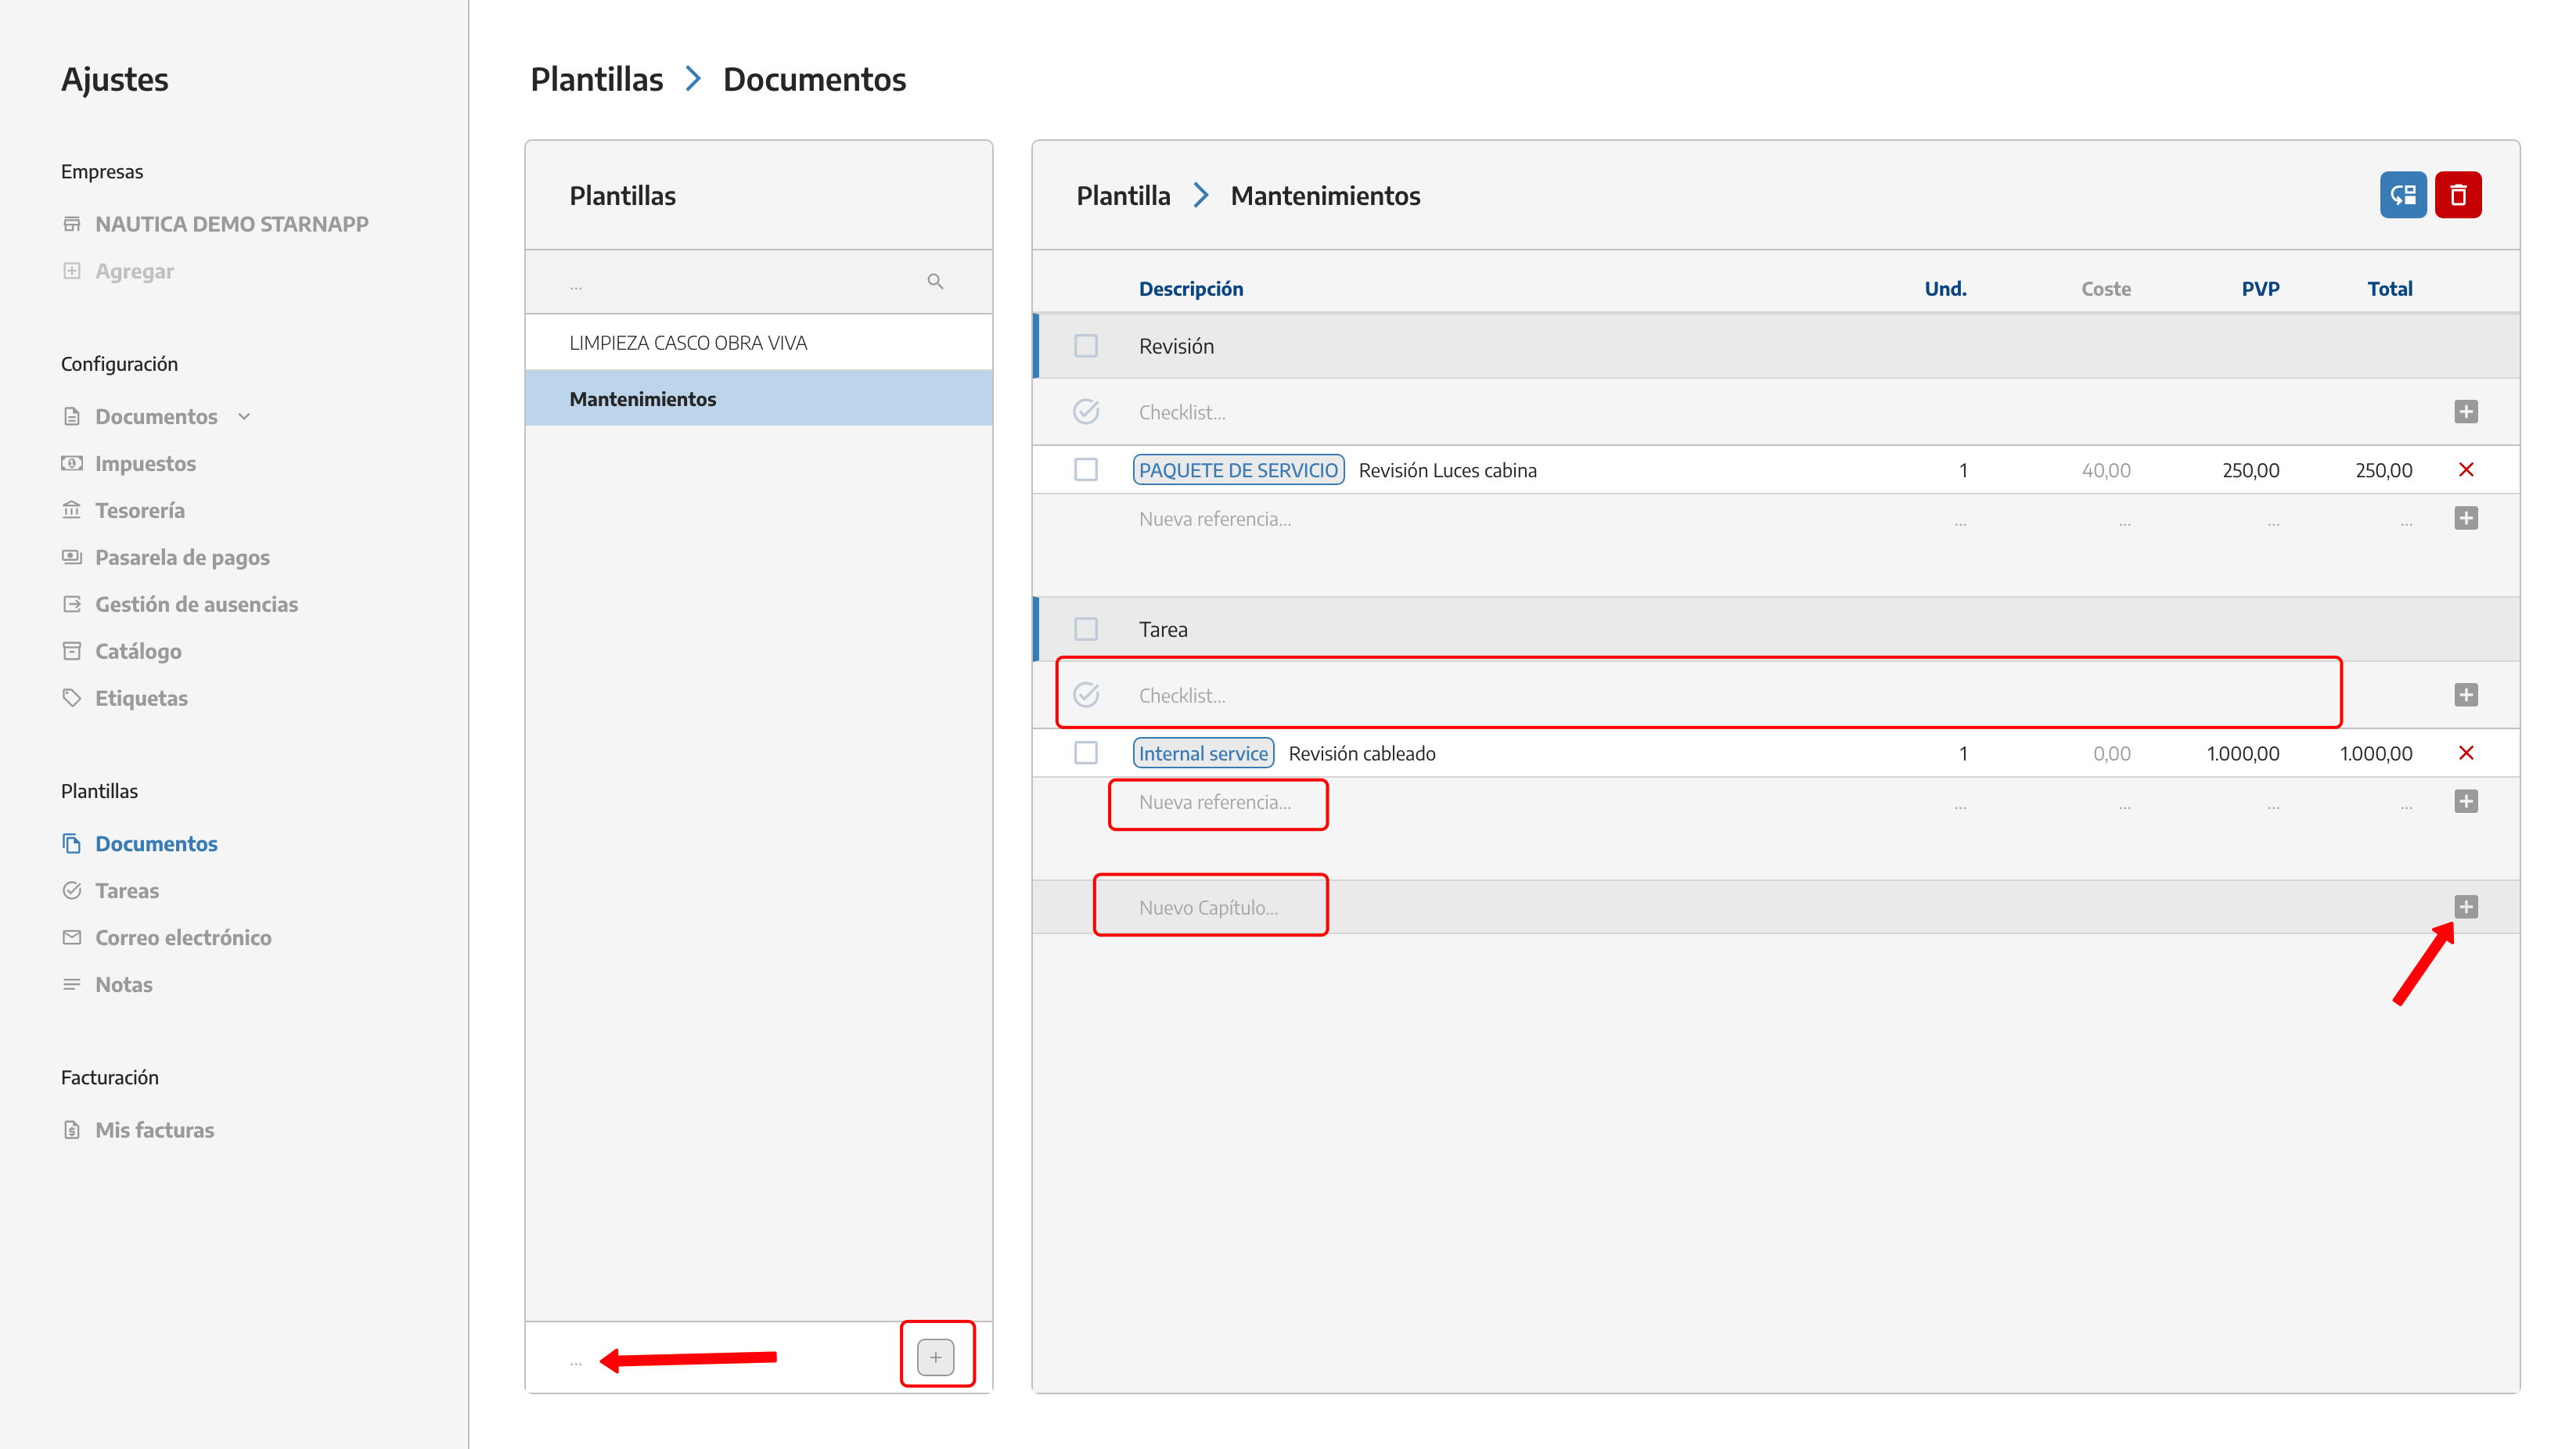
Once you’ve made the template with the chapters and lines you need, you can rearrange them however you like using the button up in the top right corner.
We can create different tasks that we use regularly so we don’t have to make them from scratch every time we make a document.
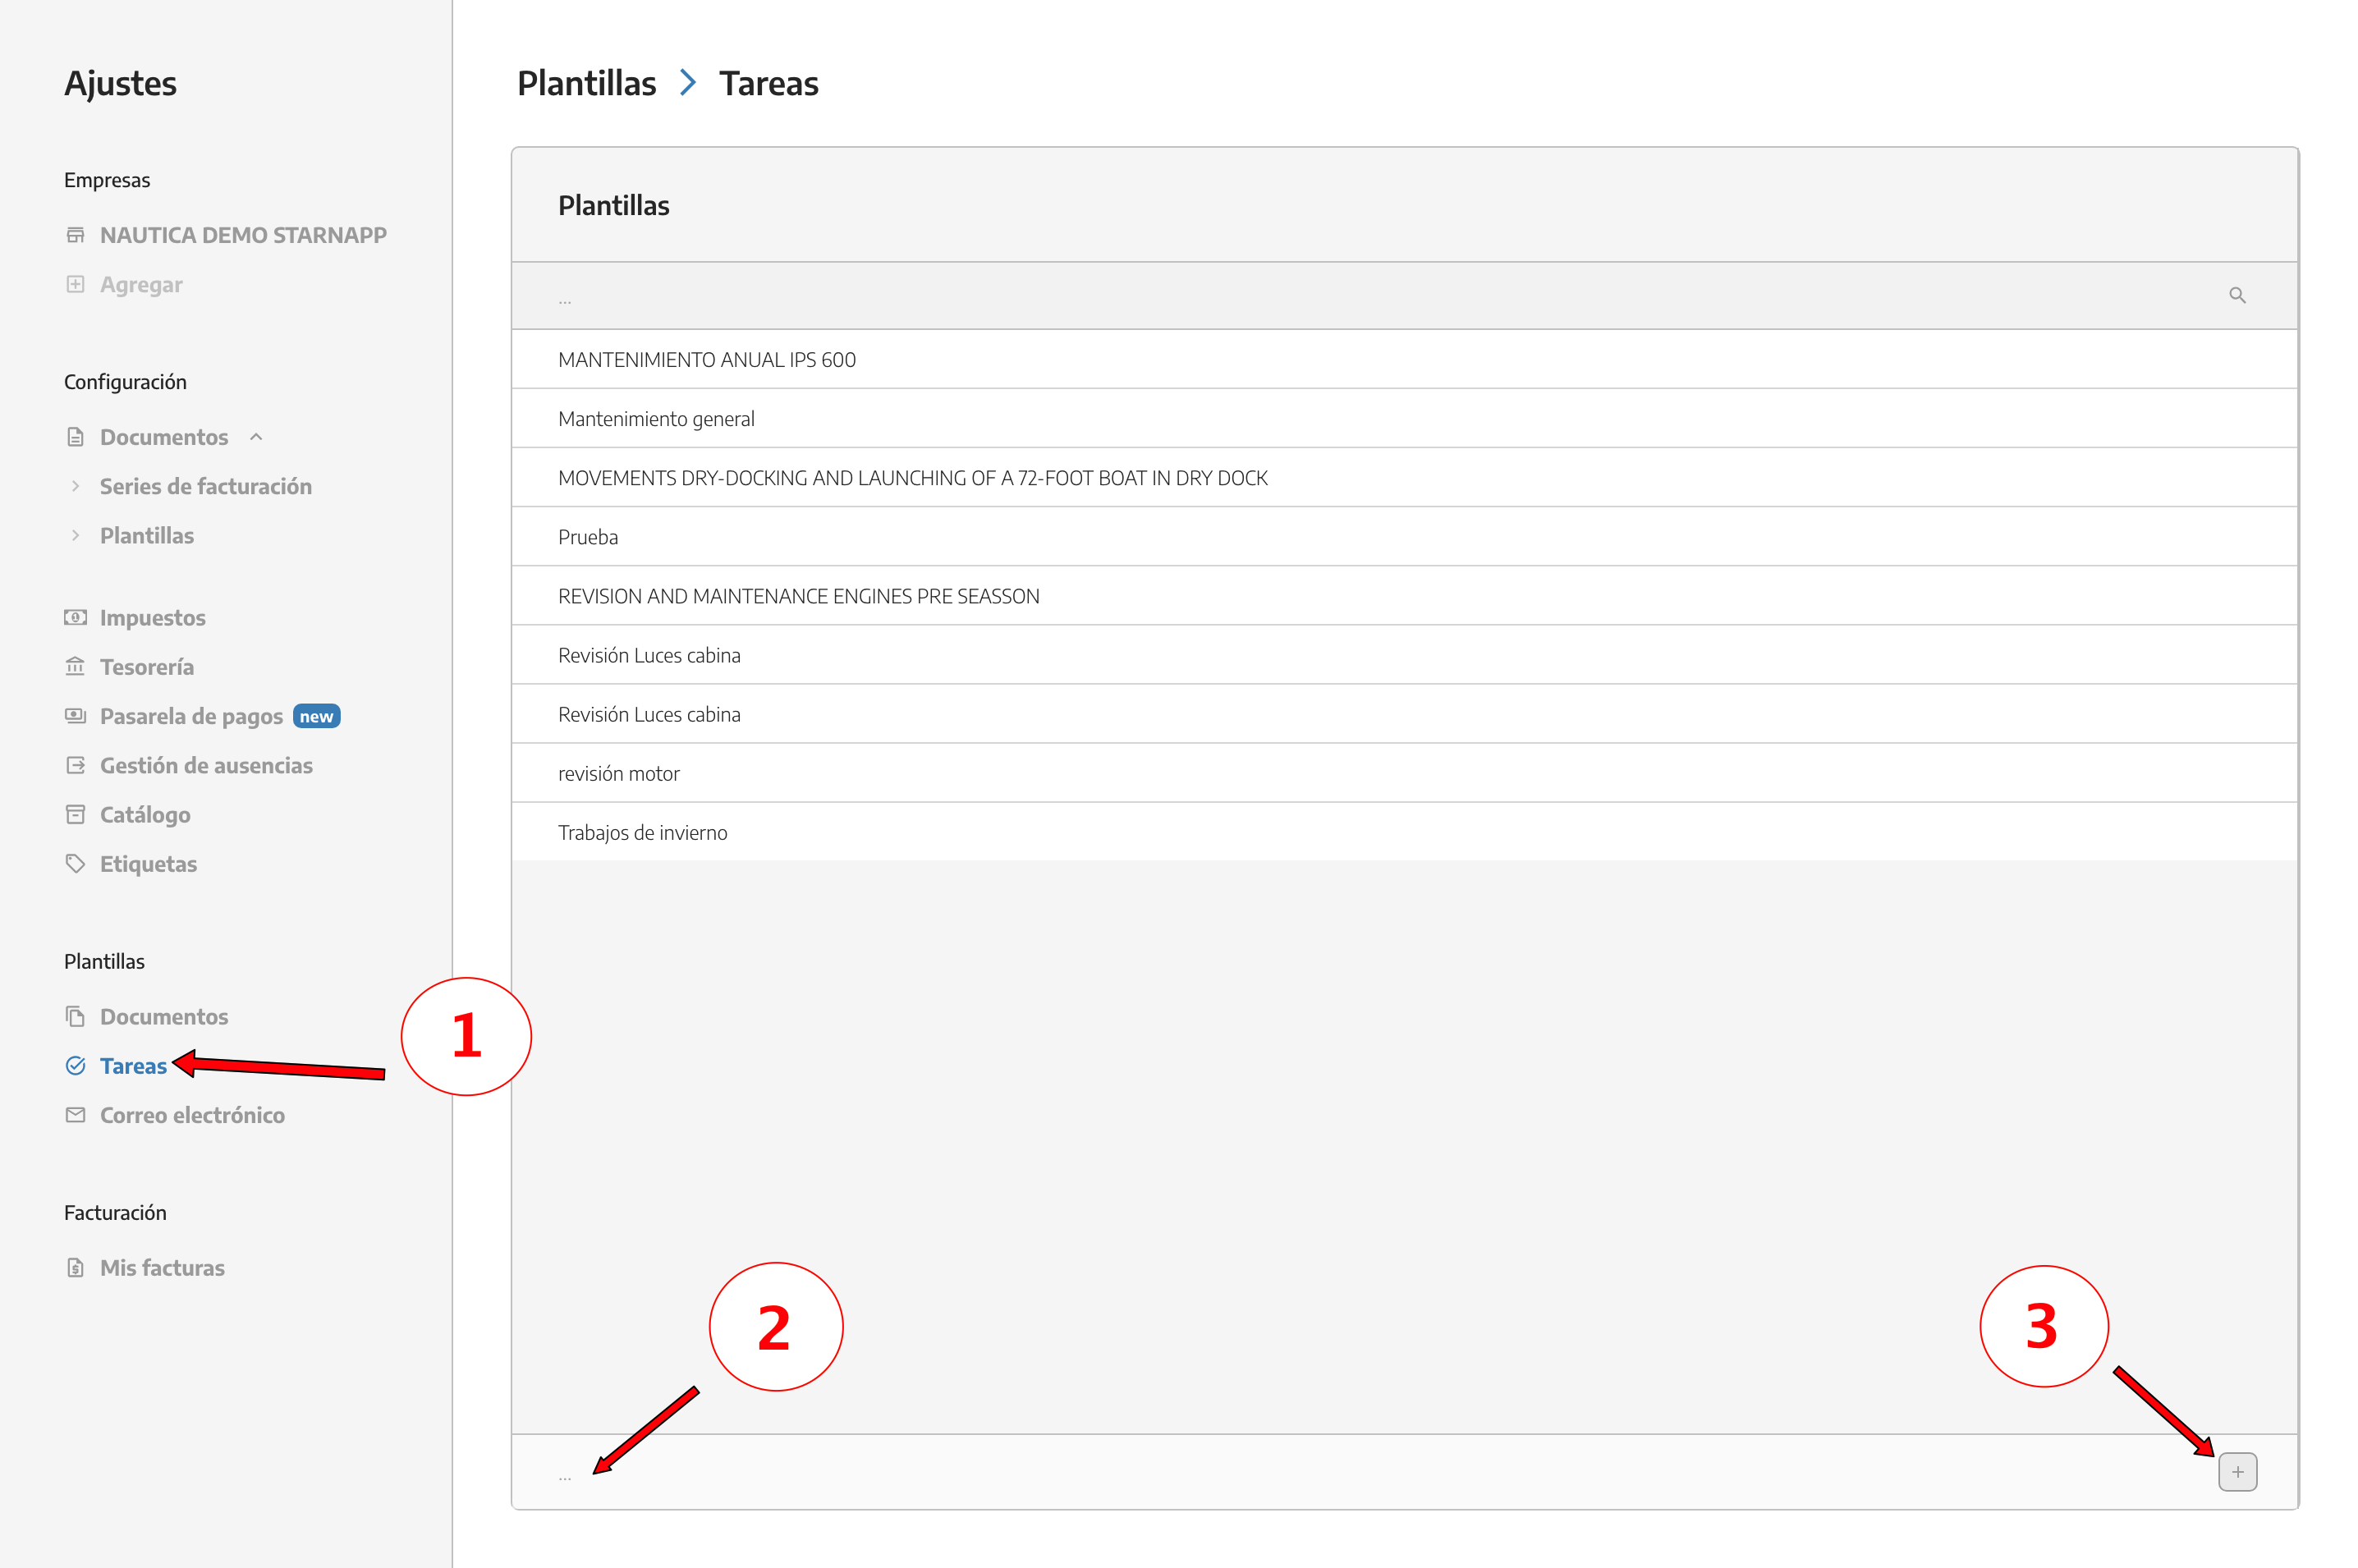
In task templates you also have the option to rearrange the lines you've already made.

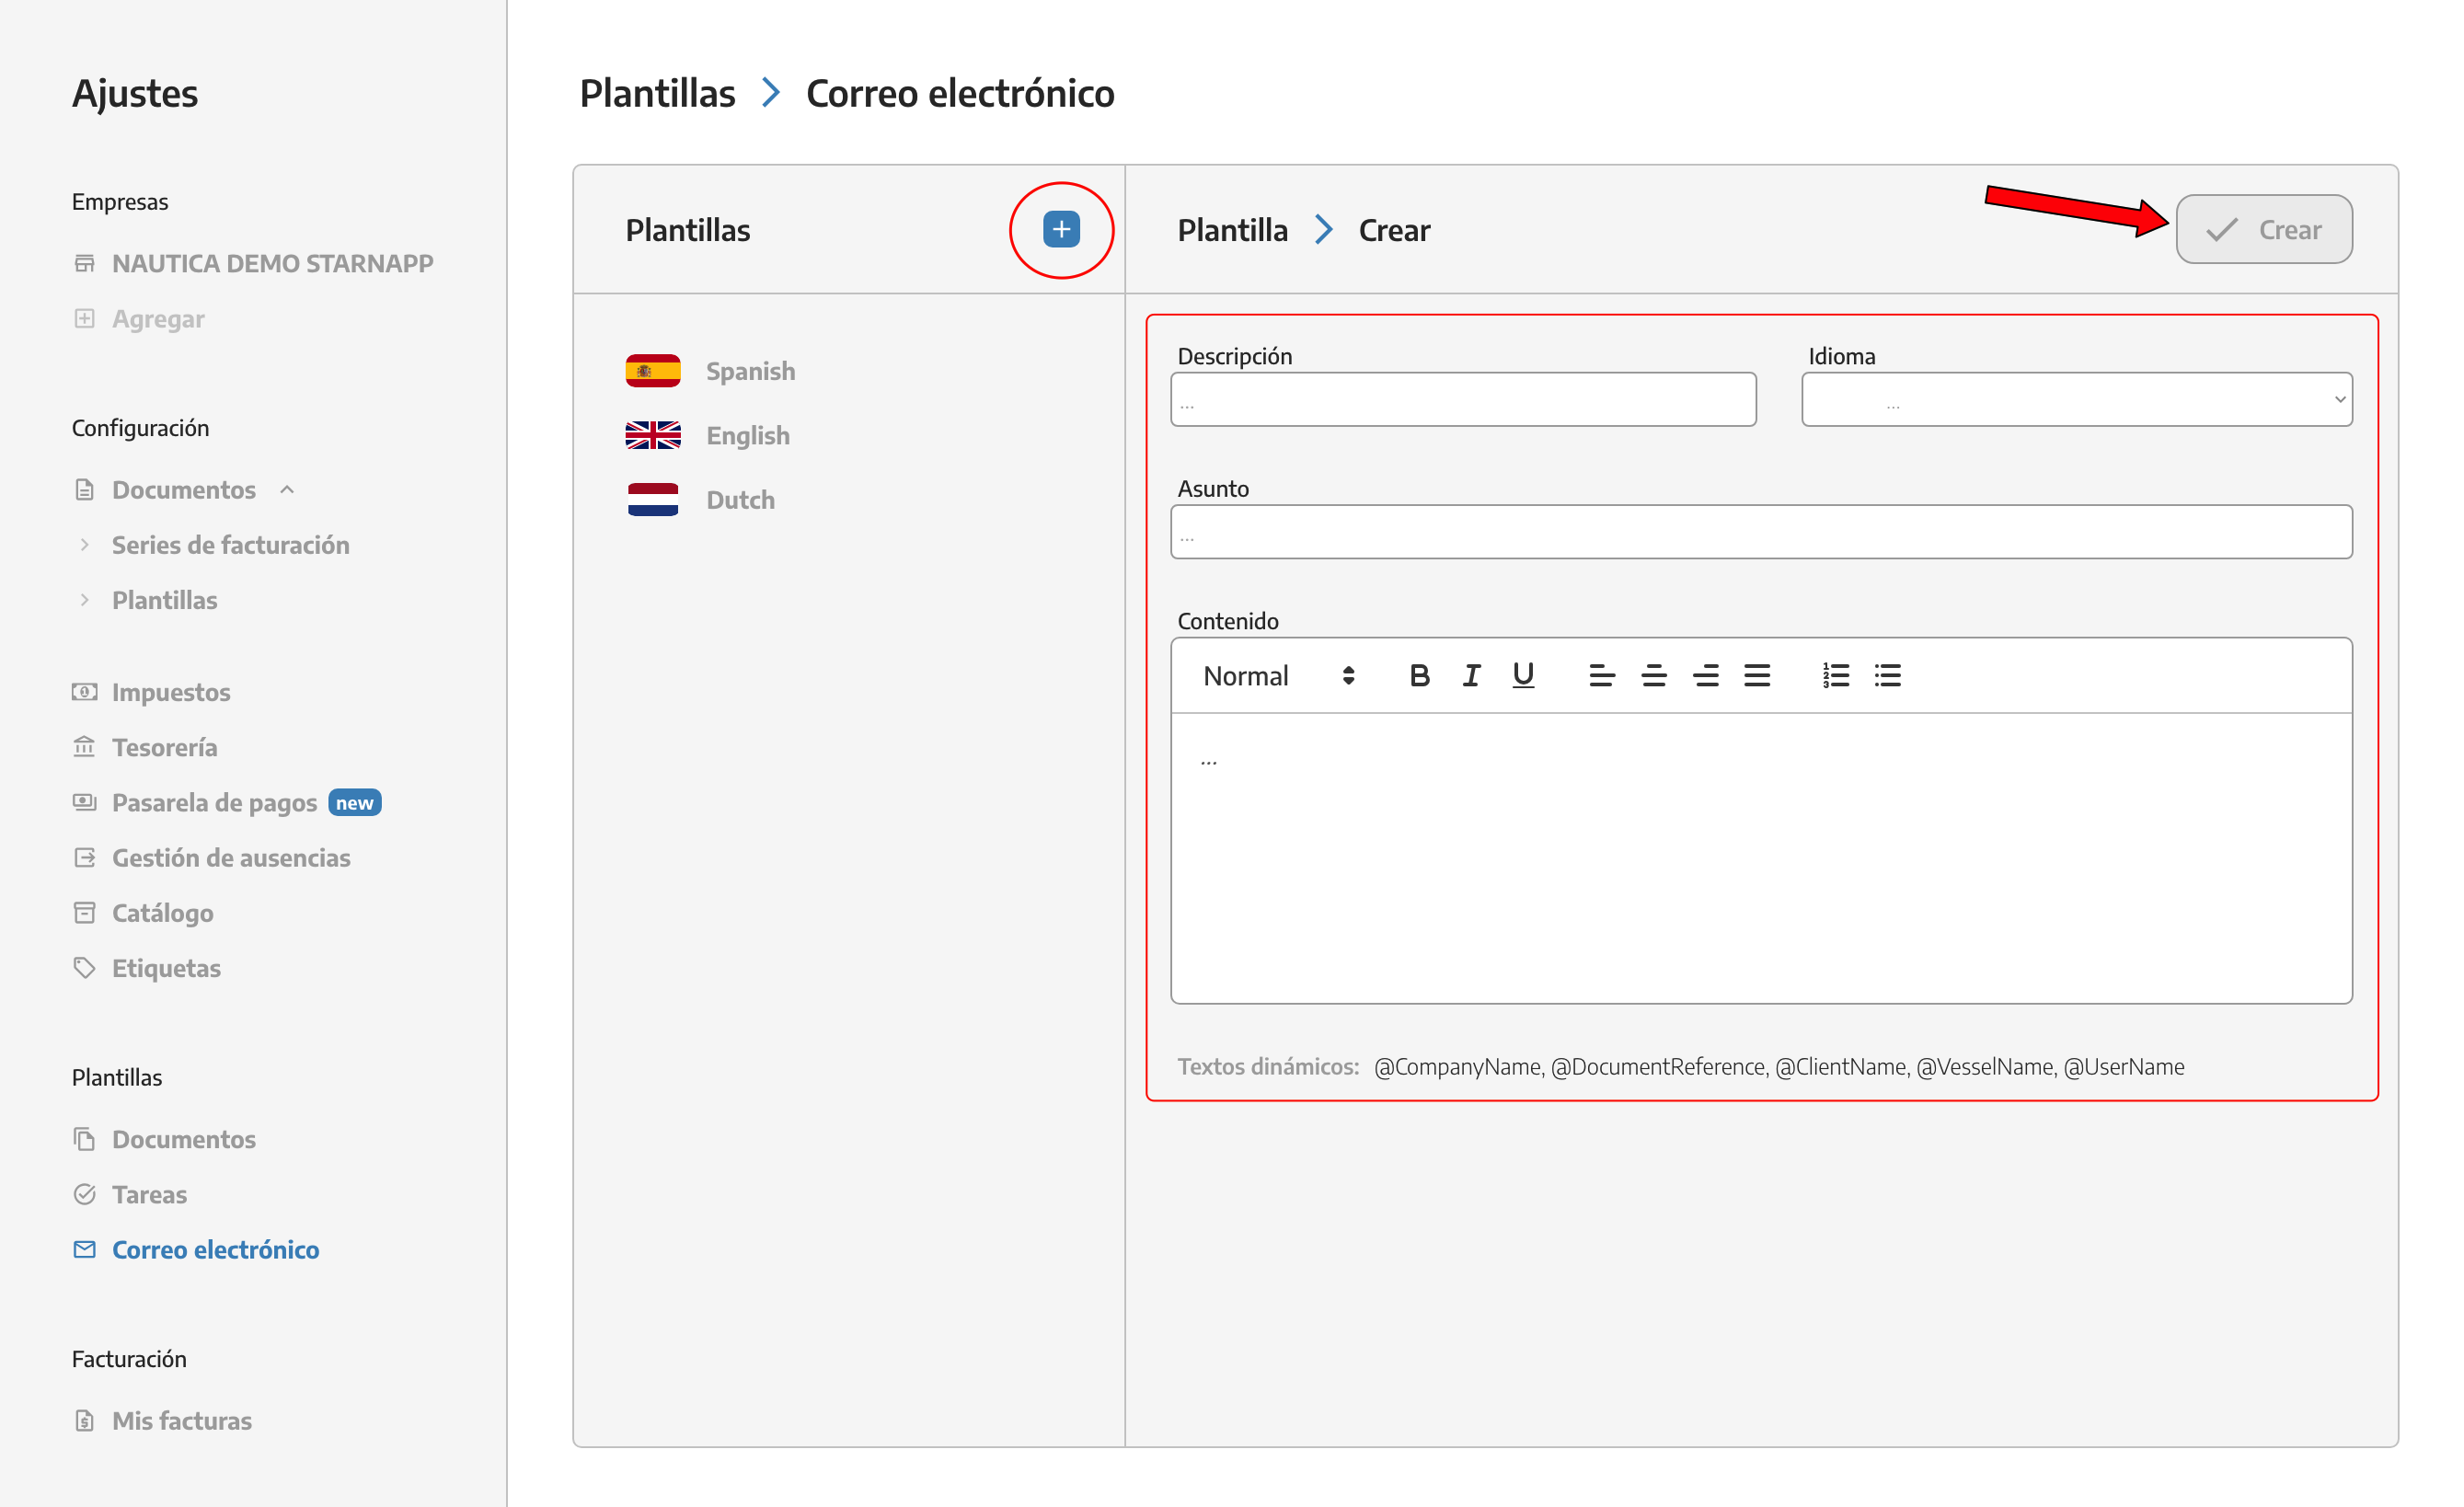
We can generate email templates in whatever language we want. Right now, we have six languages in StarNapp.
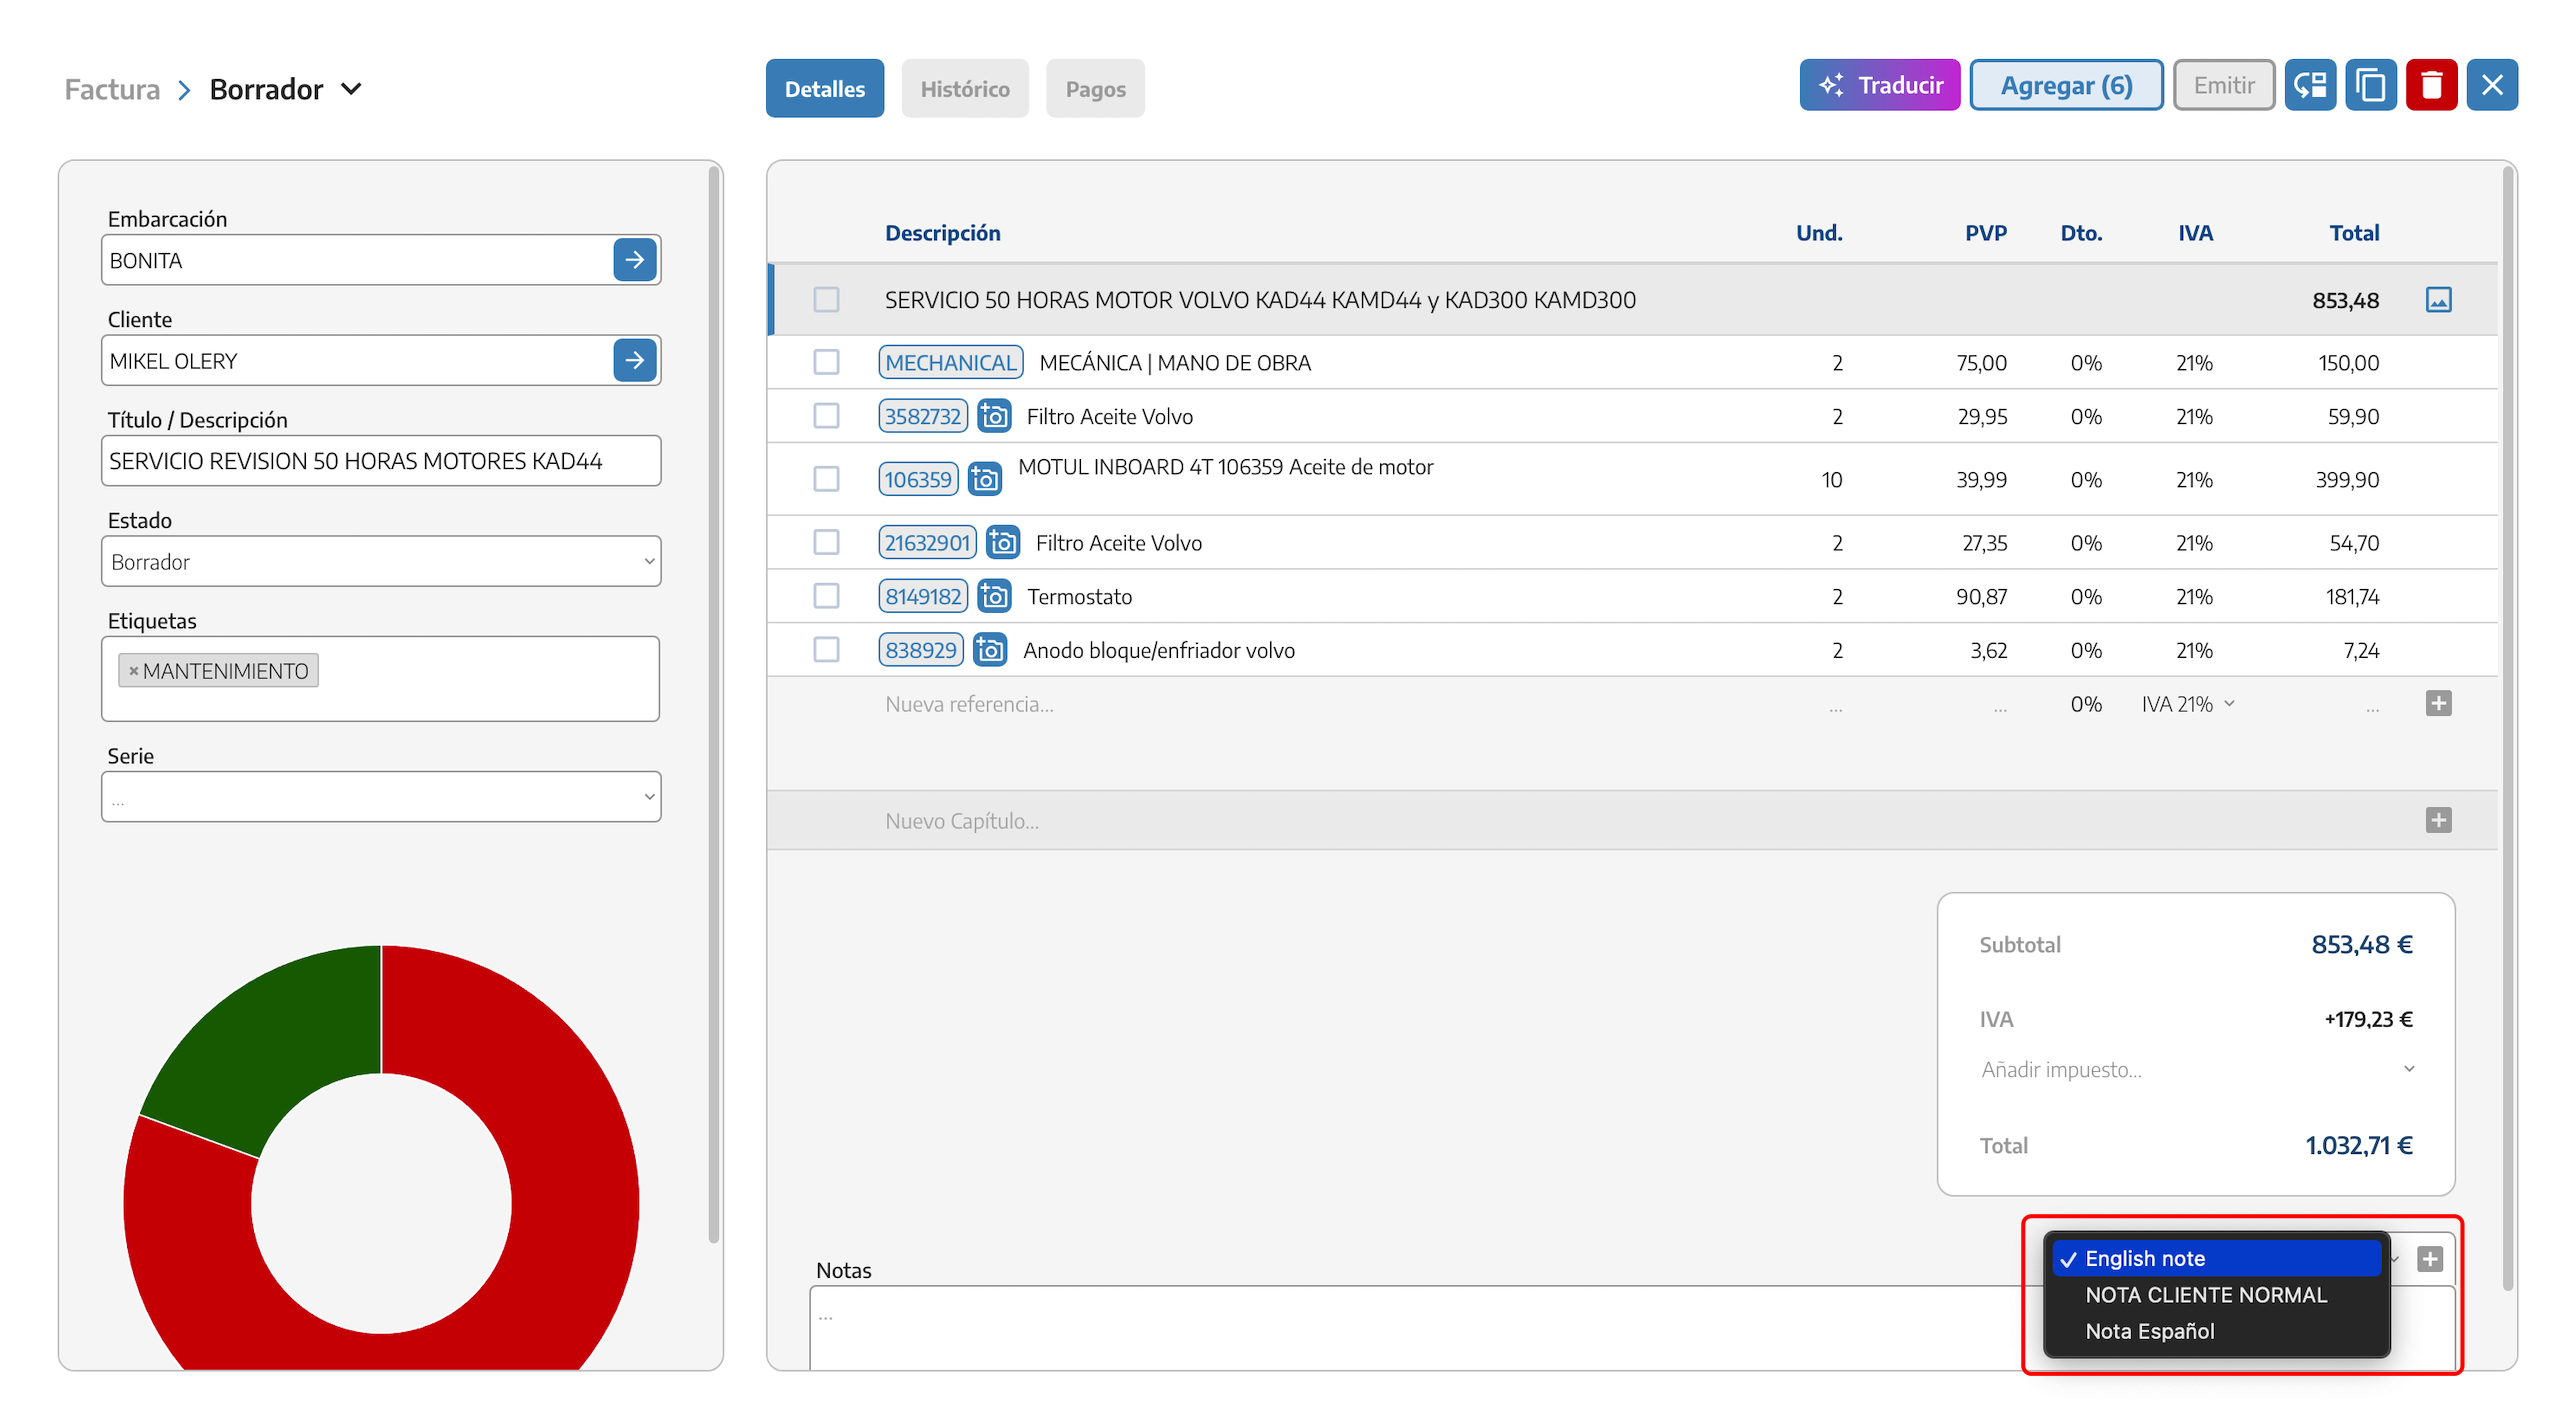
We can create templates for the notes in our documents in the languages we’ve set up in StarNapp. You can make as many note templates as you want.
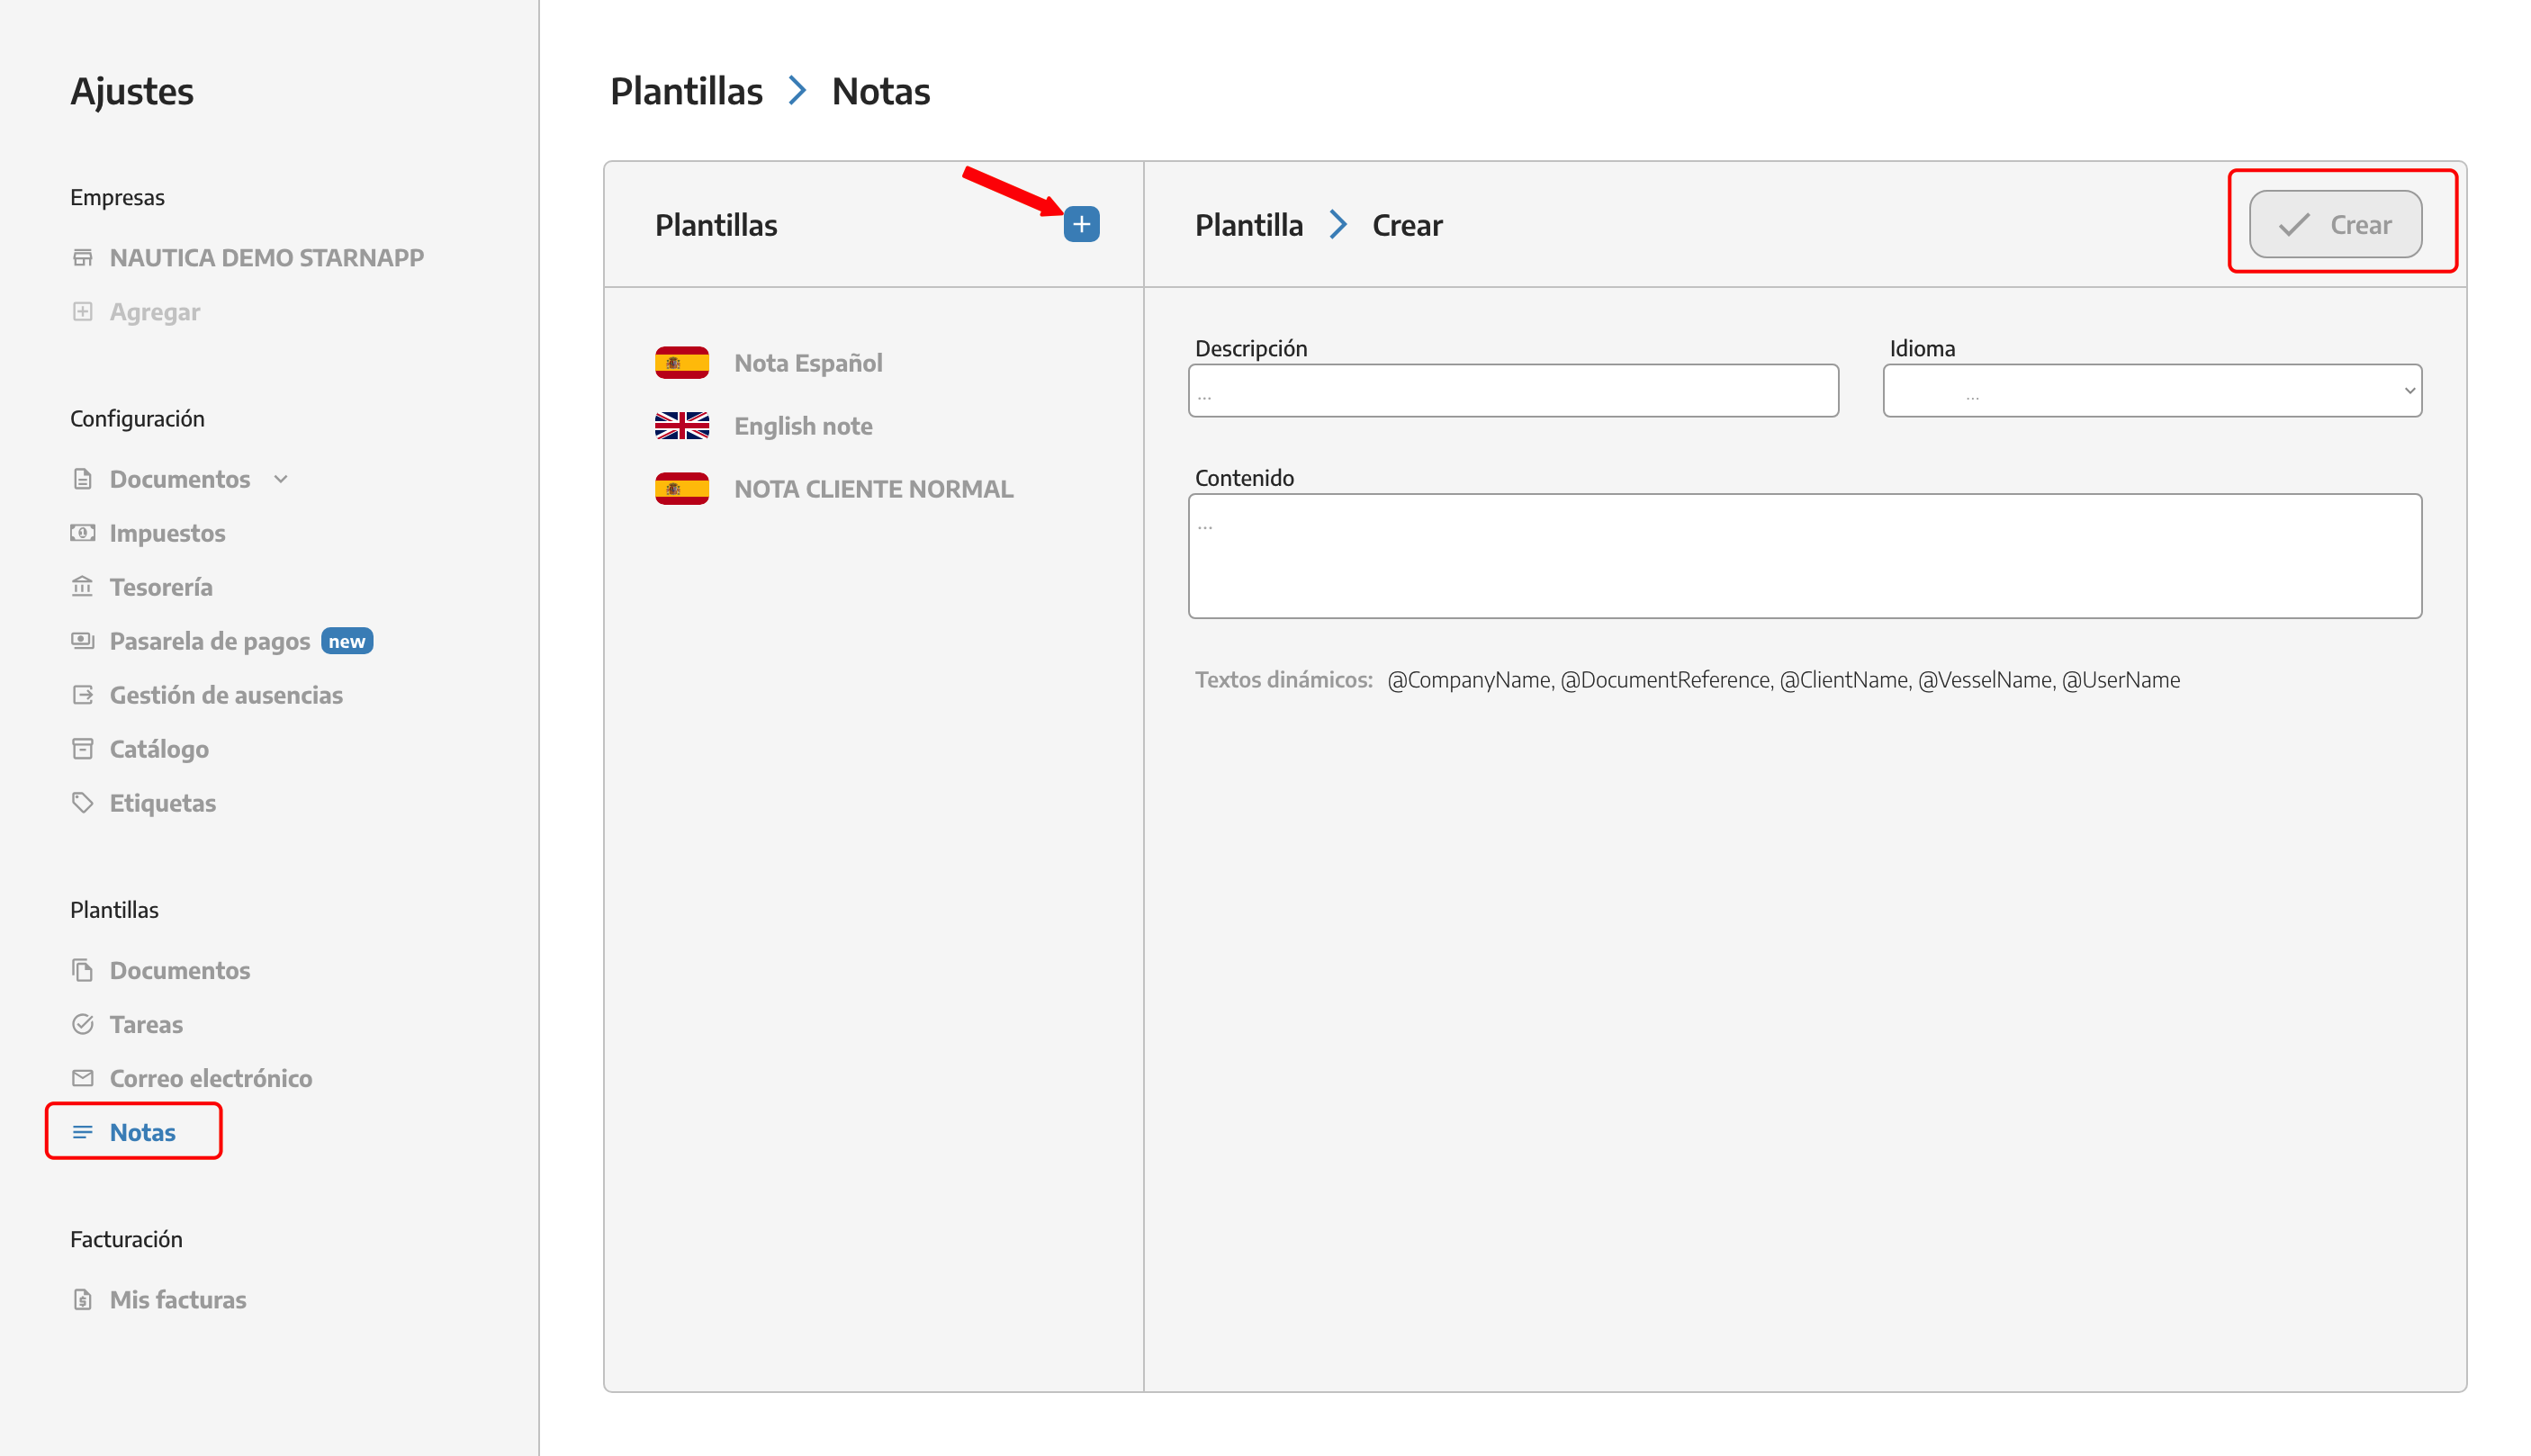
To add the notes you’ve created into the document, there’s a button at the bottom right. When you click it, all the notes you’ve made will pop up and you can pick the one you need right then.
Check here our API.