Shipyards represent the facilities or areas where we can locate vessels.
By configuring them, we will be able to:
Identify each shipyard by its name.
Locate it correctly on the map.
Delimit the area it occupies.
Consult its approximate surface area in square meters.
Use it as a reference when managing the location of vessels.
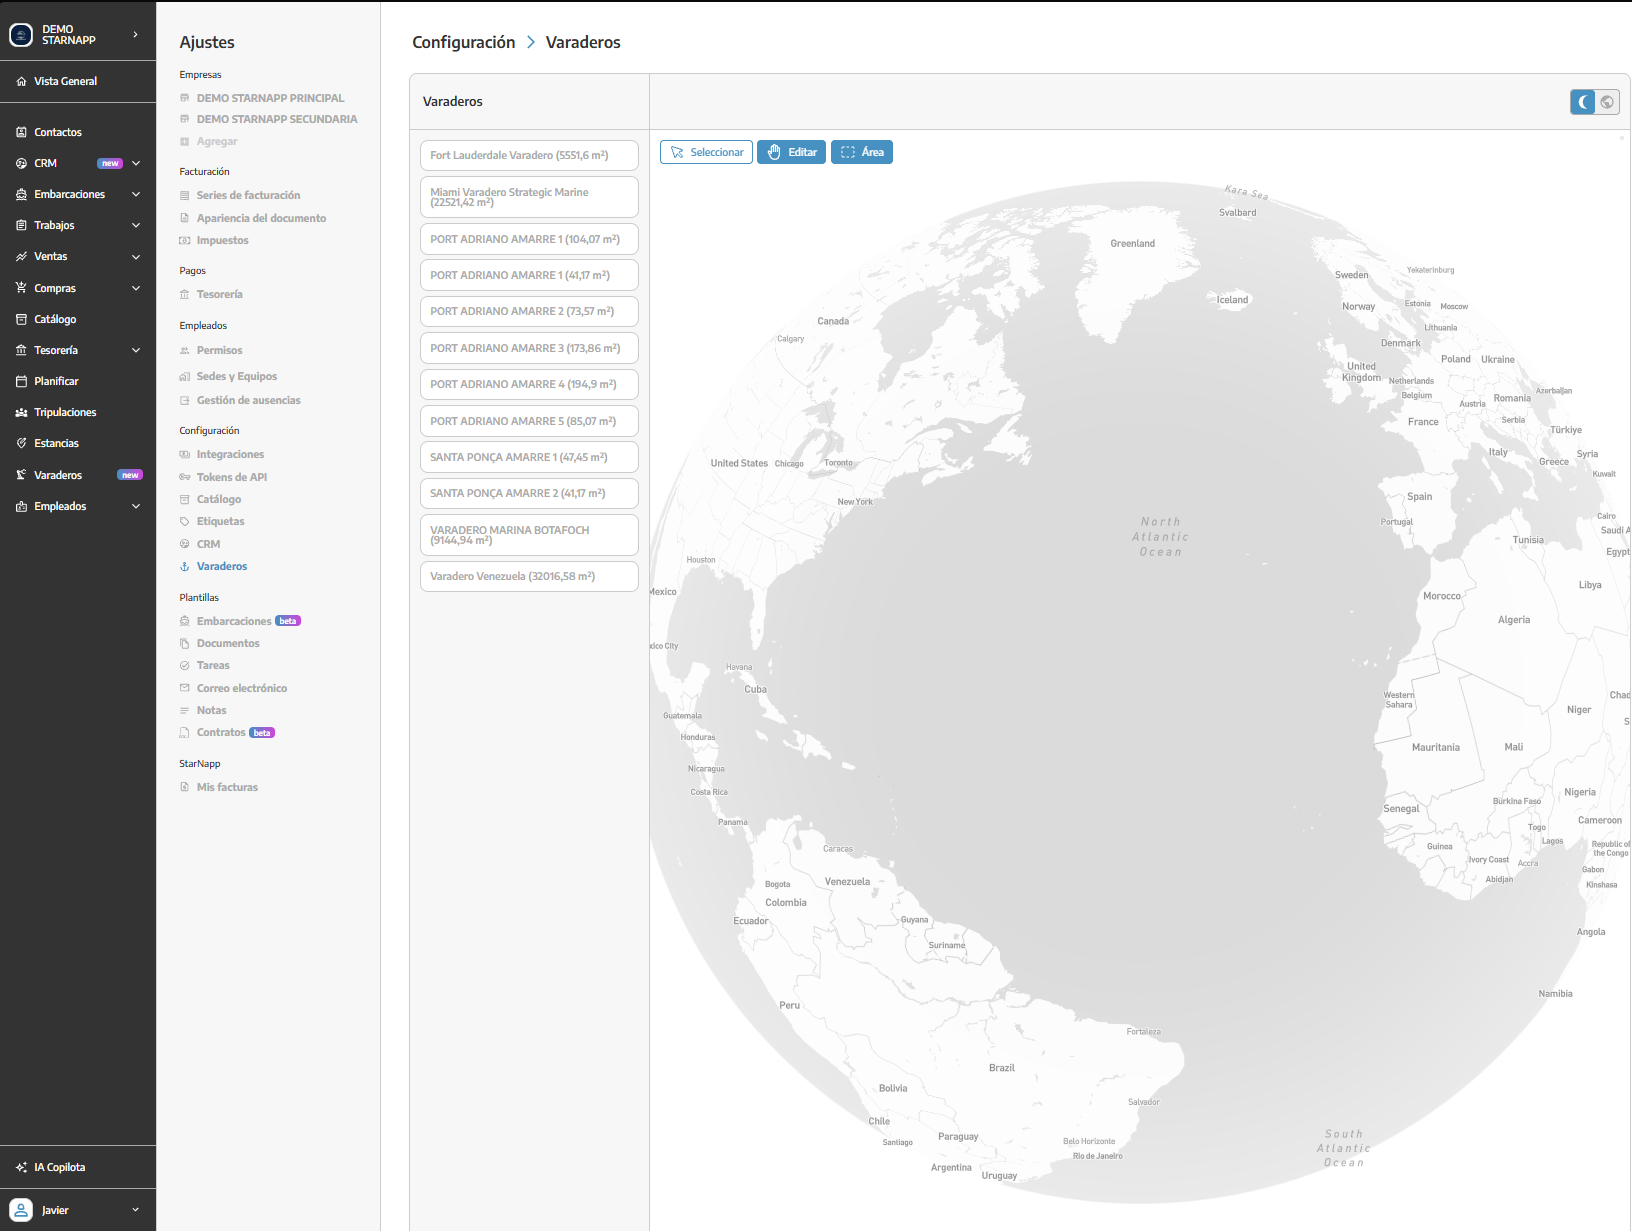
We must go to our StarNapp at the top of the side menu and navigate to:
SETTINGS → CONFIGURATION → SHIPYARDS
On the left we will see the list of configured shipyards. When selecting one, the map will display its location and we will be able to edit it using the options available at the top.
We will use SELECT to indicate or modify the location of the shipyard on the map.
We will search for the corresponding area on the globe map and mark its position.
Additionally, we have a menu in the upper right margin that allows us to change the appearance of the globe between global view mode (overview) and satellite view mode.
💡 Before continuing, we will zoom in on the map enough to ensure that we are selecting the correct facility.
Edit
The EDIT option allows us to modify the information of the selected shipyard, such as its name or the data available in its record.
We recommend using easy-to-recognize names, especially if we manage multiple facilities.
With the AREA option we will be able to delimit on the map the surface occupied by the shipyard.
We will mark the different points of the perimeter until the area is complete. Once saved, StarNapp will display the calculated surface area in square meters next to the shipyard name.
This delimitation allows you to correctly differentiate the different work areas, especially when there are several shipyards or nearby areas.
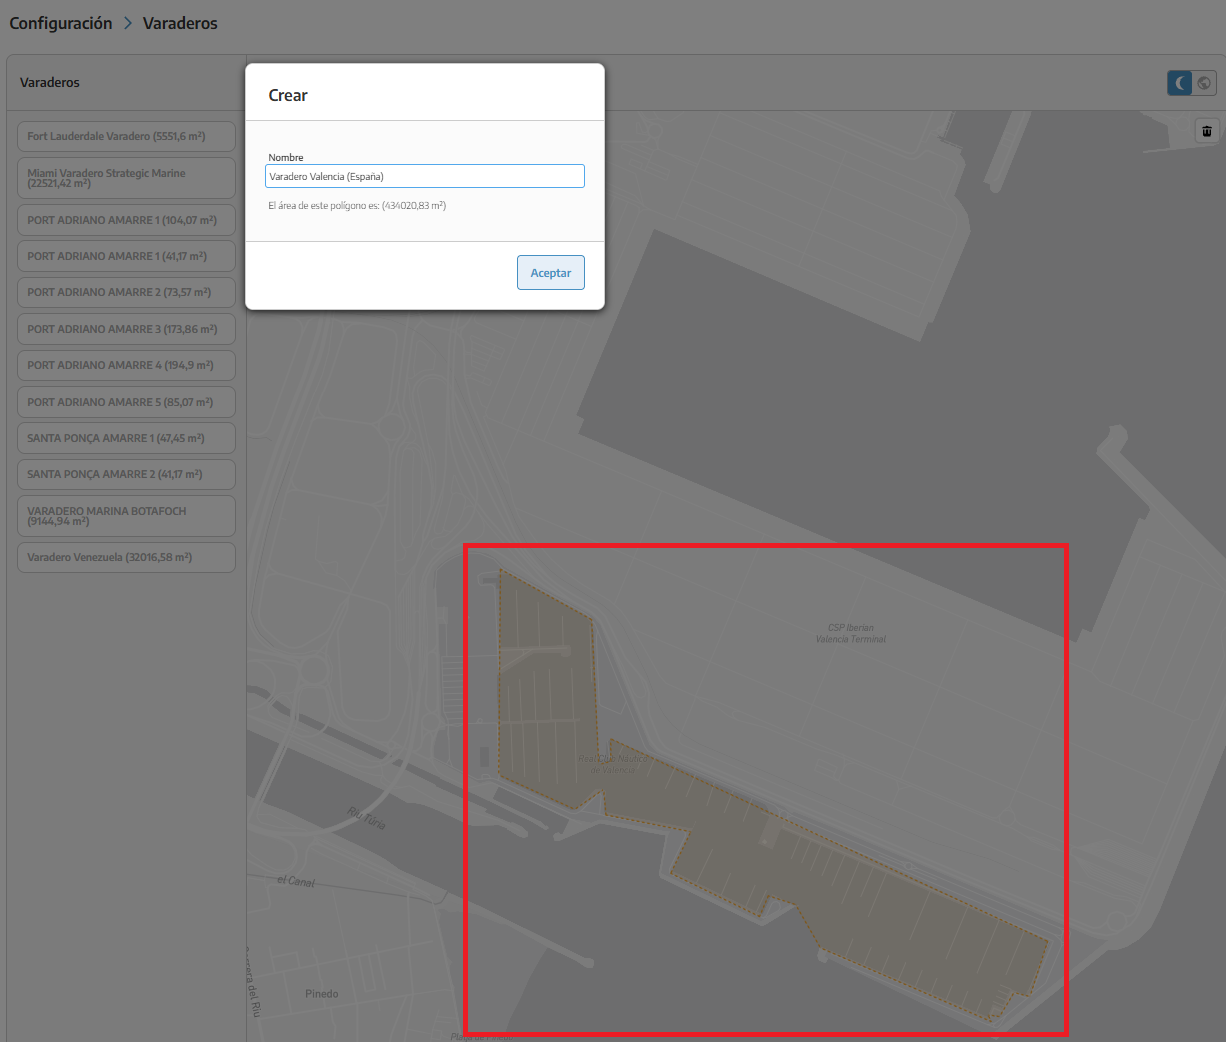
We will go to SETTINGS → CONFIGURATION → SHIPYARDS.
We will search for the location of the shipyard on the world map.
We will zoom in on the map until we precisely locate the facility.
We will press AREA to draw its perimeter.
We will mark the points that form the outline of the shipyard as shown in the red box of the image.
We will close the area and save the changes (to close the area we must click on one of the already defined points, where the CREATE pop-up will appear (like the one in the image) if the area is correctly delimited.
We will verify that the name, location and area are correct.
We will select the shipyard from the list on the left and use the corresponding option:
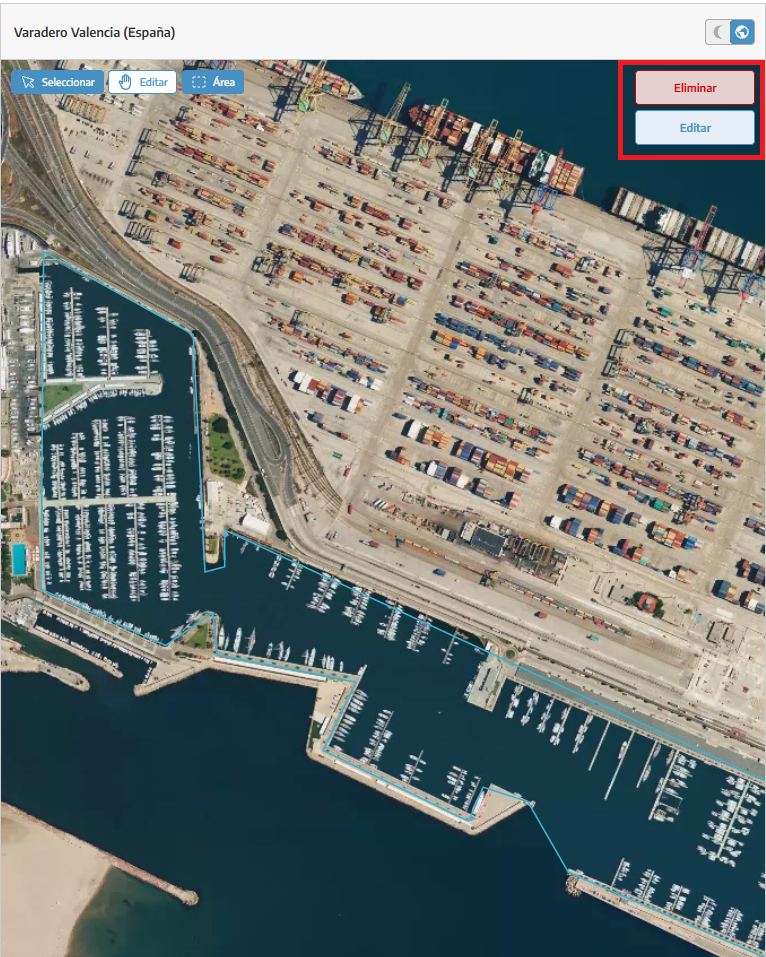
EDIT, to modify your information.
DELETE, to remove the shipyard from the list.
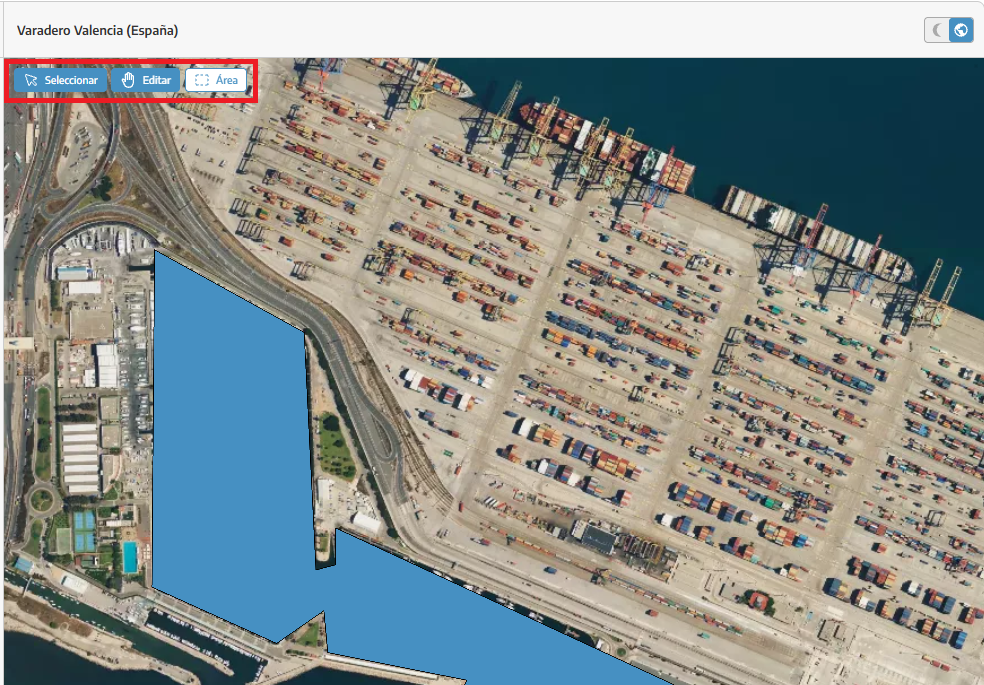
SELECT, to move around the map and select existing elements without risk of modifying anything.
EDIT, to edit an already created shipyard (you can move the selected area block with the first click, and with a double click edit the delimitation points of the area you had created).
AREA, to create another area under the name of the selected shipyard, adding to its surface.
After saving, we will verify that the updated information appears correctly in the list and on the map.
To obtain a more precise delimitation:
We will zoom in on the map before starting.
We will mark the actual corners of the installation.
We will avoid crossing the perimeter lines.
We will follow the contour in the same direction.
We will close the area by connecting the last point with the first one.
We will review the calculated surface before saving.
Shipyards help identify the installations and dry areas where vessels can be found.
This information is related to the location and management of stays. To learn about the complete planning process, consult Management of stays and moorings.
We will use a different and recognizable name for each slipway.
We will verify the location before drawing the area.
The displayed surface will depend on the perimeter marked on the map.
If we have several zones within the same facility, we will be able to identify them with different names.
We will keep the slipways updated when the facility layout changes.