The customizable document creation feature is available from the Settings section of your boating account.
Go to Settings > Contracts.
In the Templates column, enter the name of the new document.
Click the "+" button to add it.
Here, you can upload your contracts as either PDF or Image.
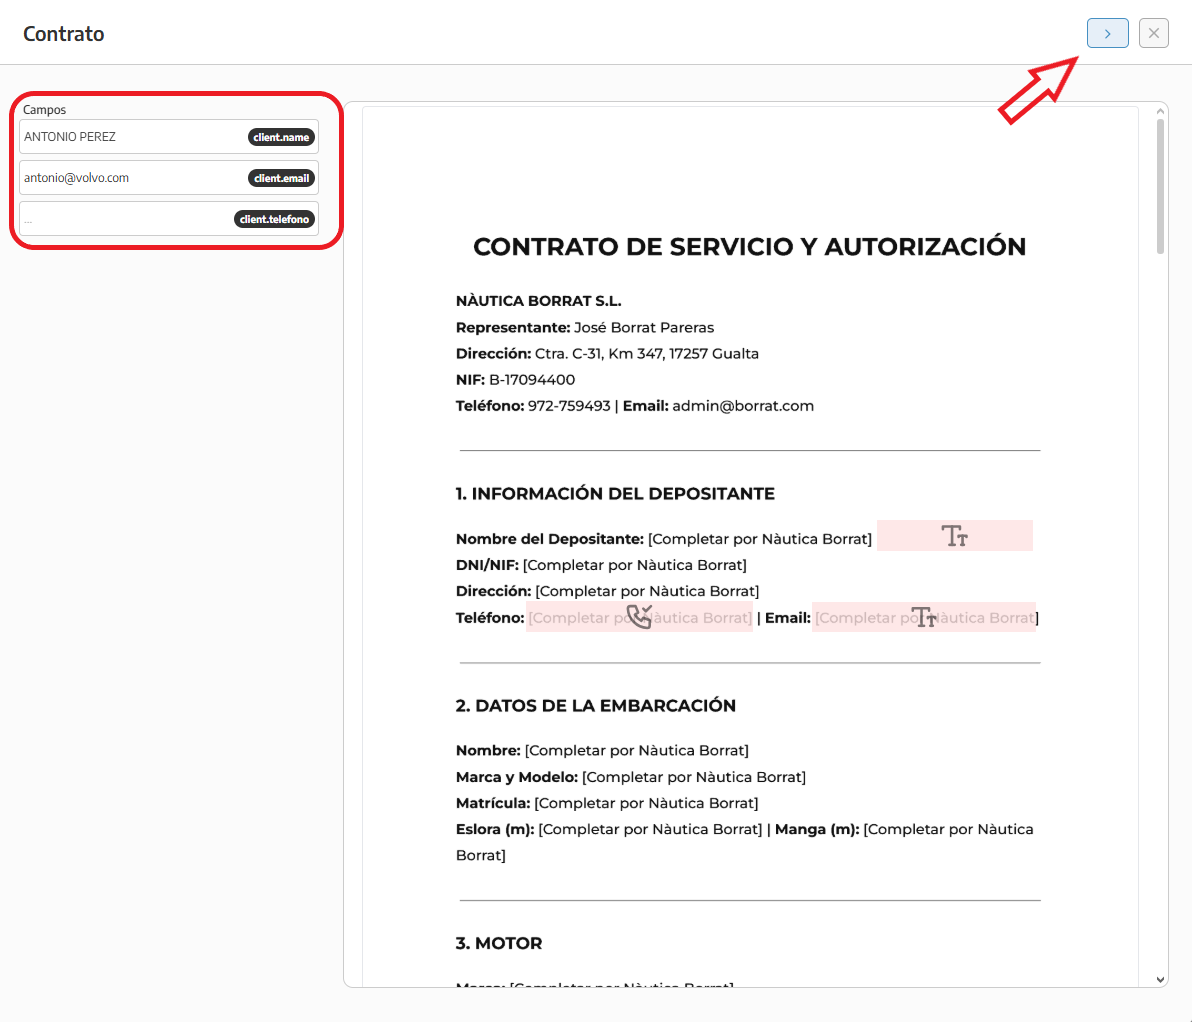
We have several customization options. You can add fields like customer name, email, phone number, and more.
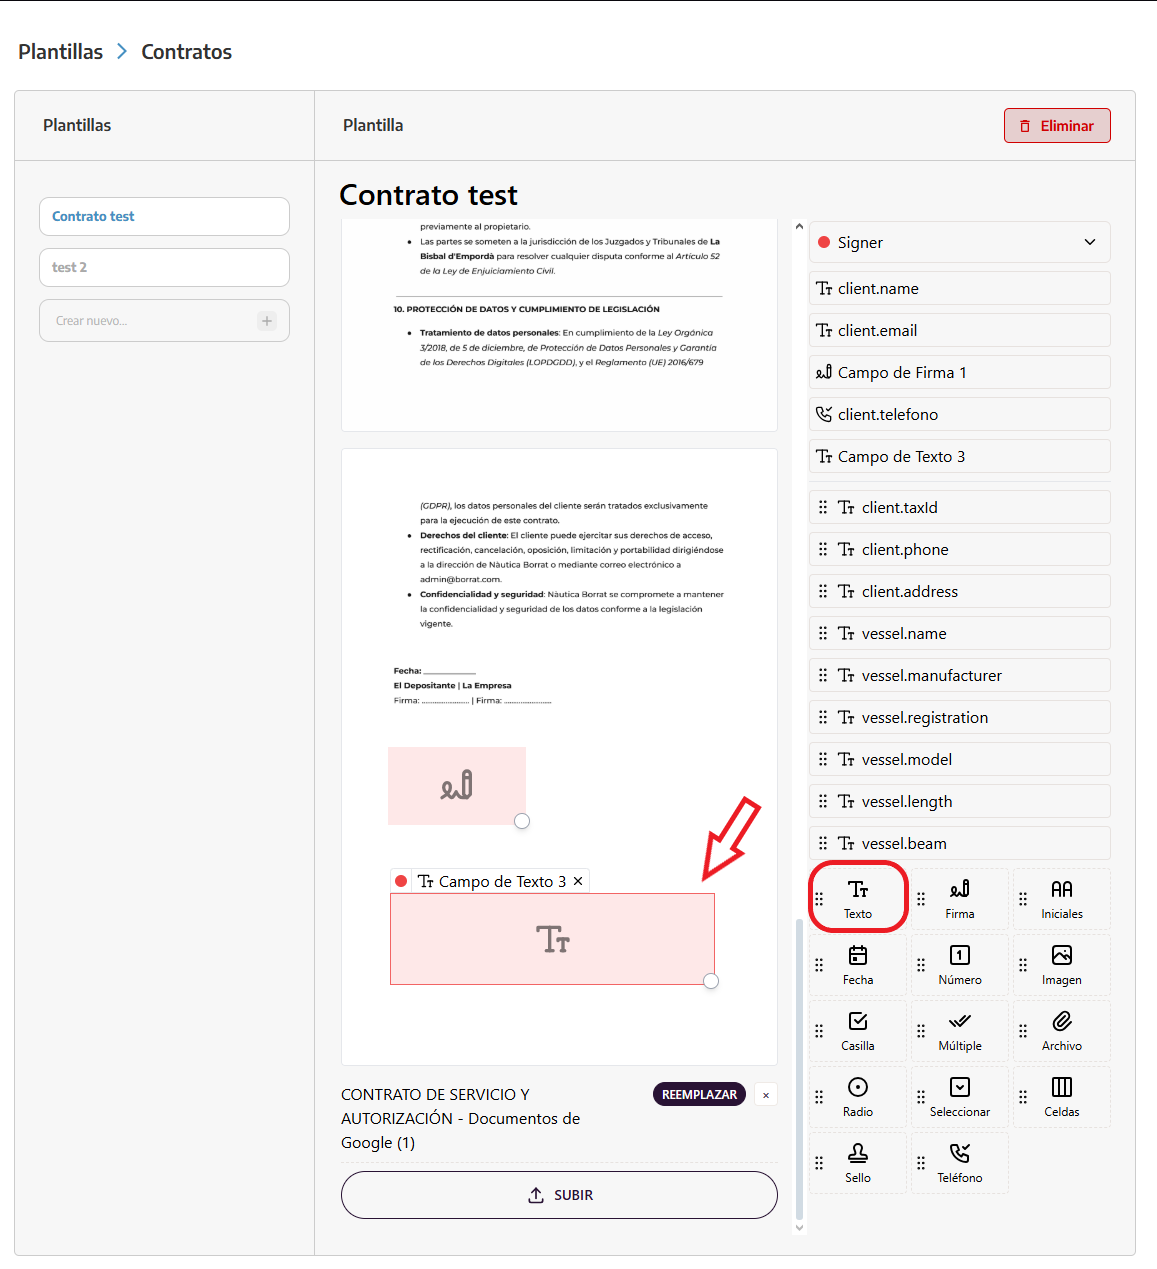
You can also add text, signature, or image fields among others.
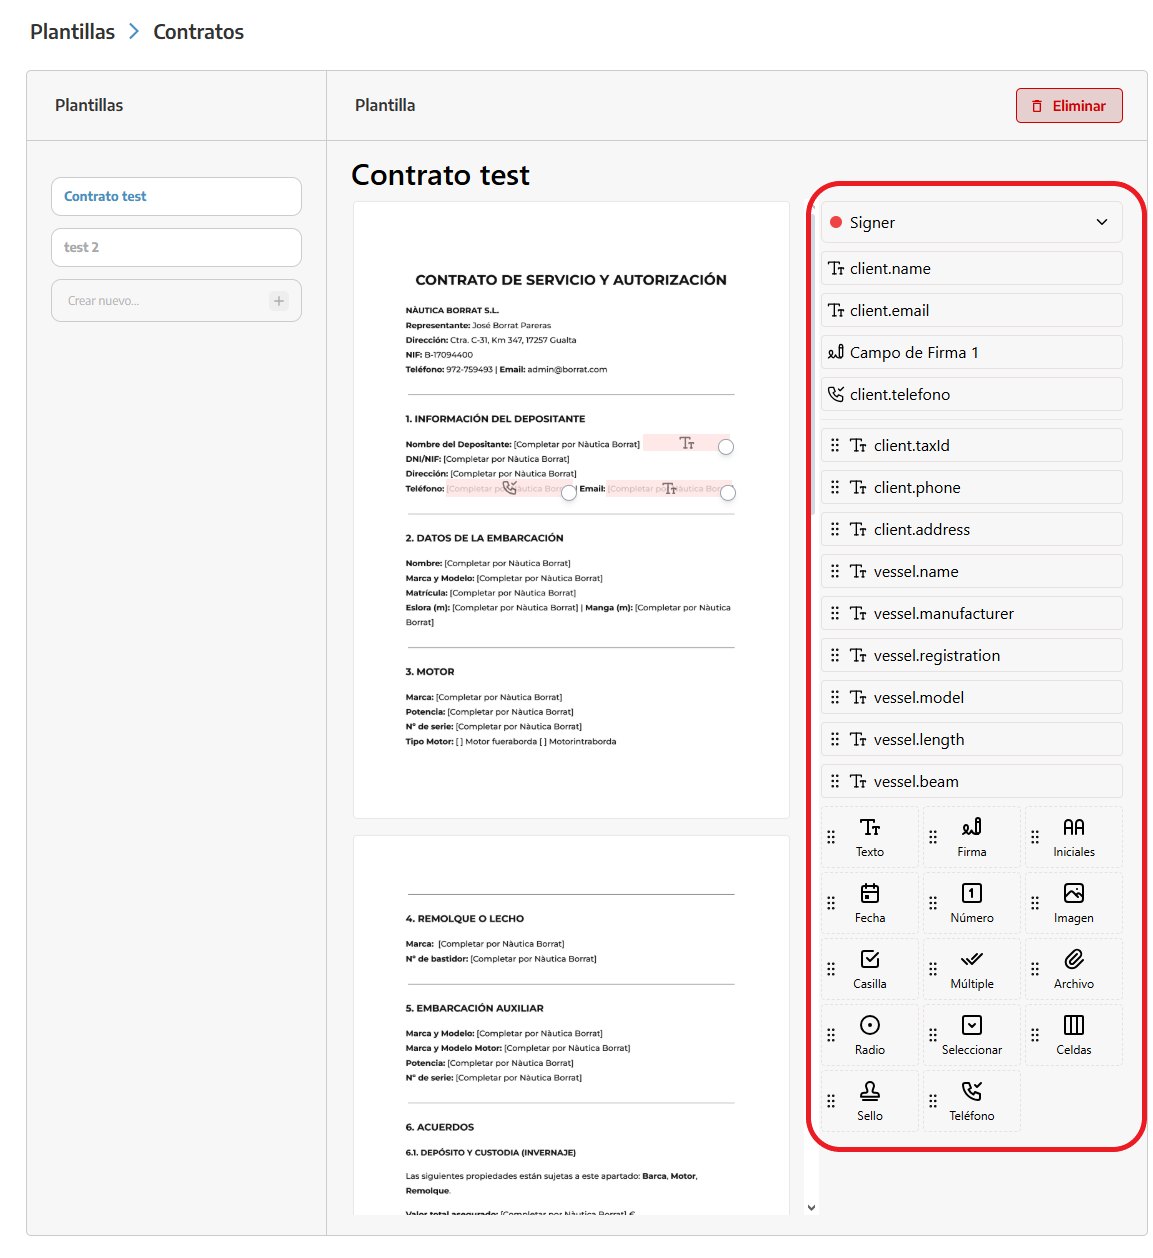
To add these fields, just pick the one you want and drag it to where you want to put it.
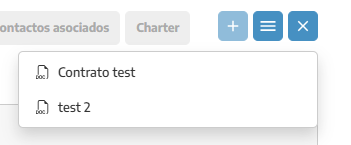
Now we're going to send the contract to the client. In the boat's details page, you'll see the contracts tab at the top; there will be a + that lets you add the contract you made to this boat.

When you have the contract selected, check that the customer and boat info is correct. Once you’ve checked everything, hit the arrow in the top right to keep going.
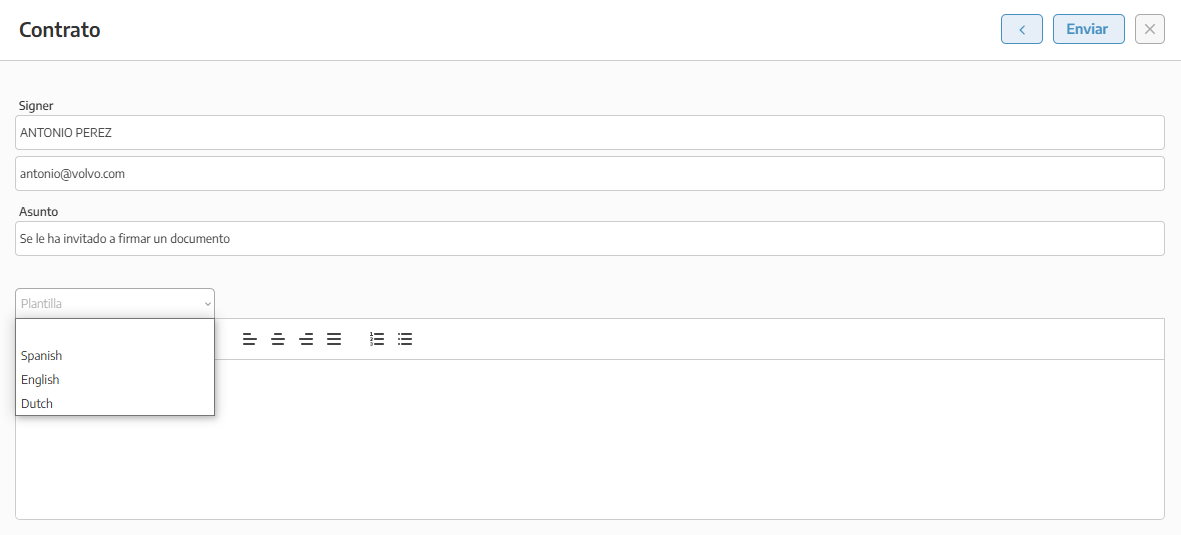
In the next step, we’re going to send the contract to the client. You can pick one of your email templates that you’ve set up in StarNapp. Once you pick the template, you can send the contract.