To create the documents in this section we will follow the same line in all cases.
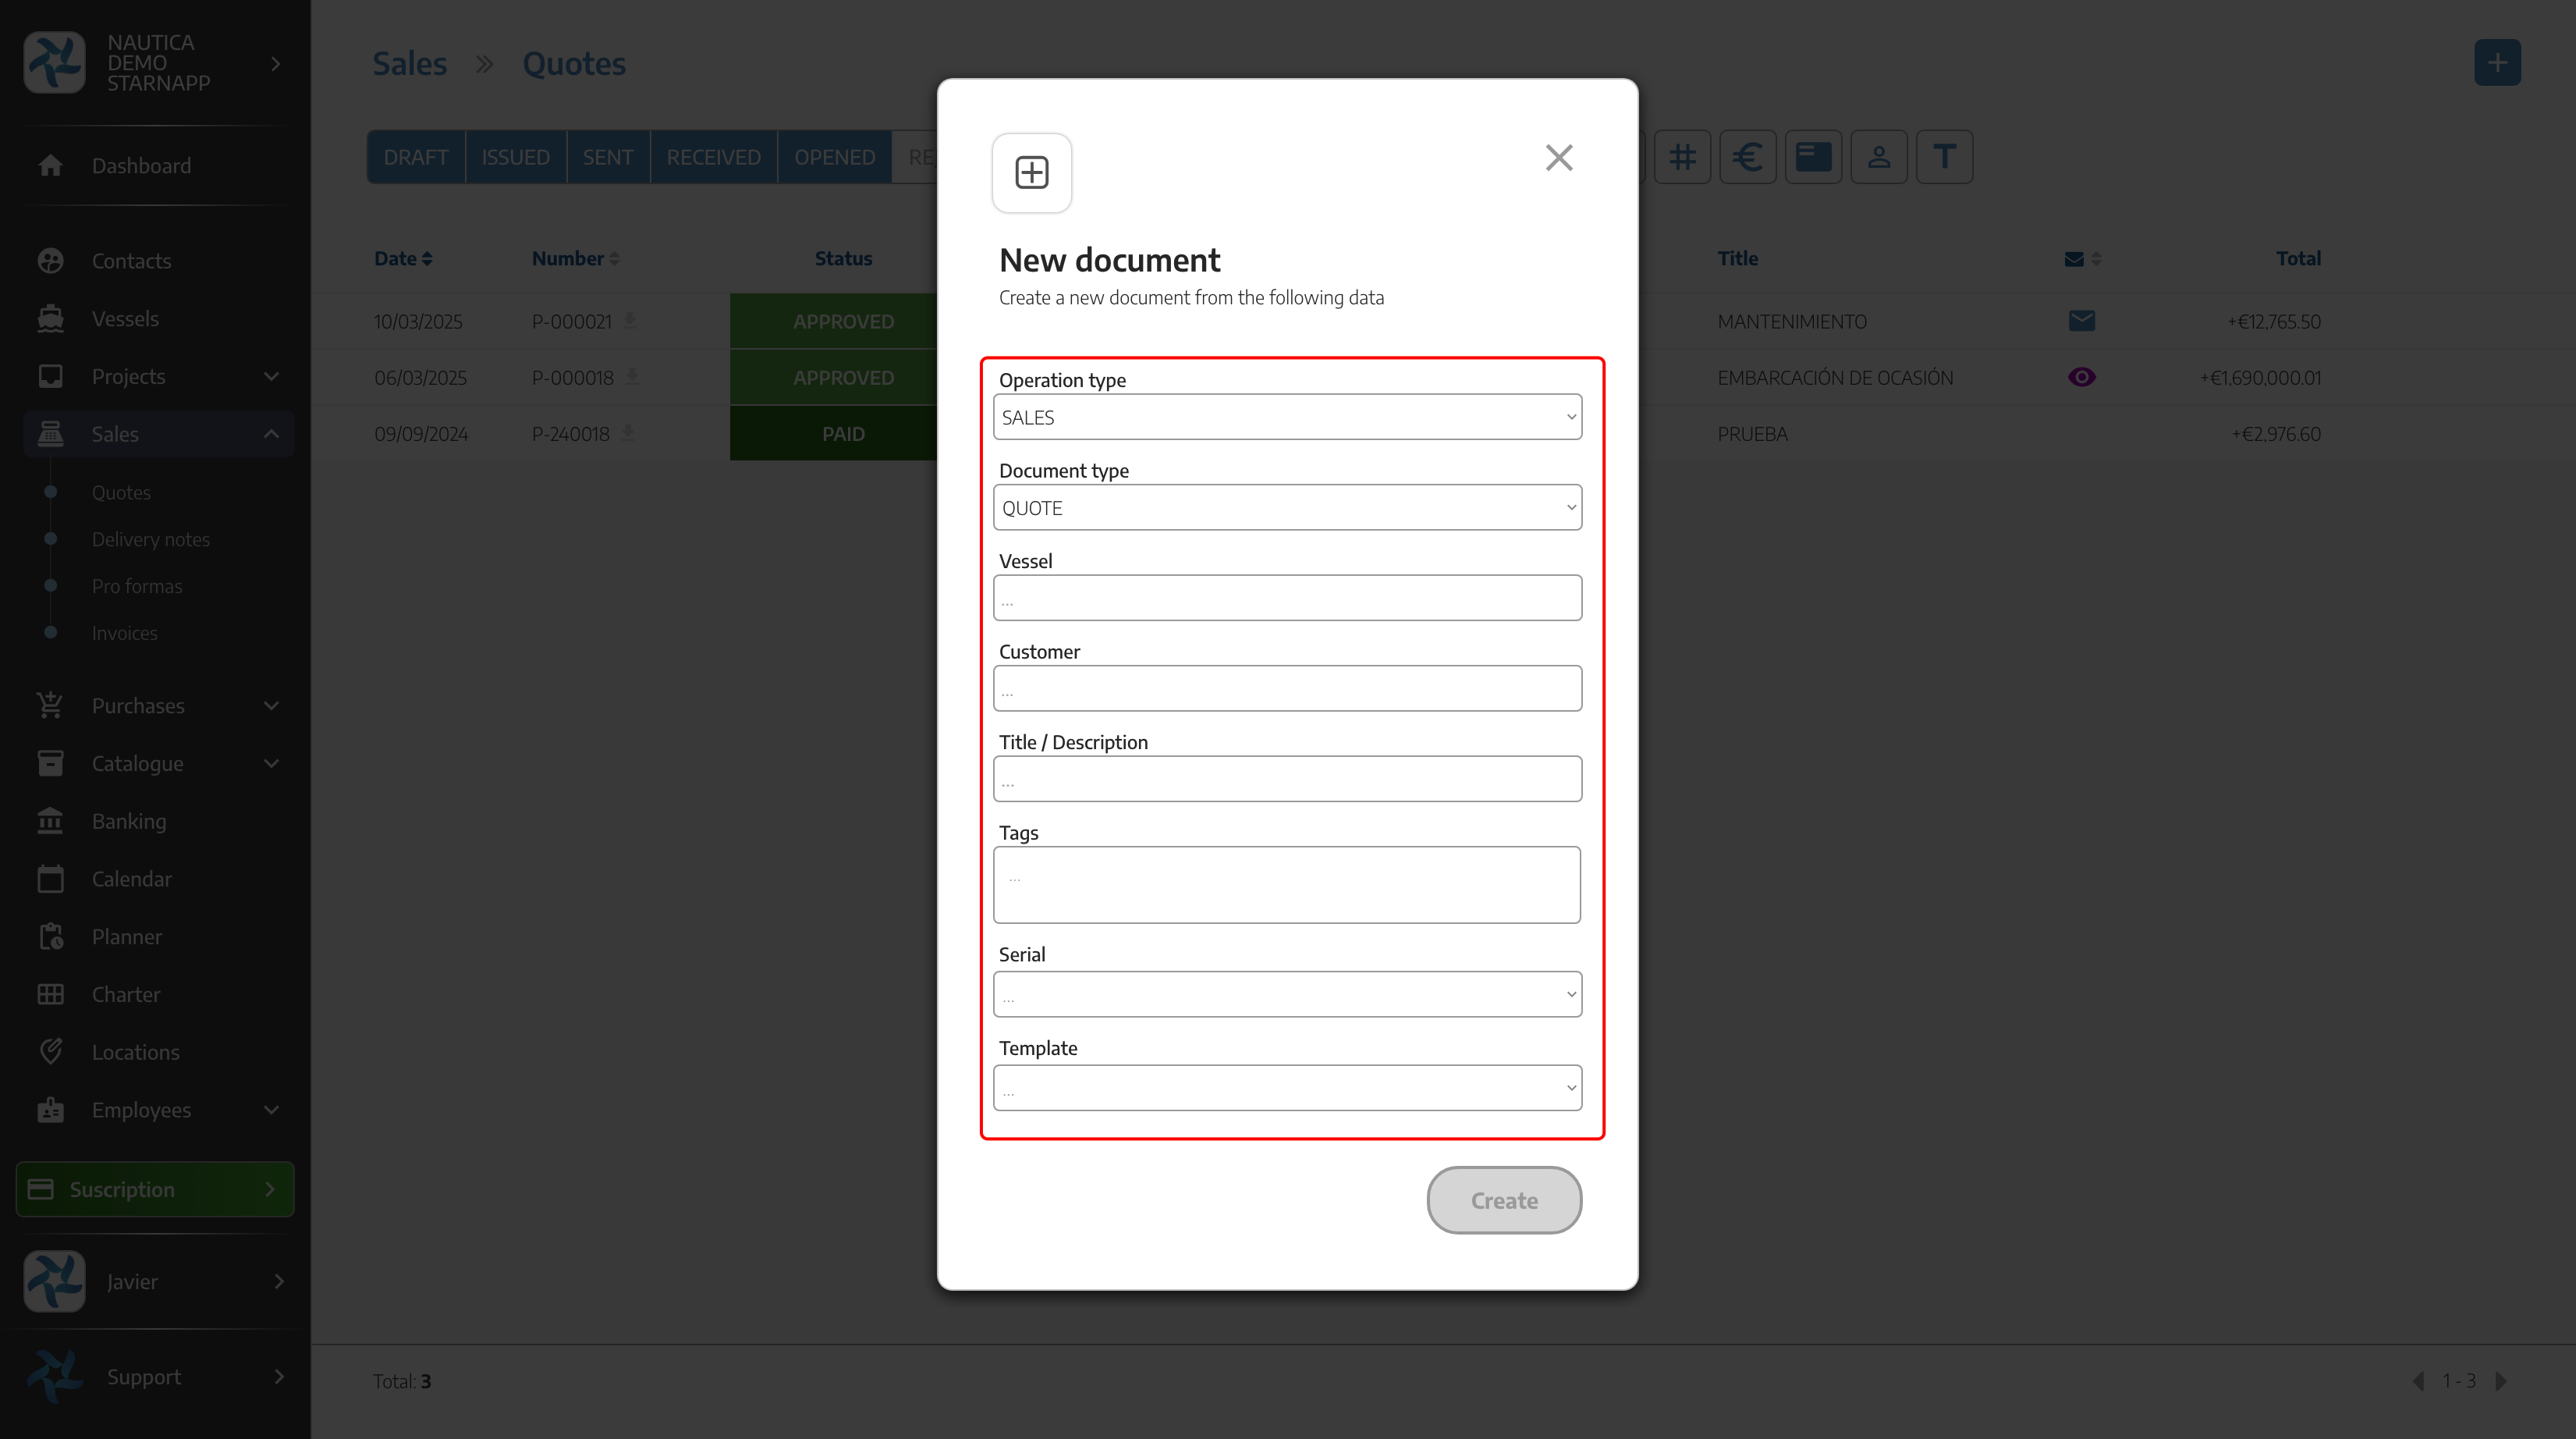
First we can select the type of document we are going to use in this case, we will be able to choose between 5 different types of documents. We will be able to choose between five different types of documents.
BUDGET
WORKING ORDER
PROFORMA
DELIVERY NOTE
INVOICE
Next we will select the vessel where we are going to impute this document, if we have saved this vessel in our list of vessels it will automatically introduce the name of the contact to which the vessel is associated. In case we do not have any of these fields created, when we introduce them we will see the following message . Once these two fields have been created, they will be saved in both lists.
Now we will introduce a description to get a general idea of what this document is about.
We will be able to add tags so that later if we need to search for these documents in the lists we will be able to find them more easily.
Finally in this one we can select the series and the template of these documents that we have saved. Appearance of documents.
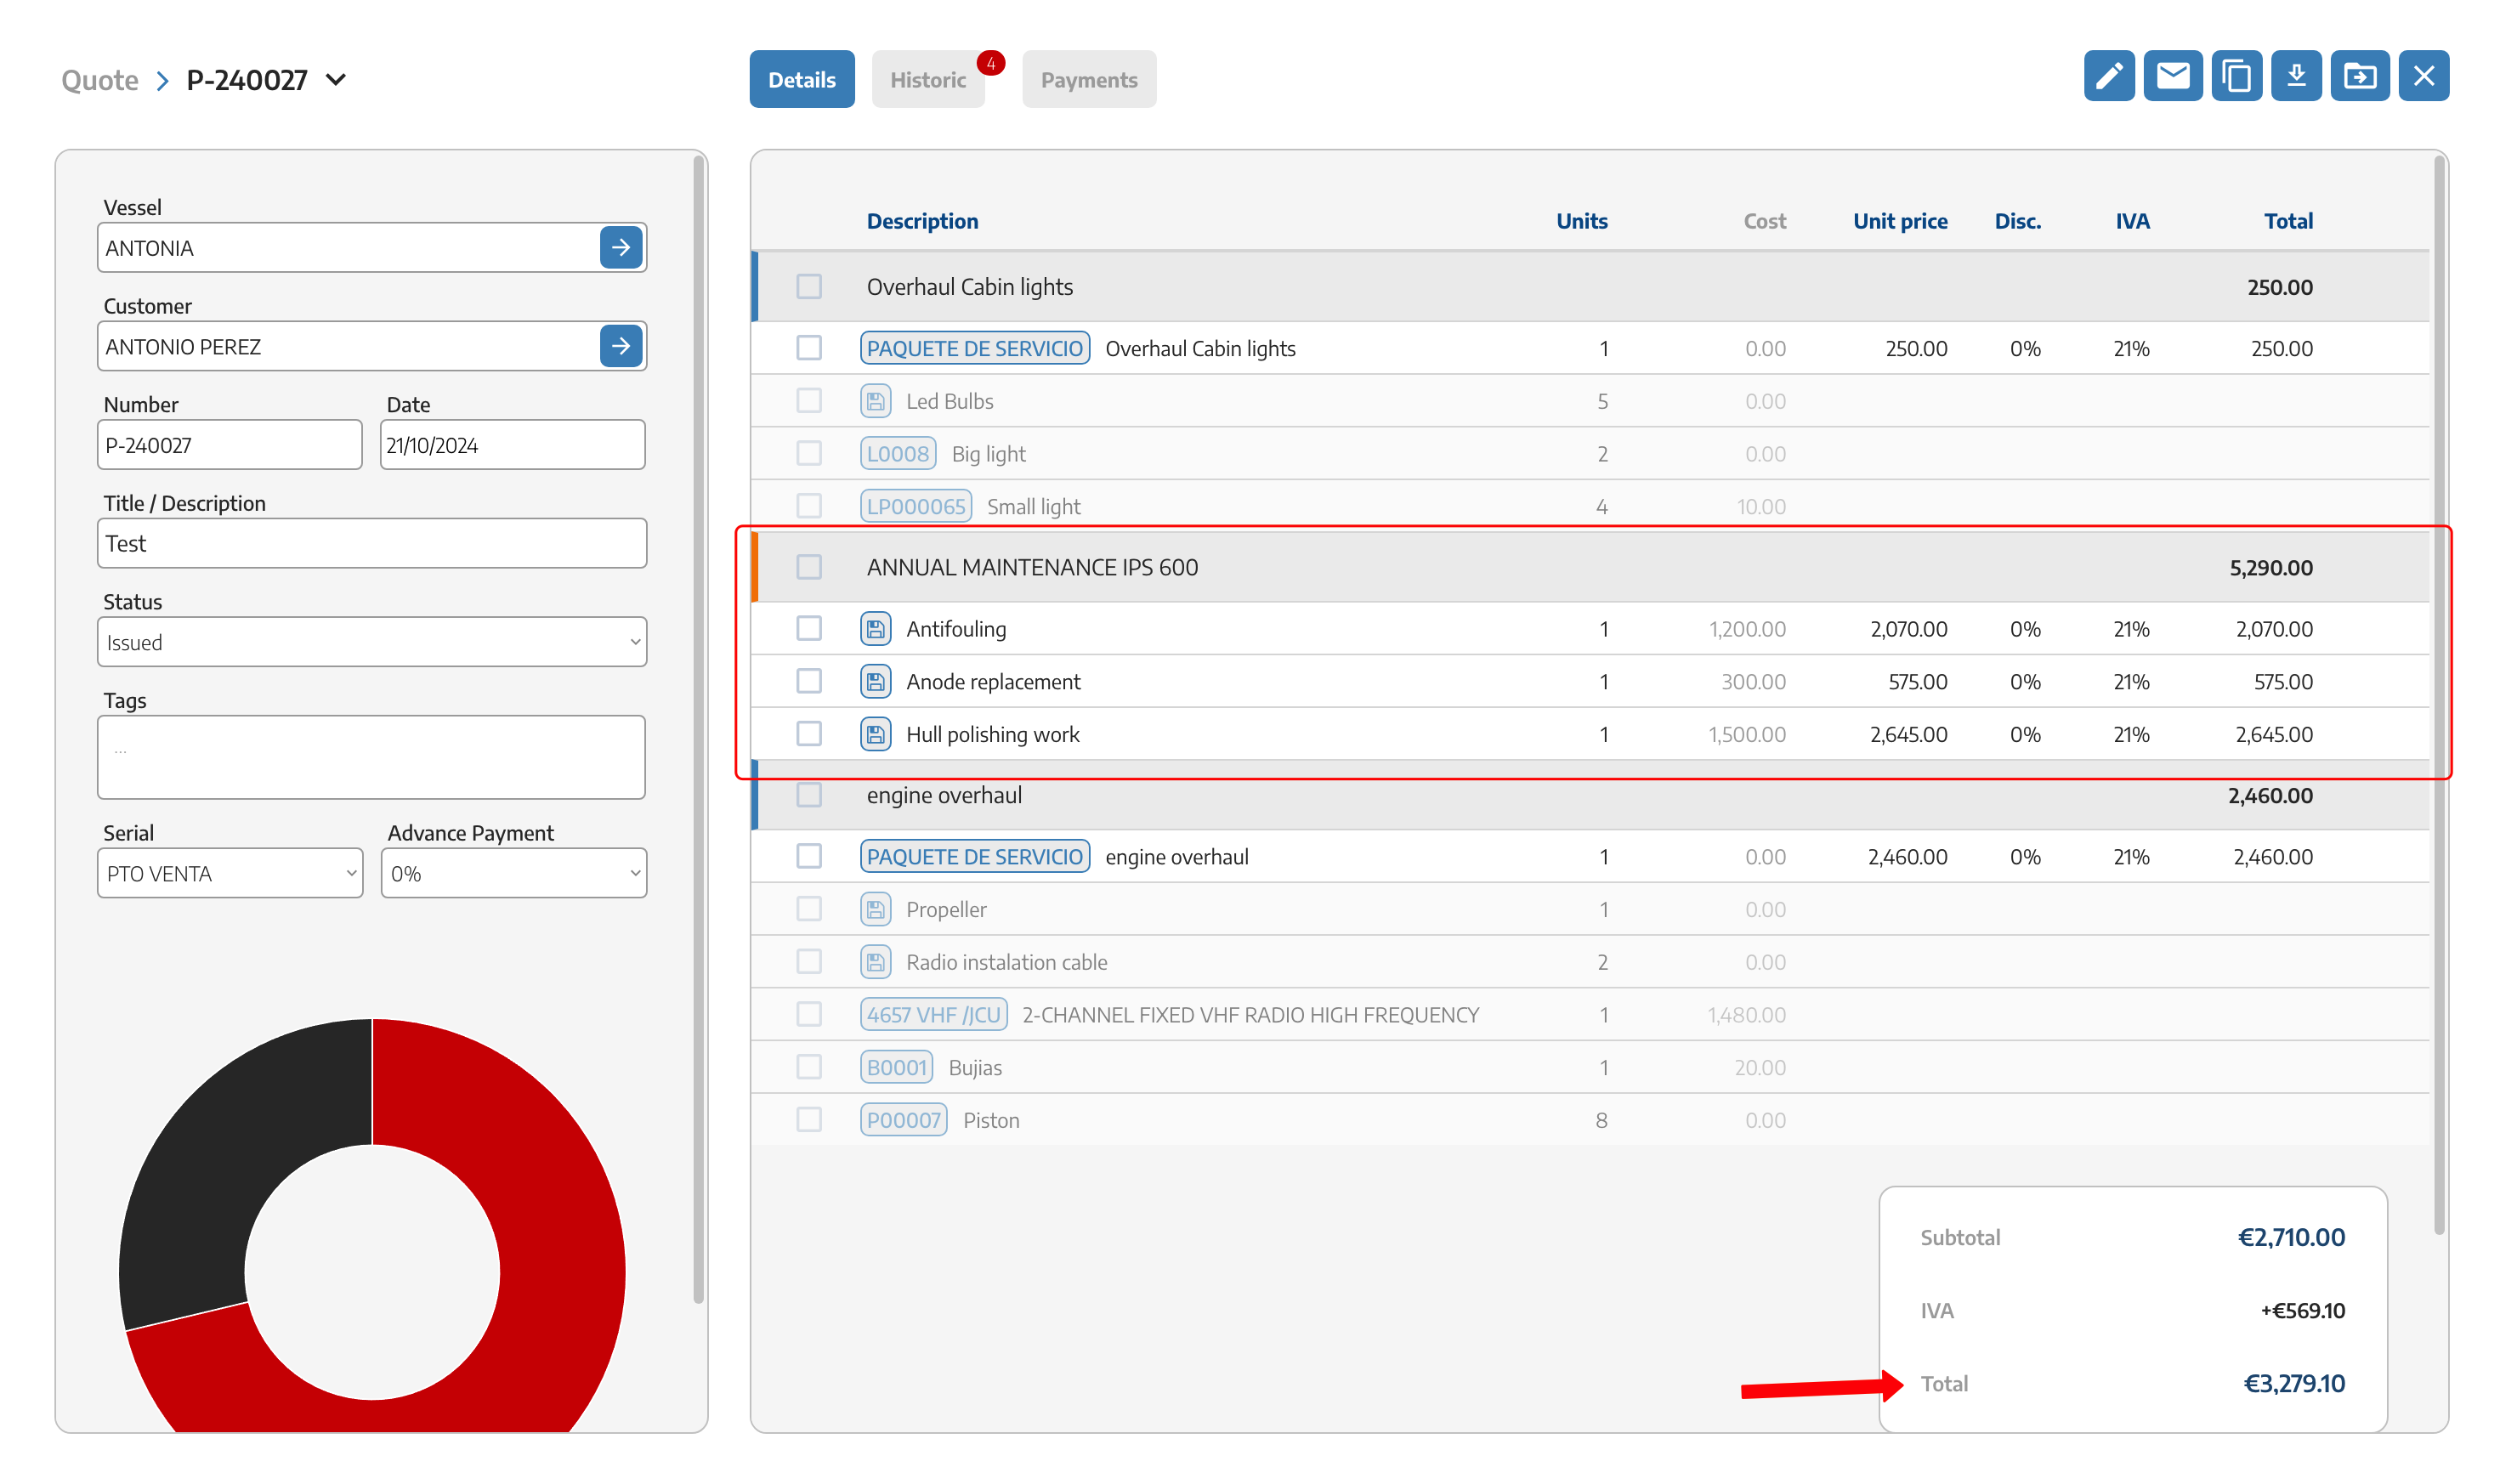
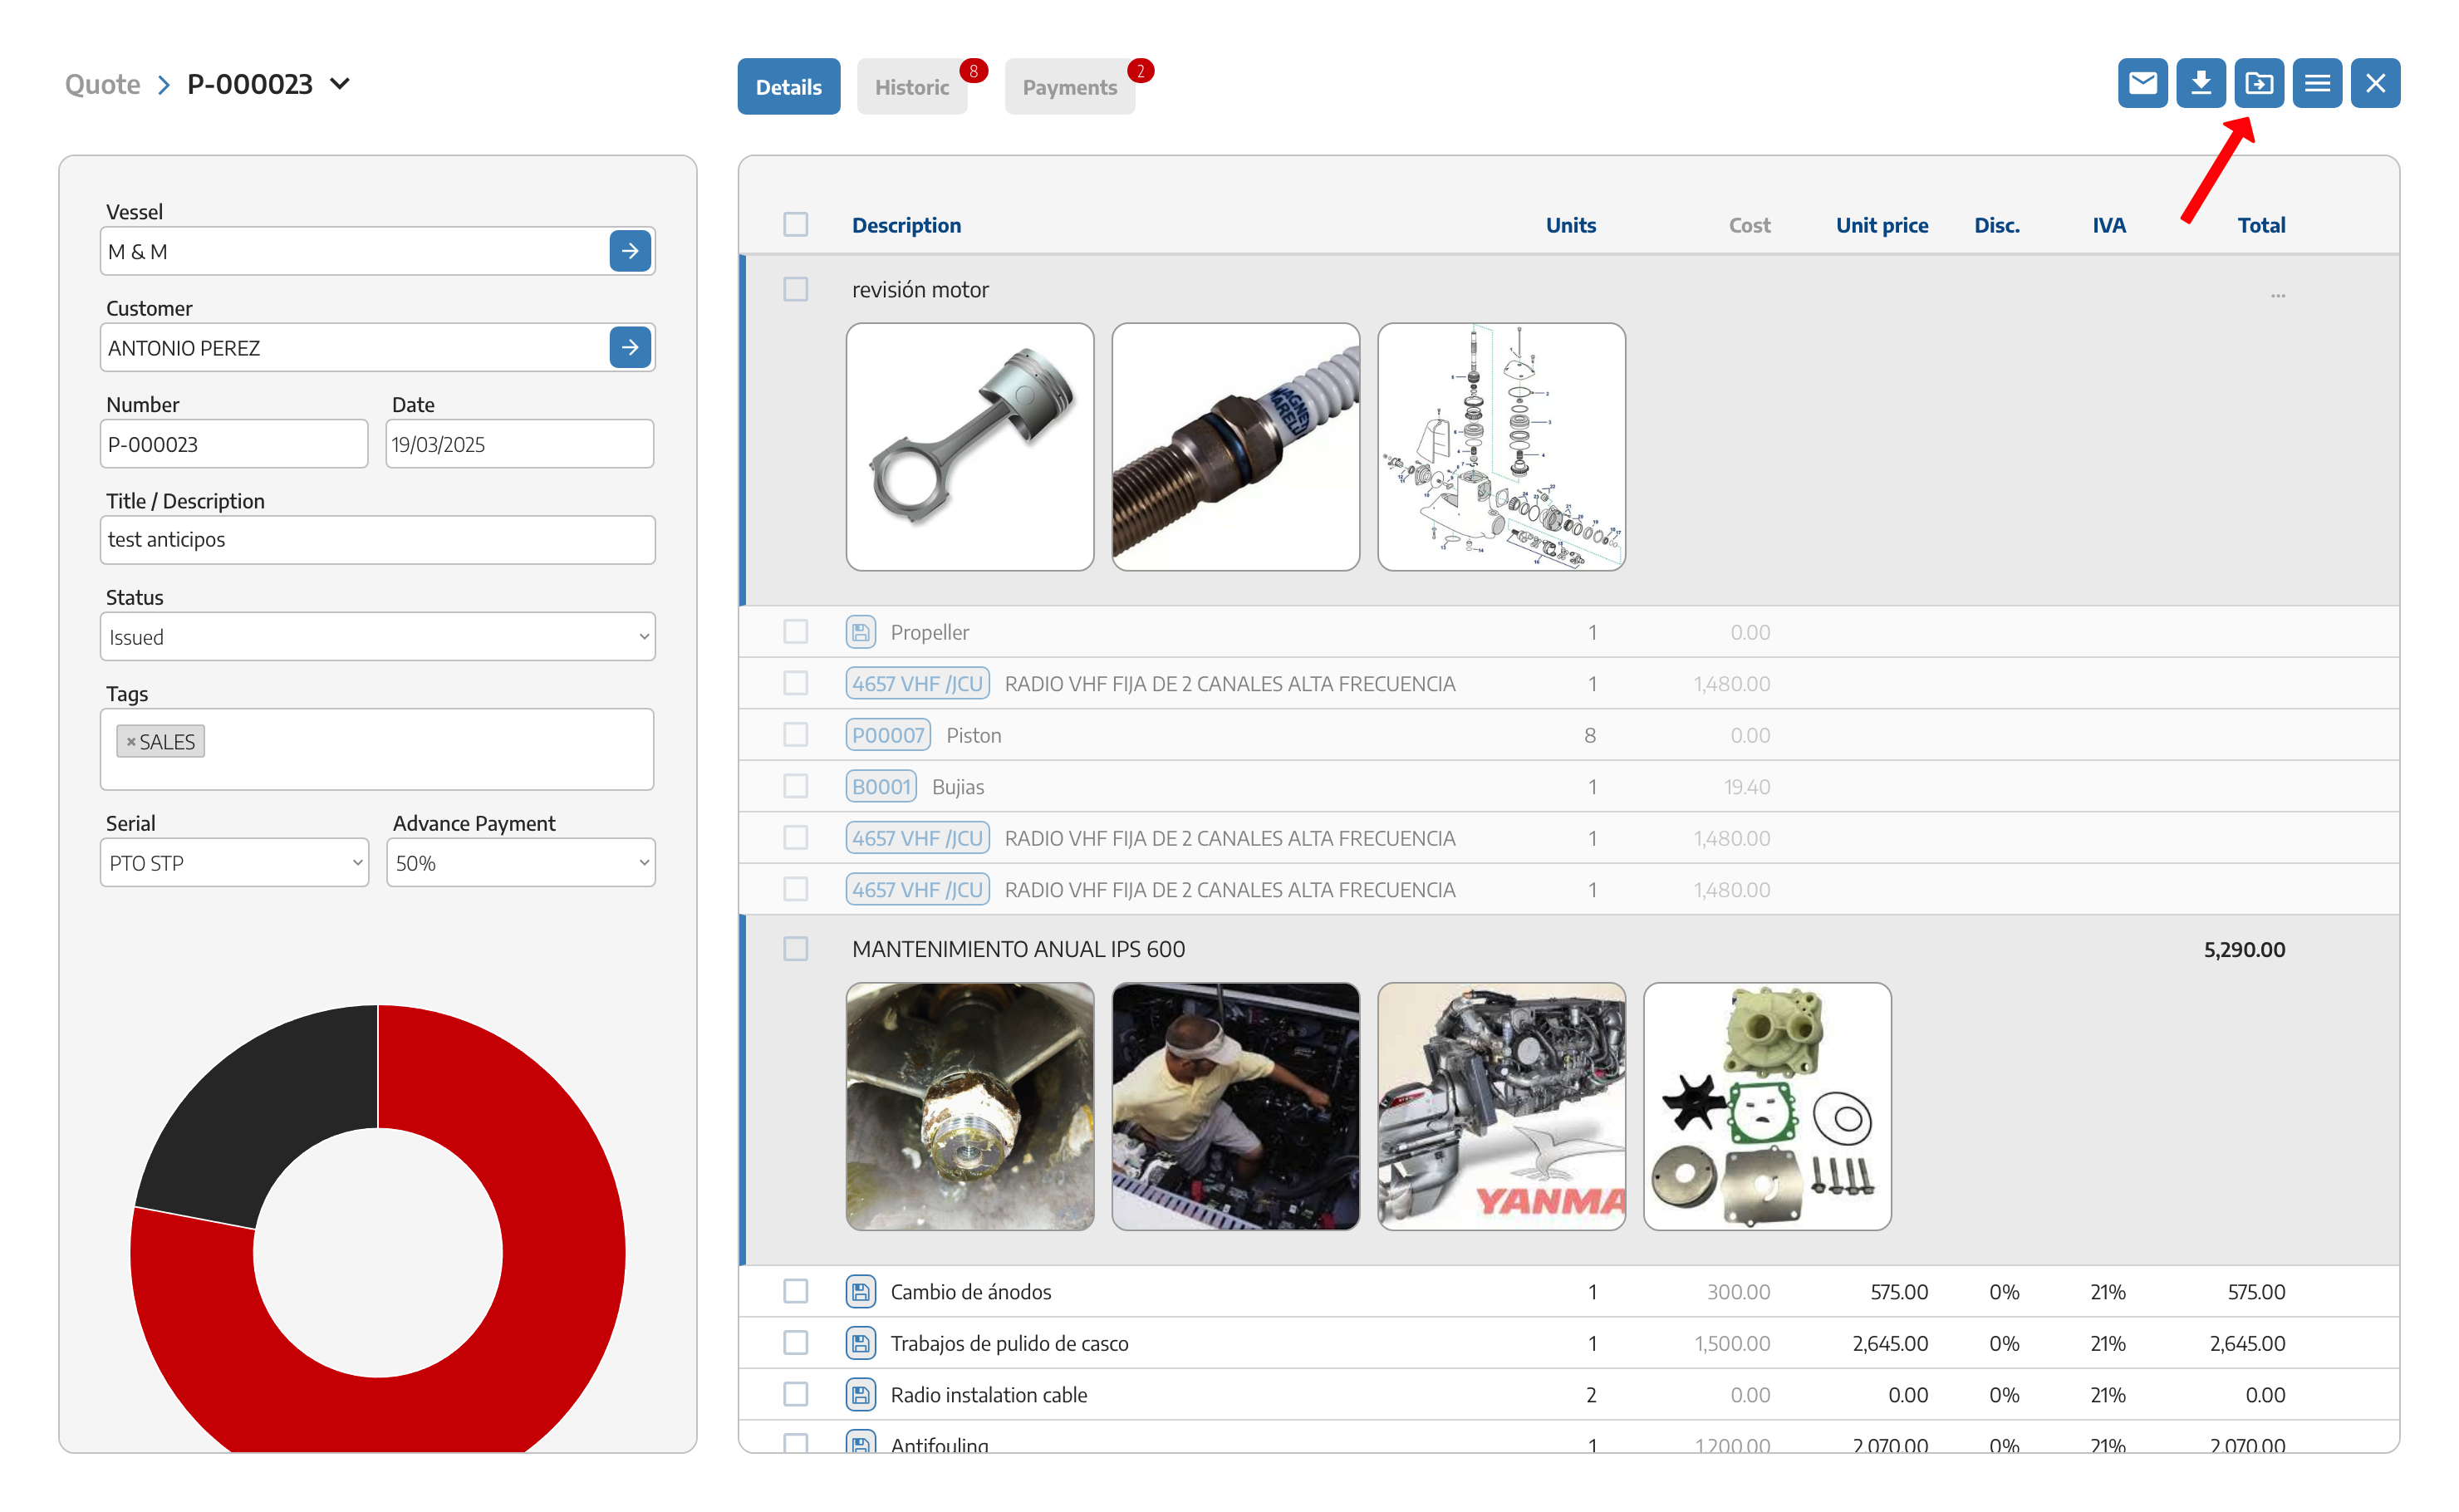
Once the document is created, in this case it is a Budget, we will go to the left column and we will have all the data that we introduced previously.
As long as we have this budget in draft mode we will be able to edit all its data.

Once the document has been created, in the right column we can start to load the different chapters and materials with their respective prices, discounts, taxes, etc.
In order to include chapters of optional works within the budget which will not affect the sum of the budget if it has not been accepted by the customer but which must be incorporated for information and possible acceptance or not by the customer, you have a button in the chapter of the budget indicating the OPTIONAL item.
At the top right of the chapter we have this button where it will act as an indicator that the item that has been made in that chapter is optional and will be pending prior approval but should be informative for the customer.
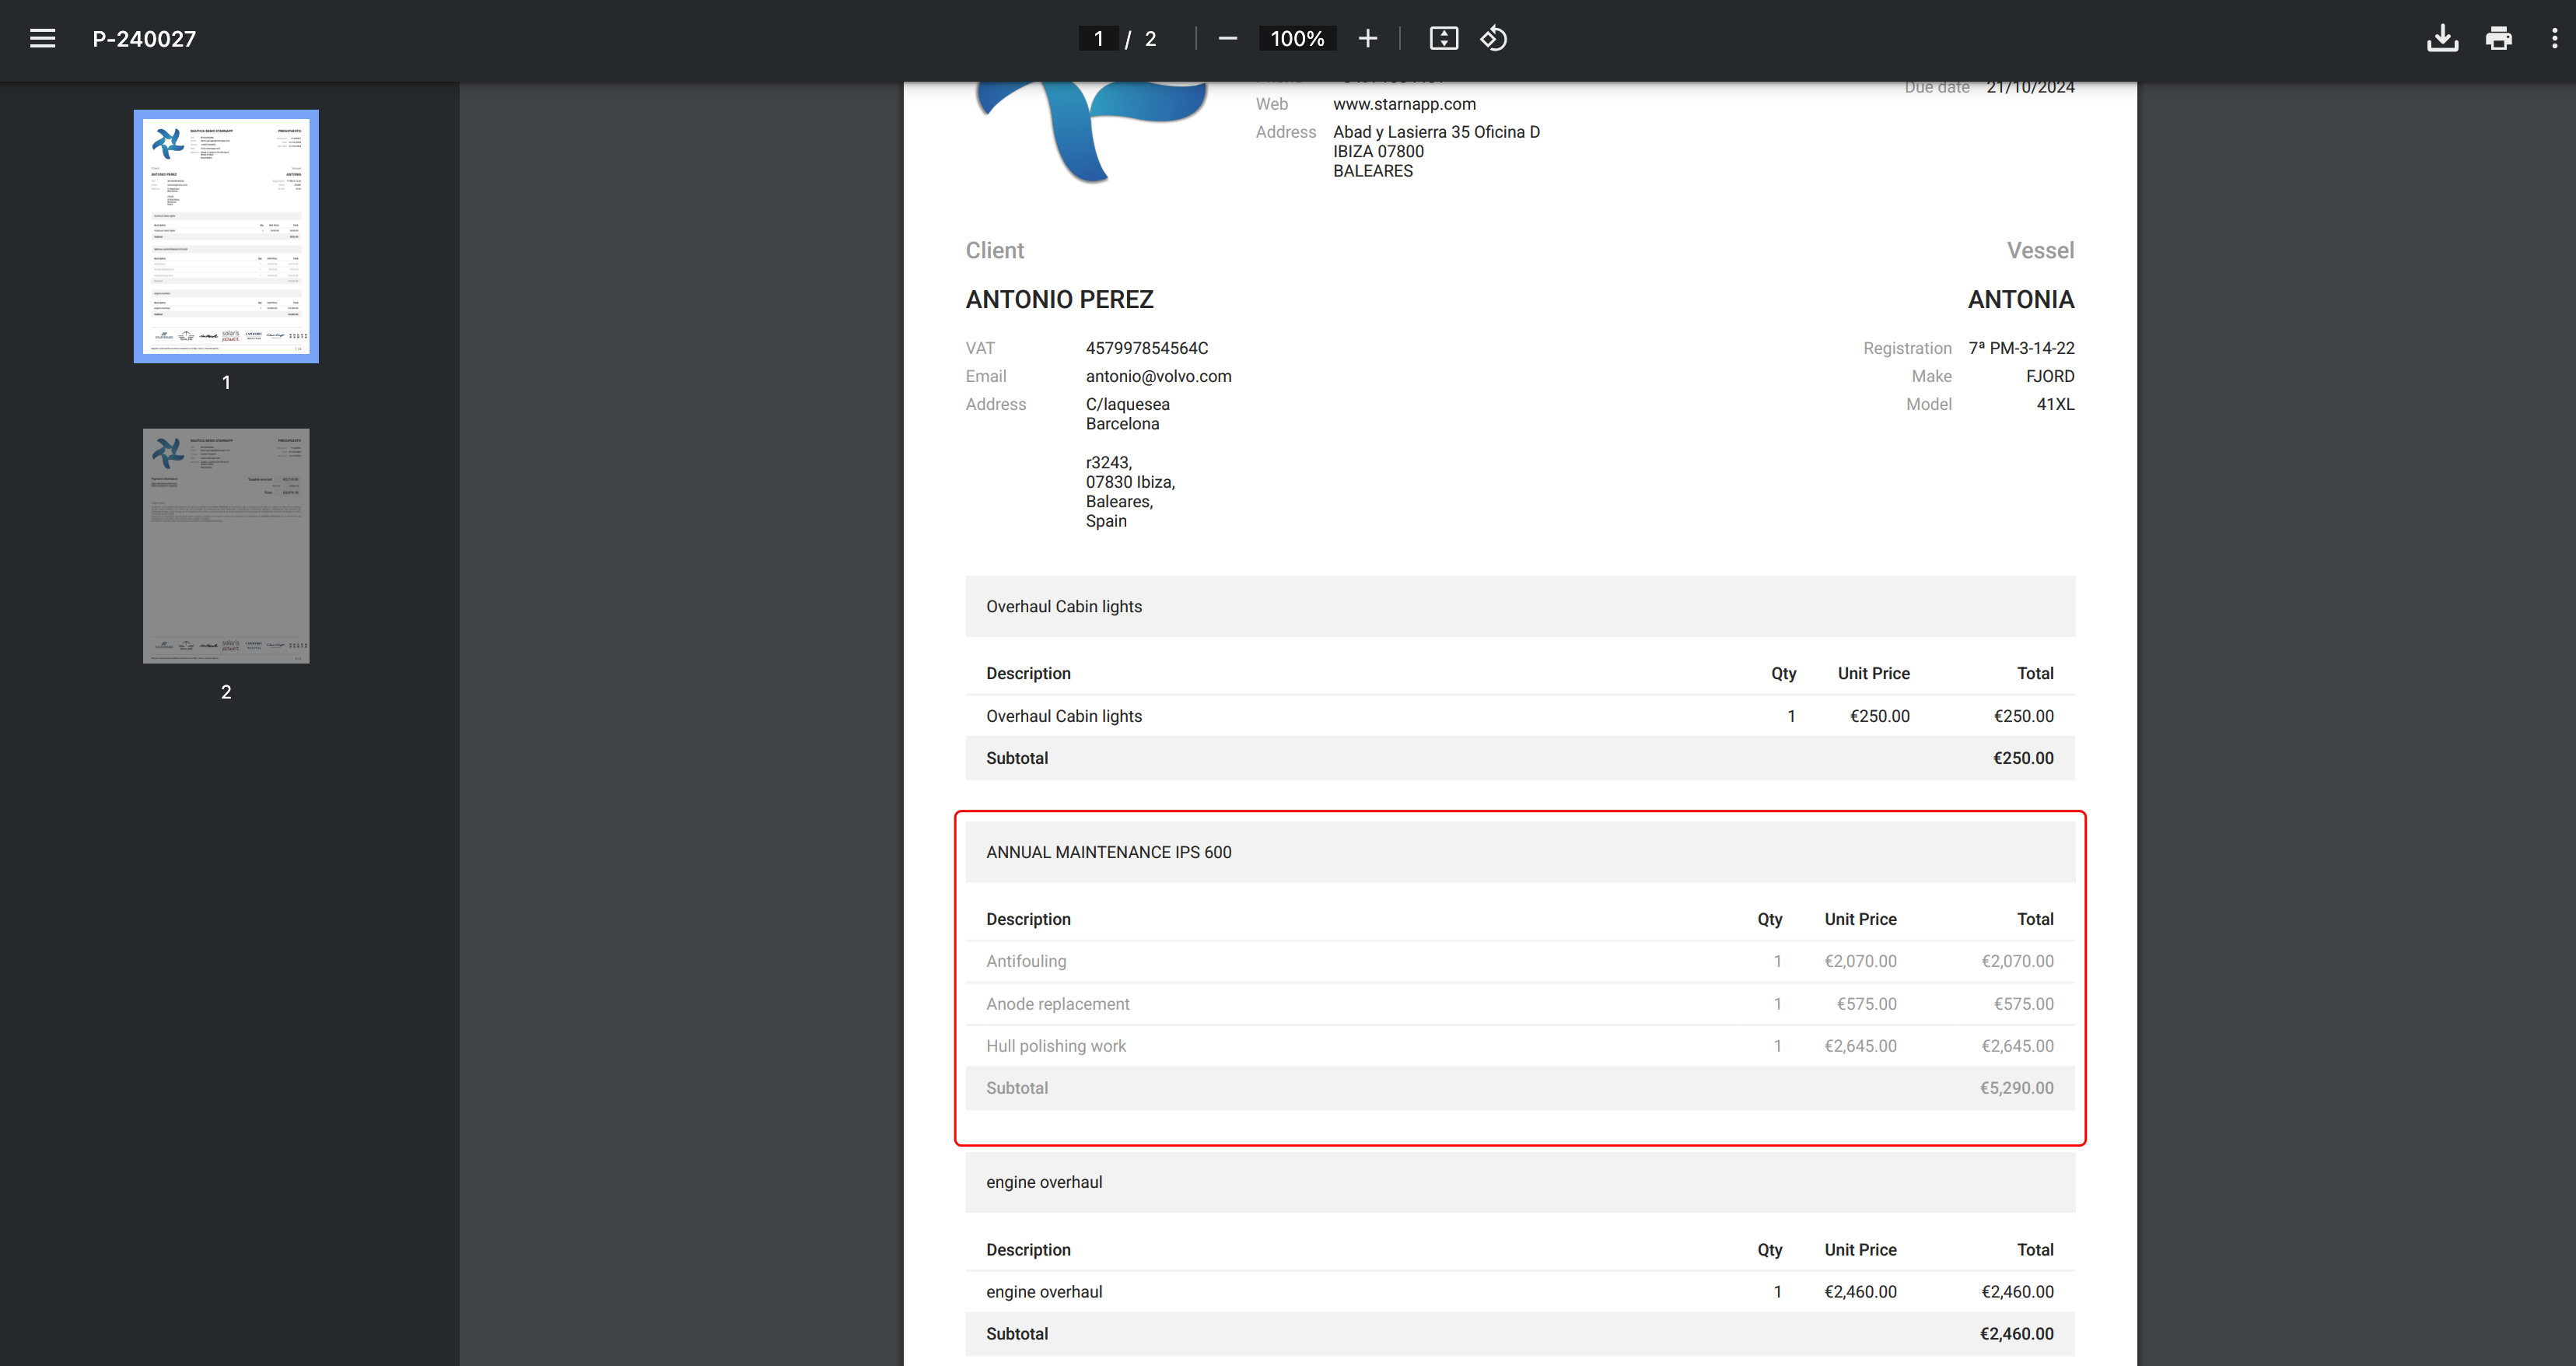
Below you can see how to identify the optional items in a budget, which will not be included in the final sum.
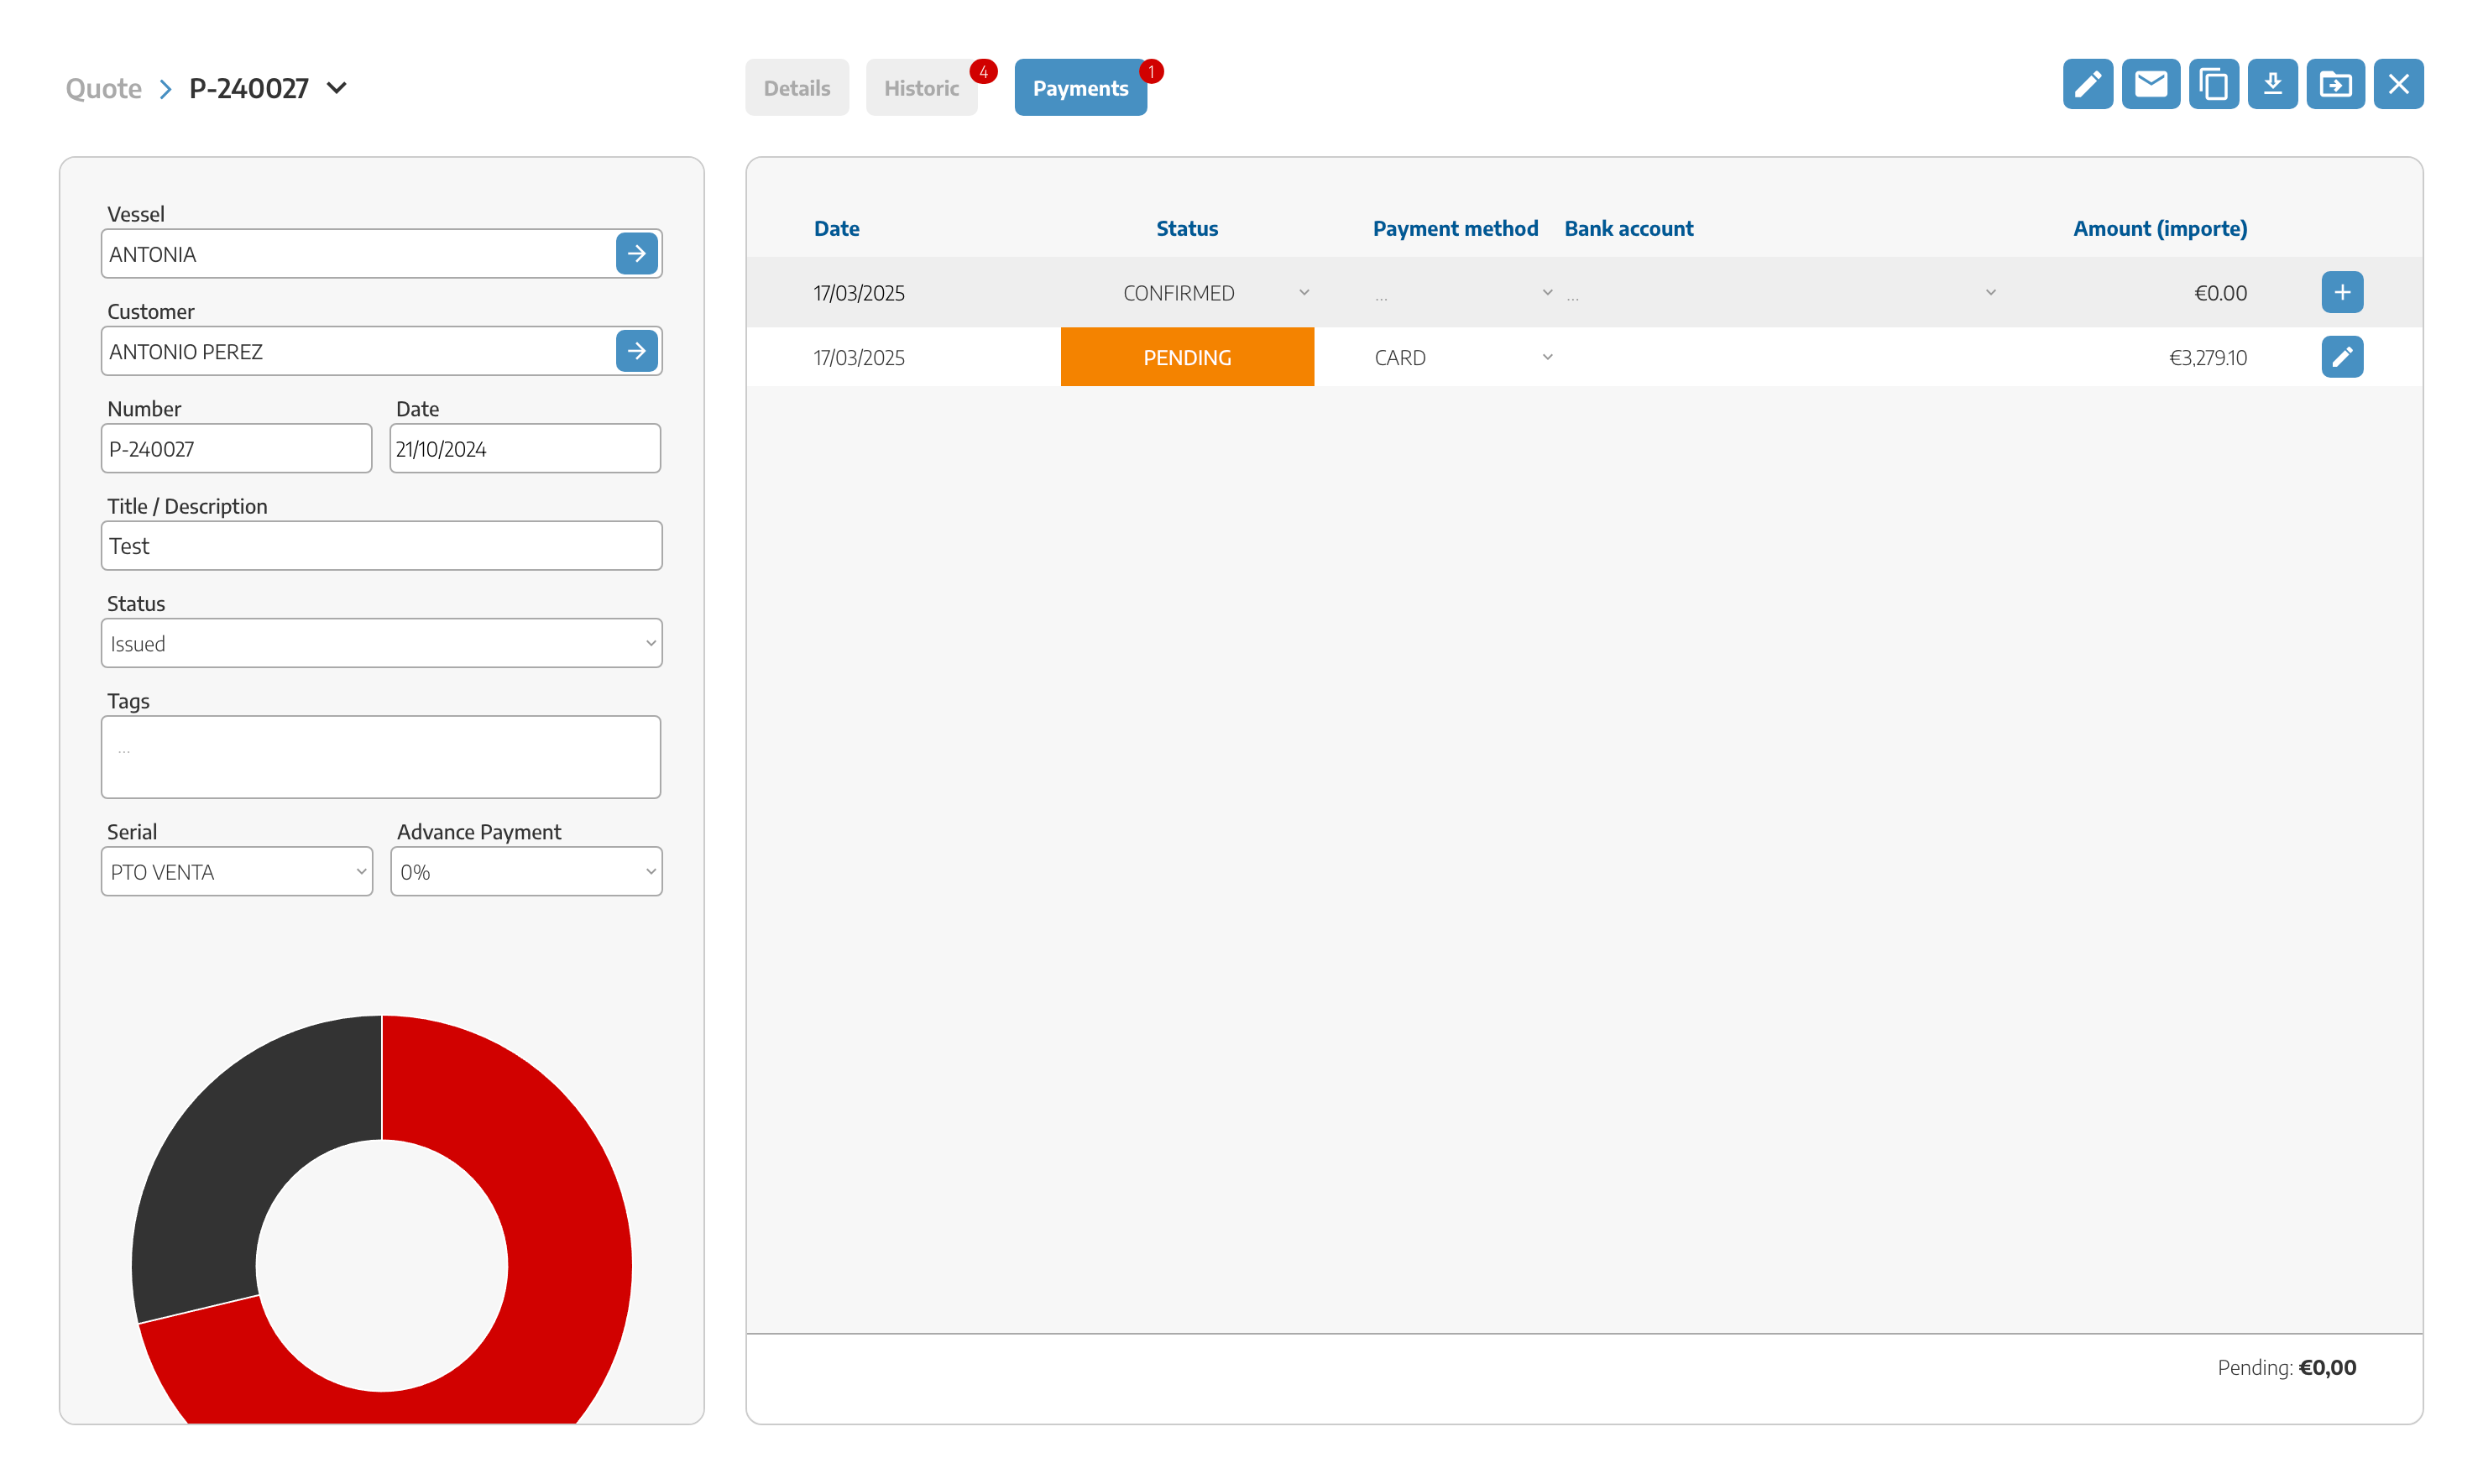
In the next view we will see the History section, here will appear all the states that this document has gone through. We will see if it has been accepted, rejected, if the client has made any comments, etc.

In the payment section we will be able to see all confirmed and pending payments for this budget.
Now we can associate new budgets that we create to previously created work orders.
We will do it with the convert button and select the work order option.
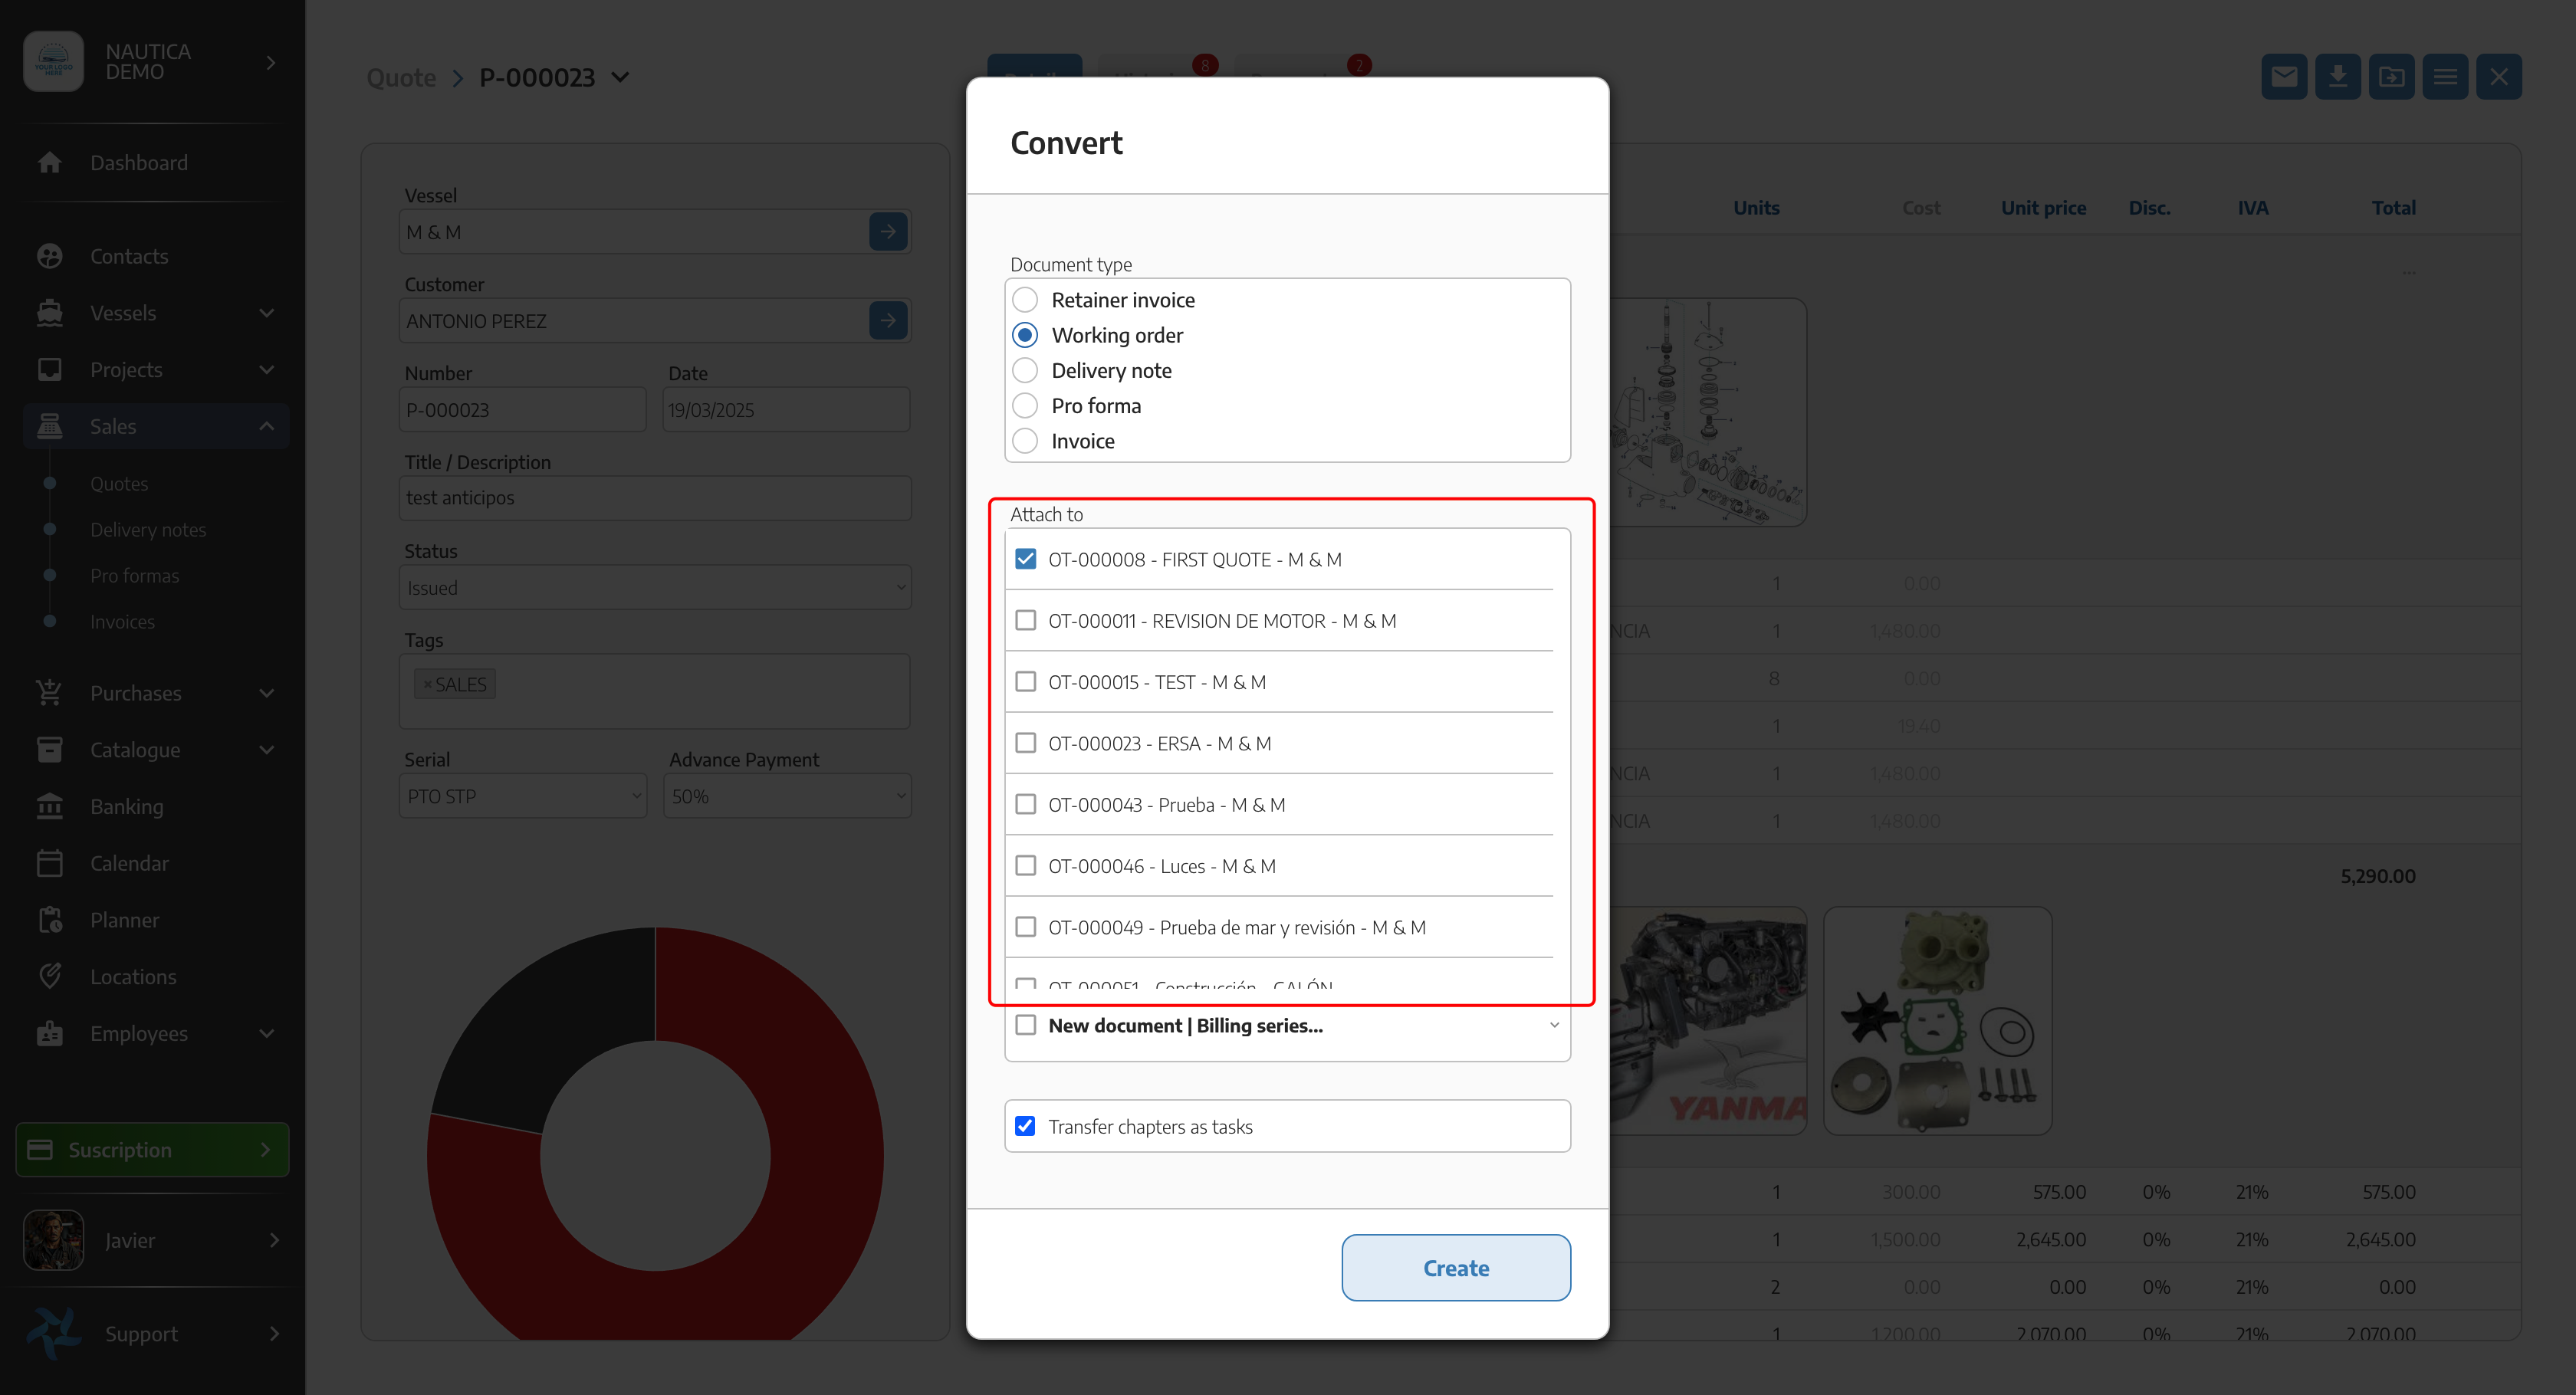
Once selected we will see all the WOs that are associated to the same customer.