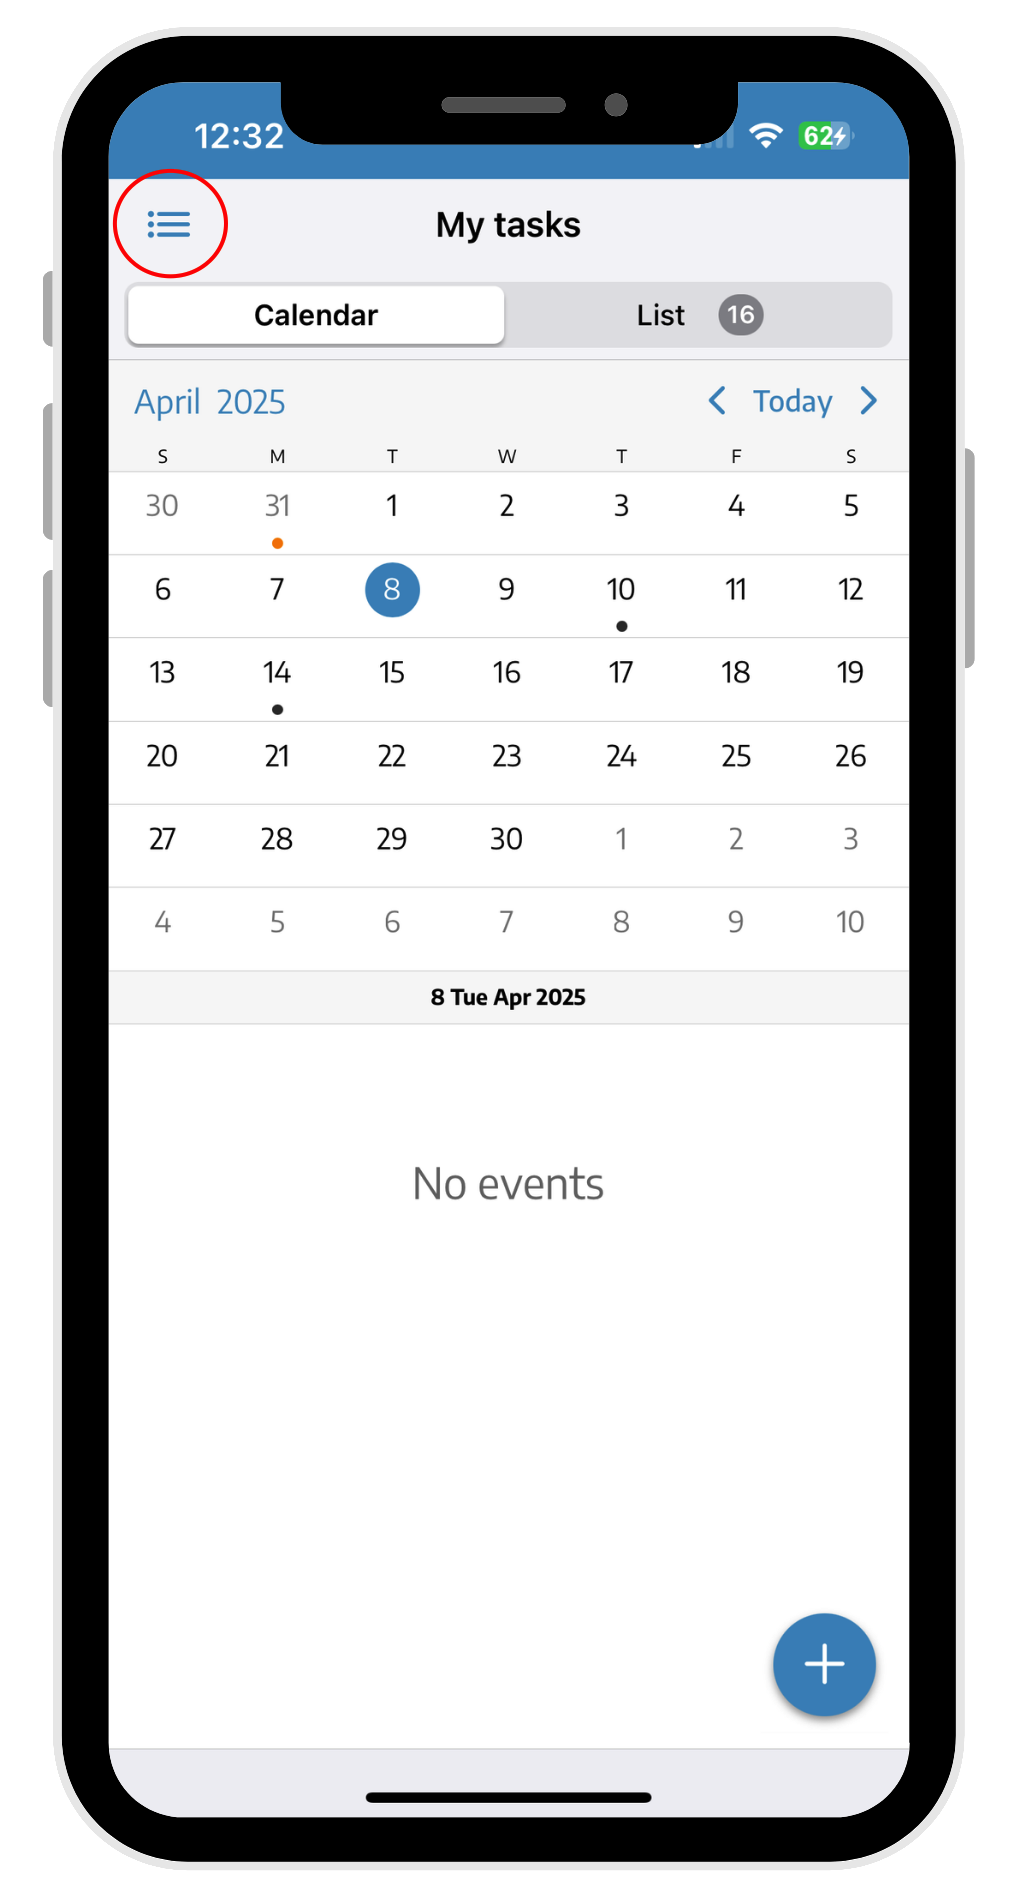
This is the first screen that will appear when we log into our StarNapp session. We have two ways to enter our hours in StarNapp.
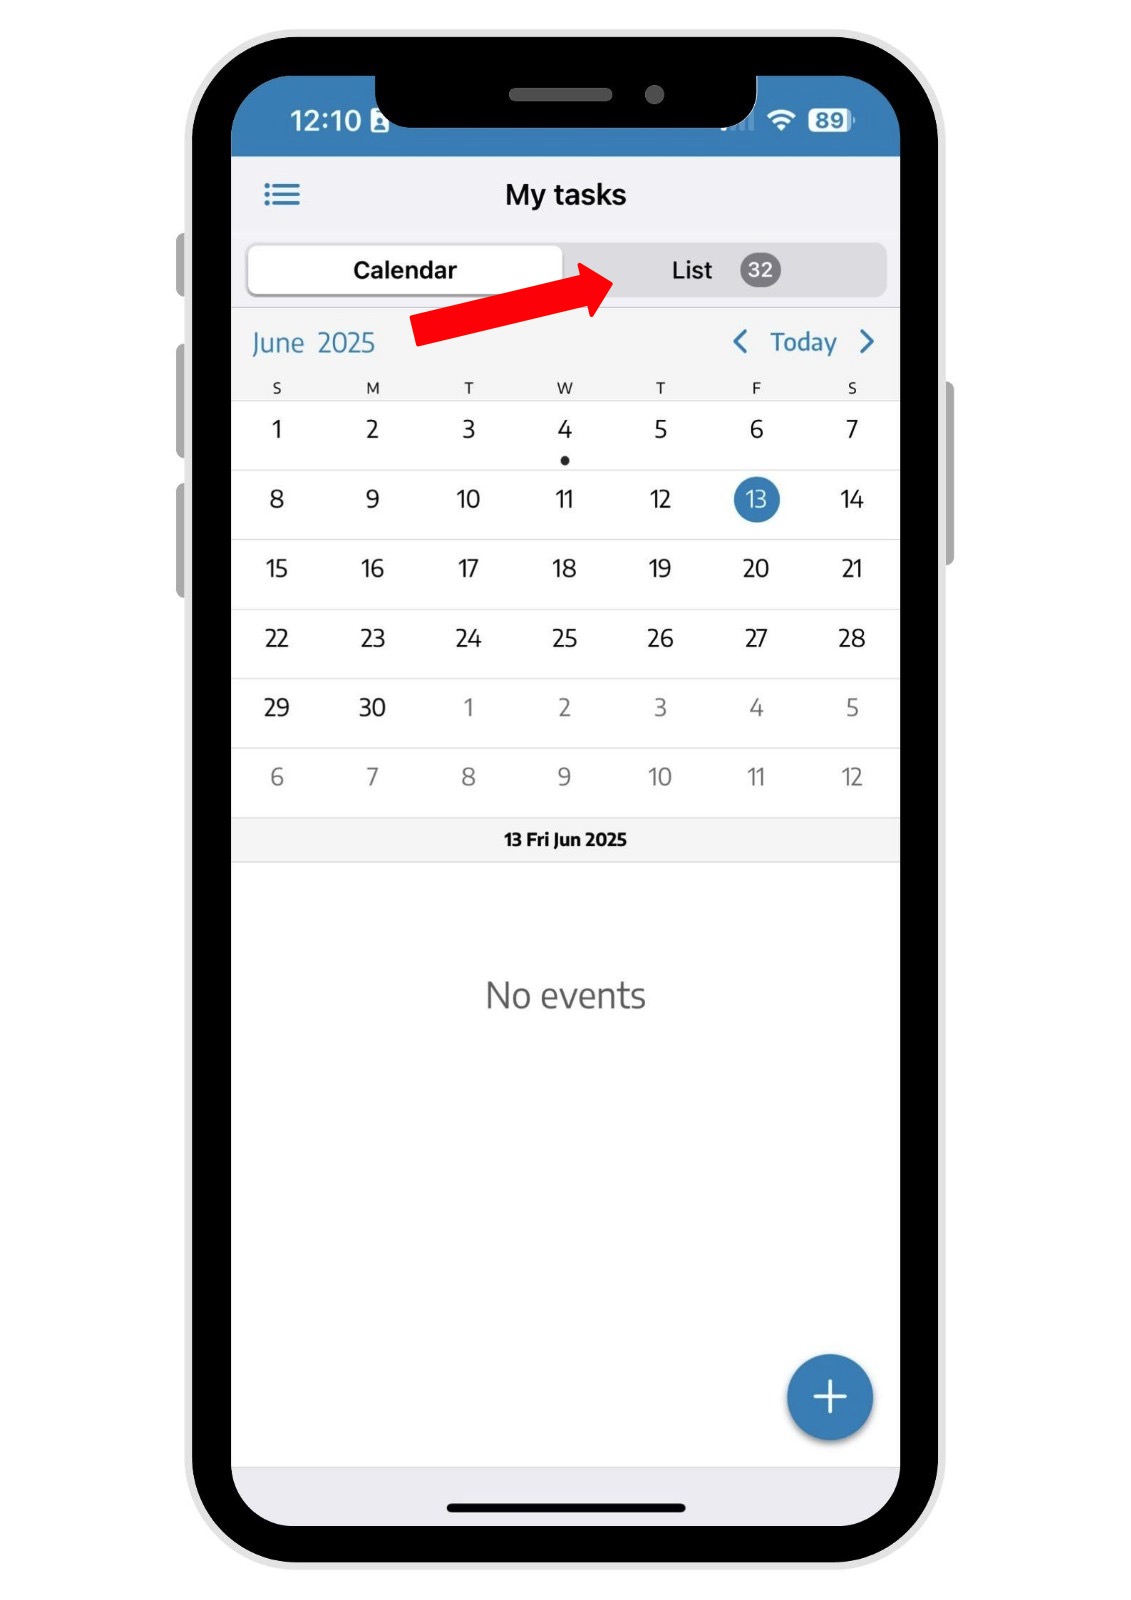
The first option is located in the tab next to the calendar, where you'll see the list of tasks you're linked to.
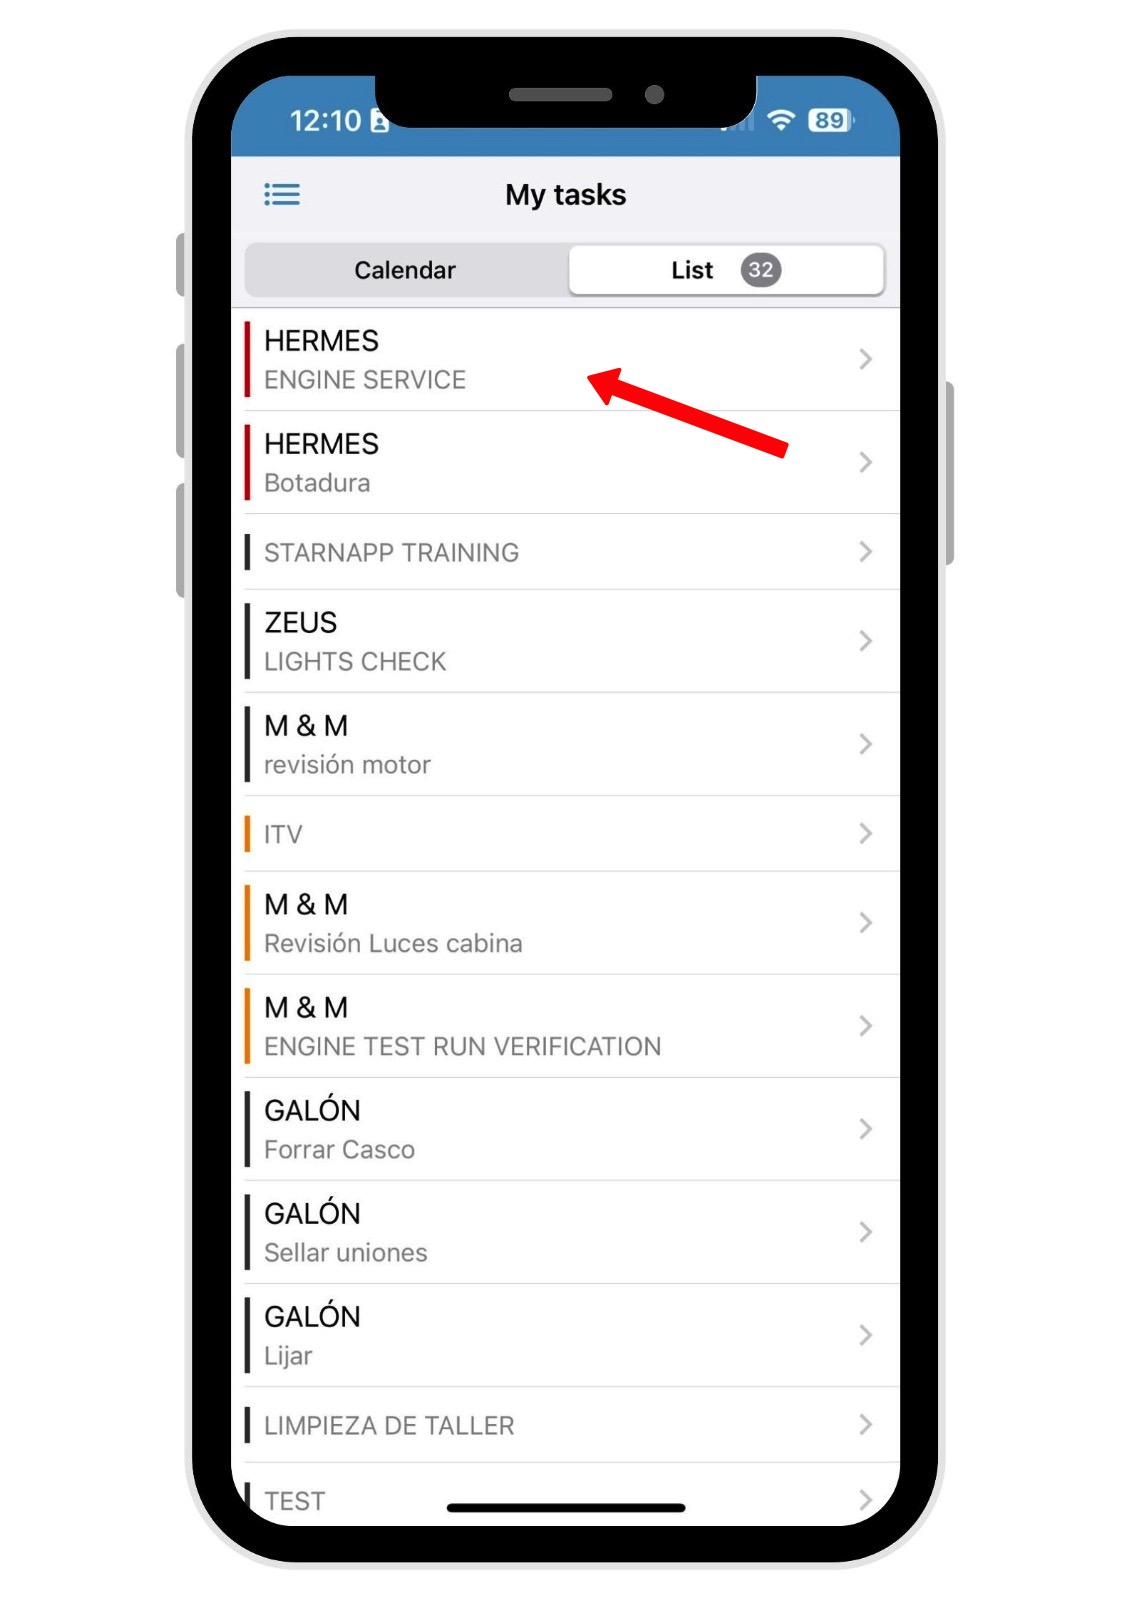
Select the task you want to log your hours for.
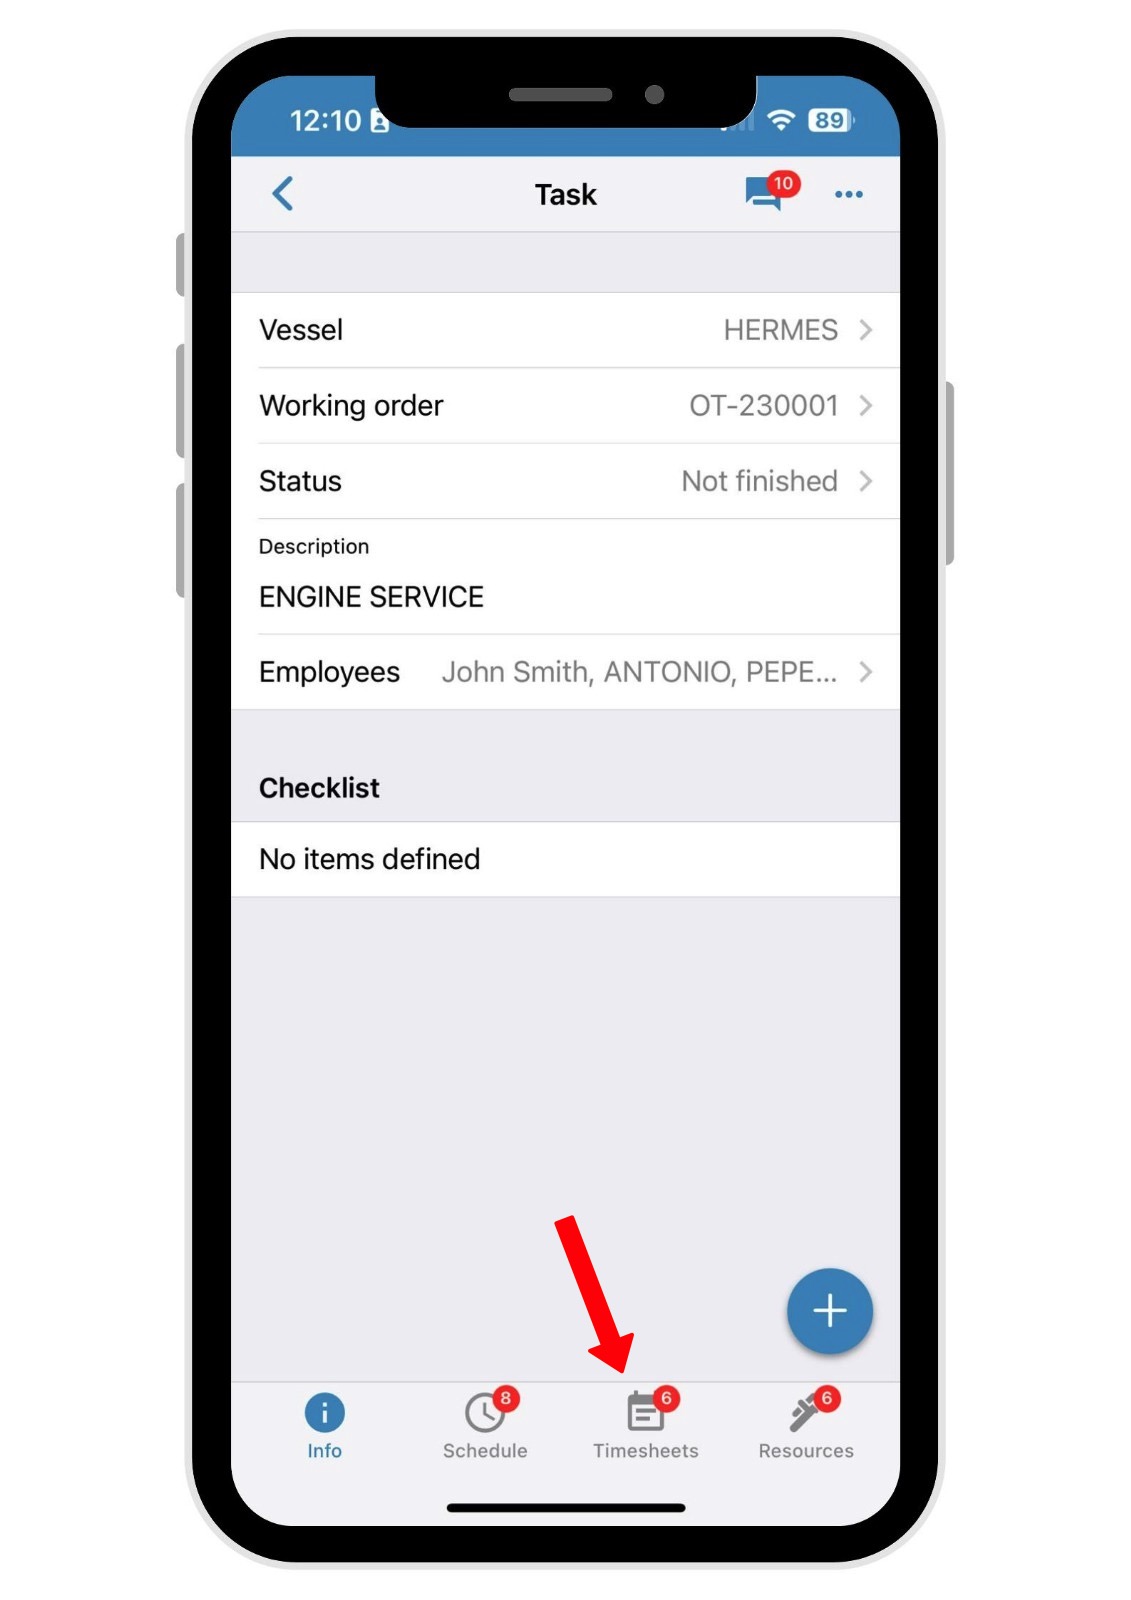
Once inside the task, go to the TIMES section so you can log your hours.
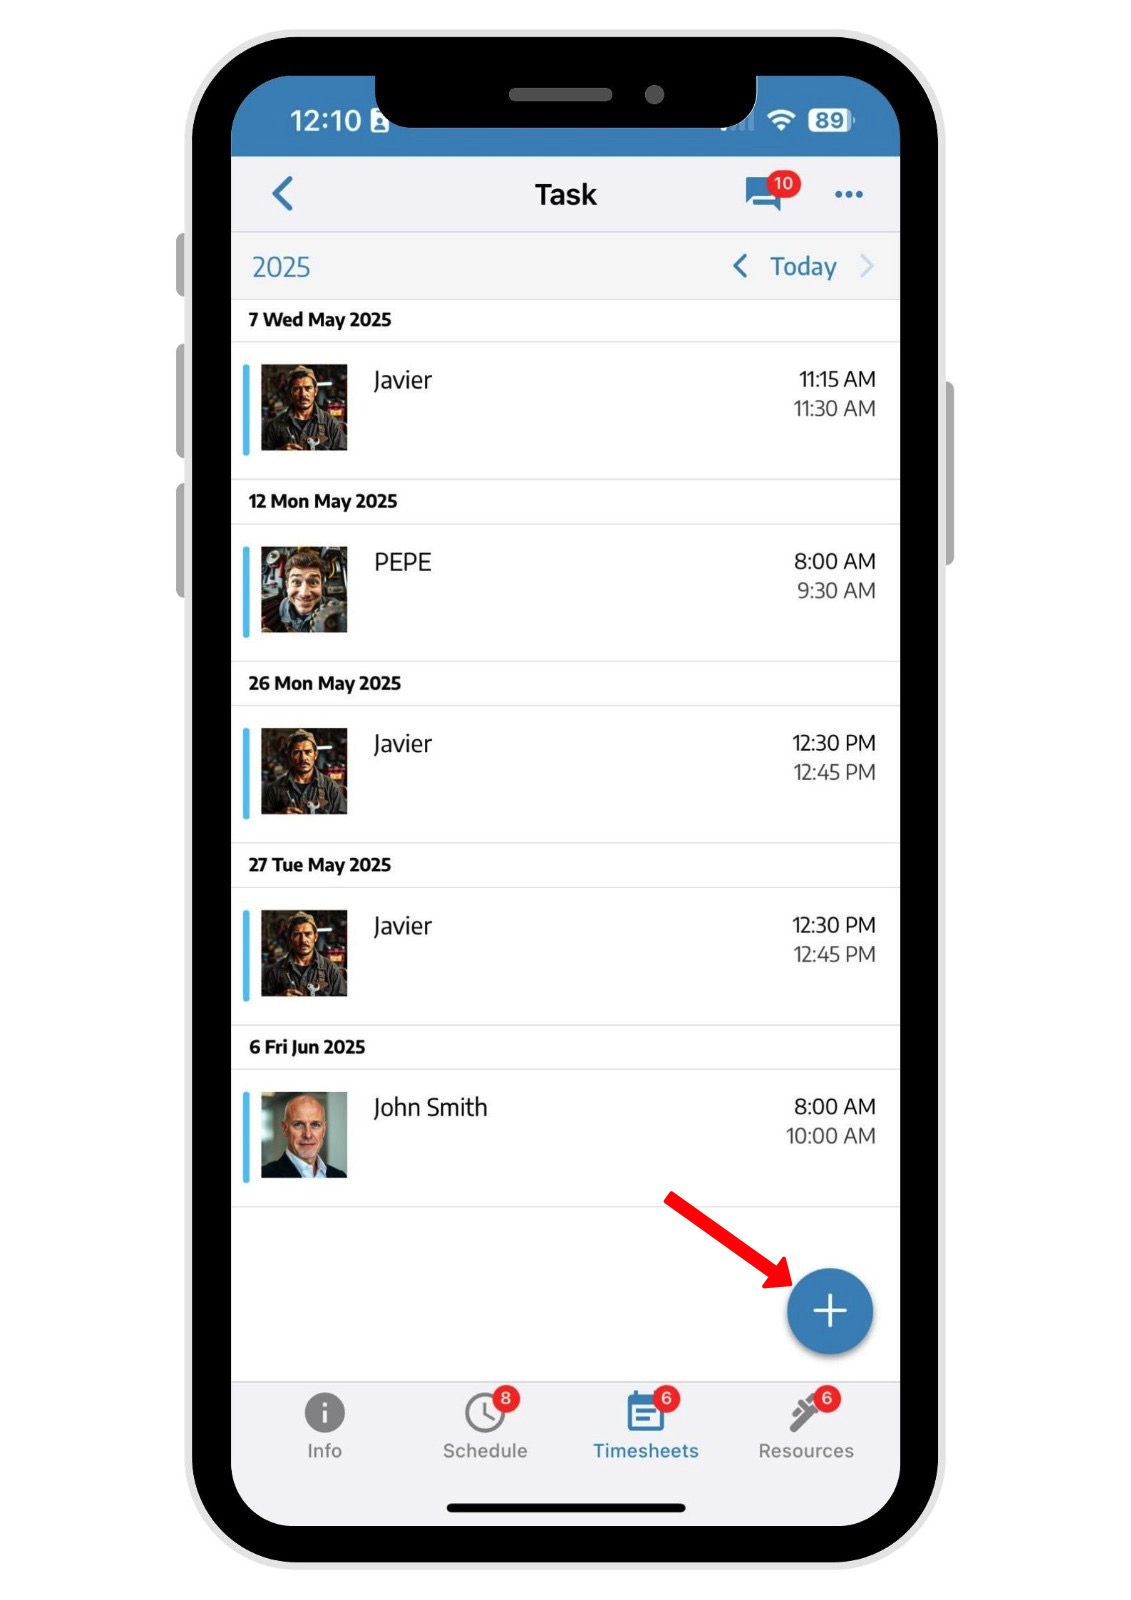
Here you'll see all the hours logged by the workers. If you tap the + sign, you can add your own.
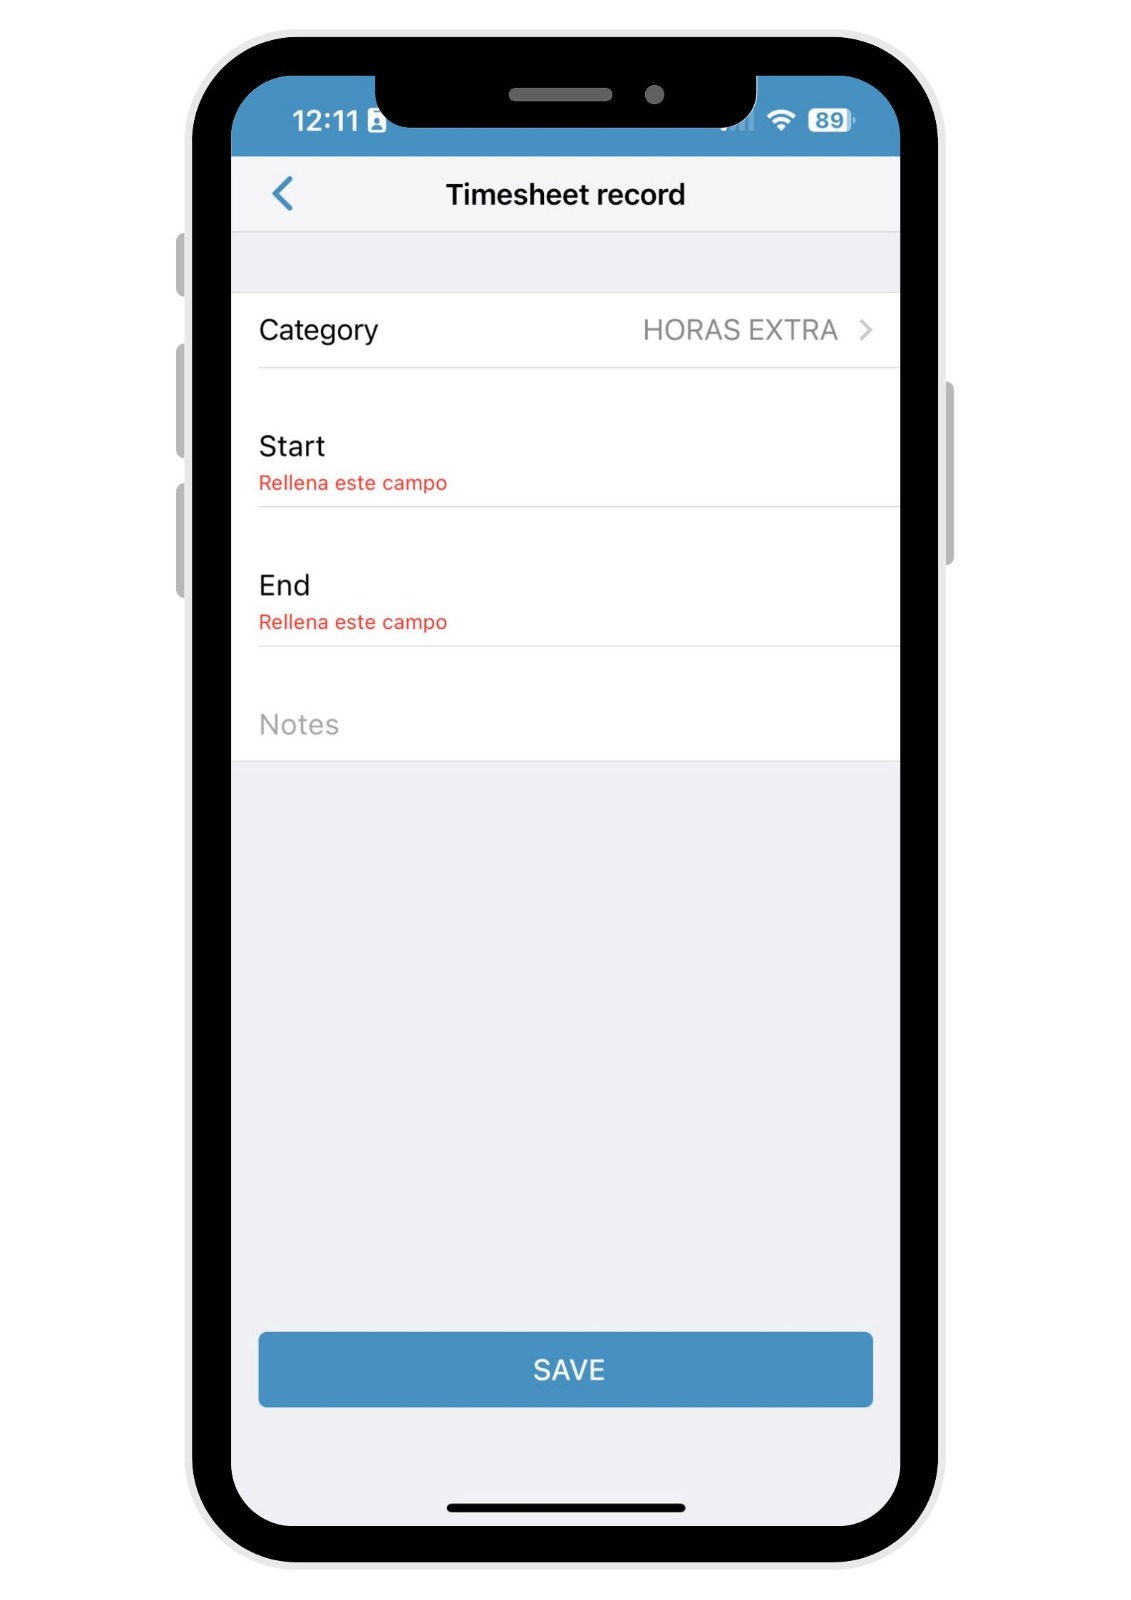
When logging your times, you can pick the job category you belong to. You can also add notes if you need to.
The second way to log your hours is from the menu on the left
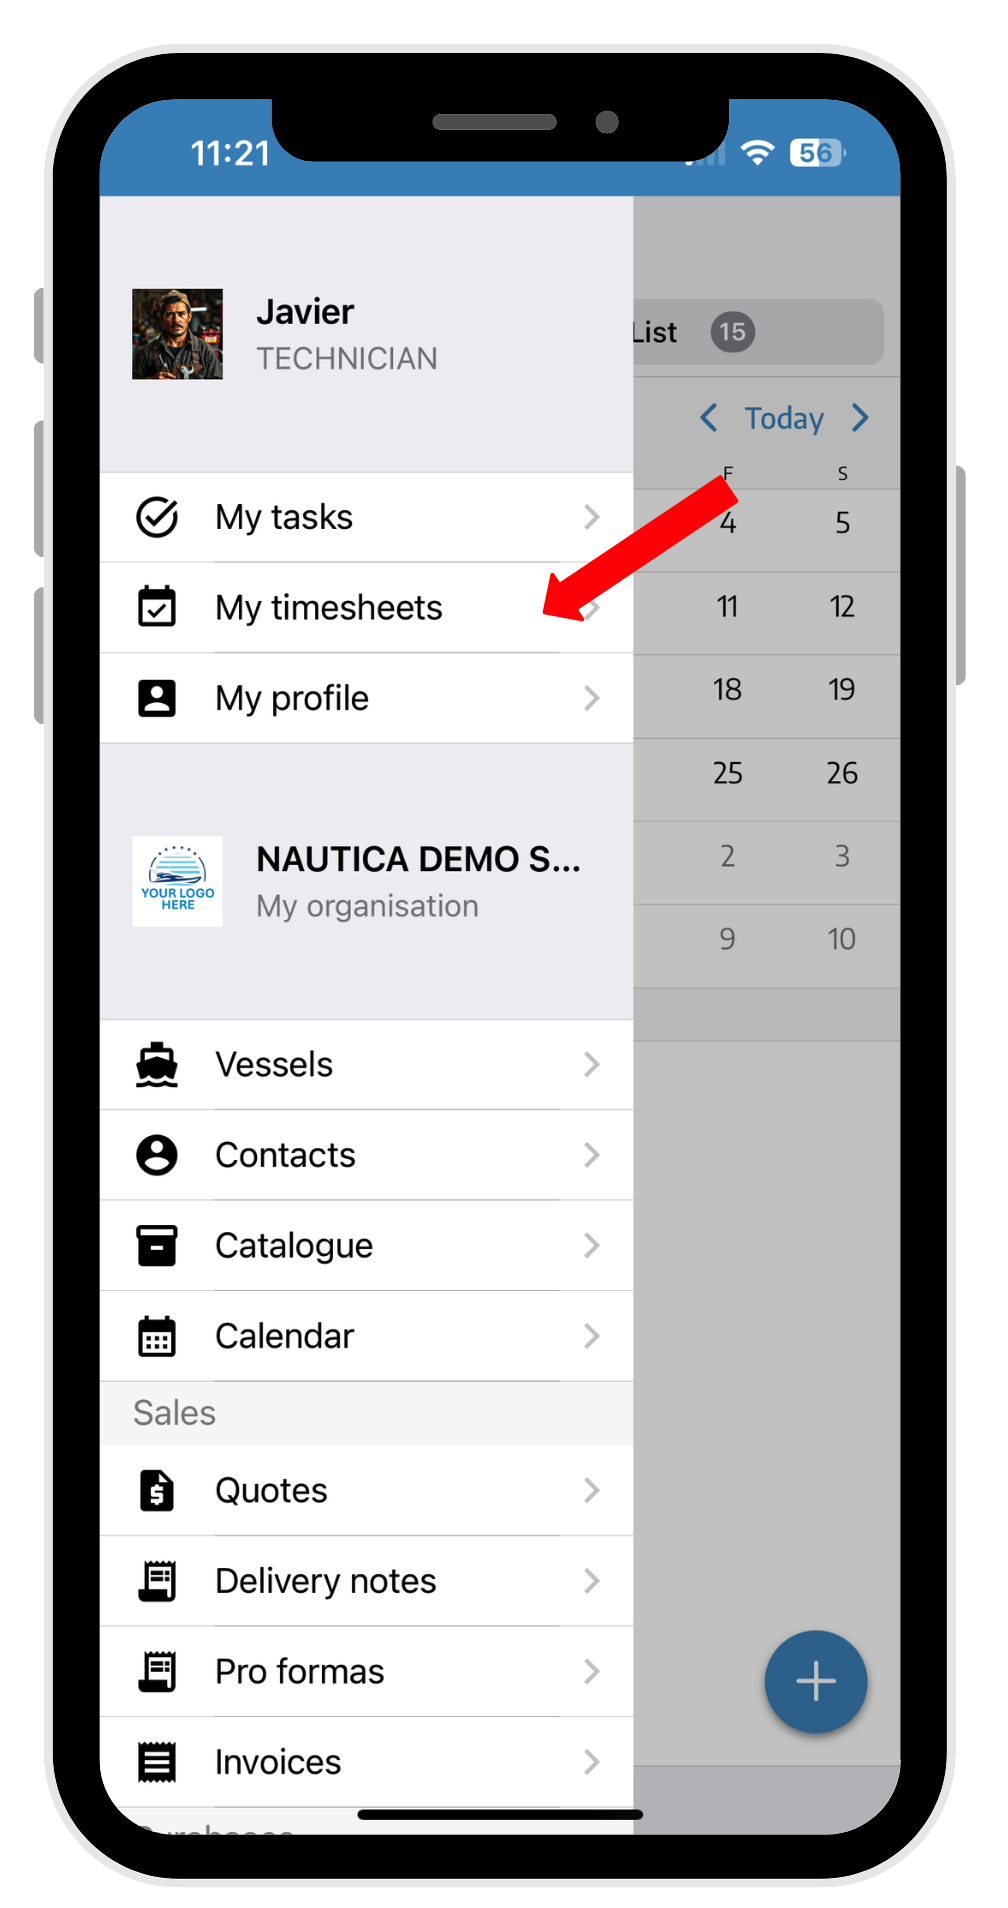
In the drop-down menu, these options will show up:
TASKS
MY TIMES
MY PROFILE
BOATS
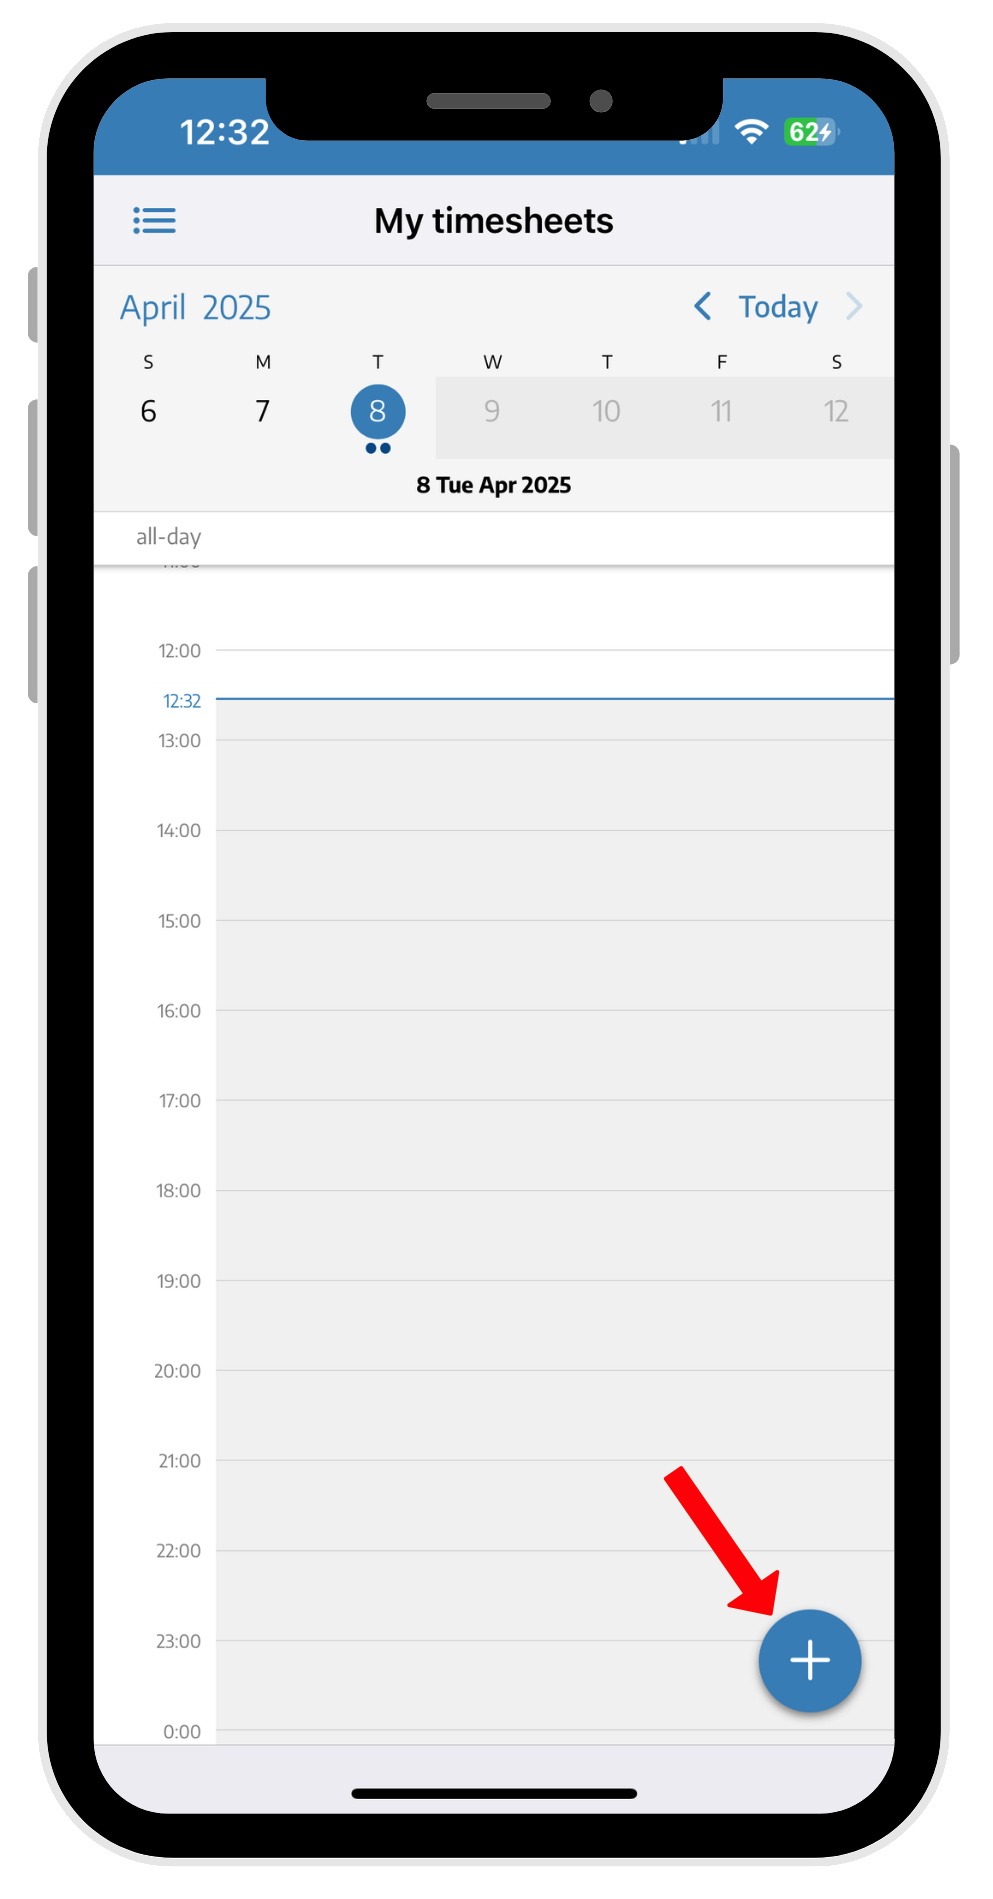
The fastest and easiest way for an operator to add jobs is by going to the MY TIMES tab.
In My Time Logs, the operator will tap the + sign to add a new entry for hours they've worked on a repair or job.
The first thing the operator needs to do is pick the type of job—if it's a BOAT or an INTERNAL TASK.
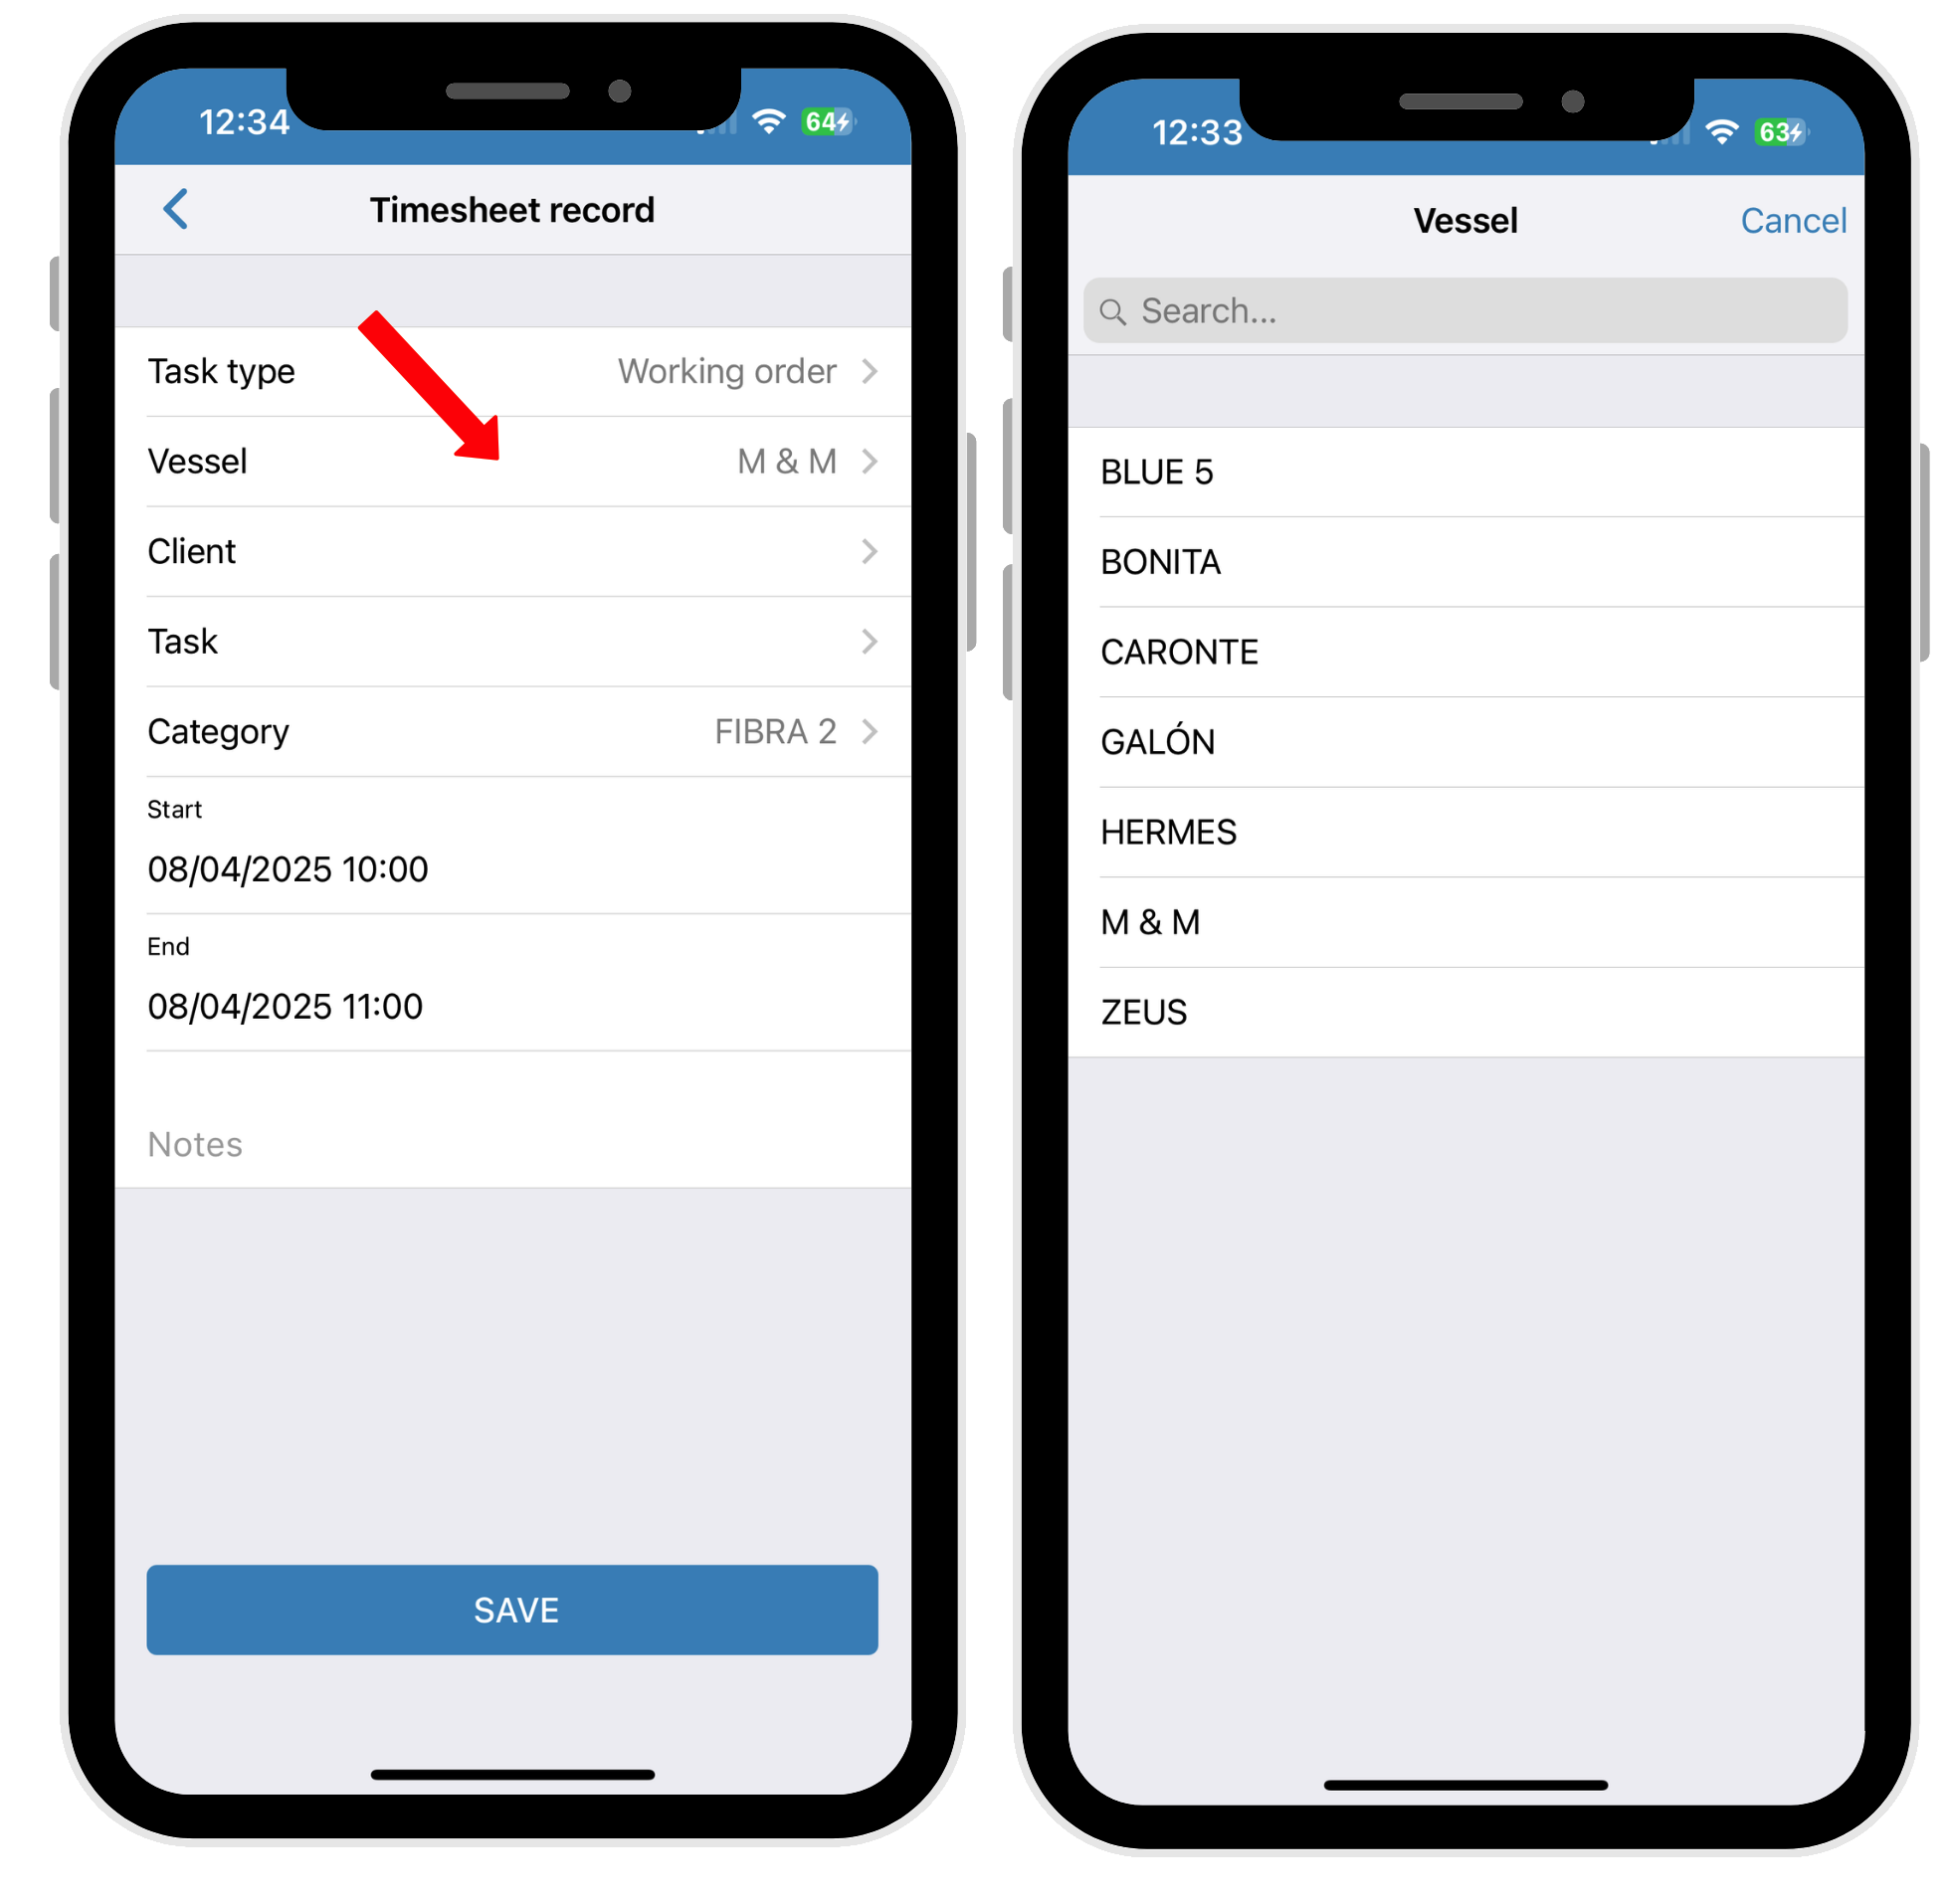
If the job is on a BOAT, you can then choose which boat the work was done on.
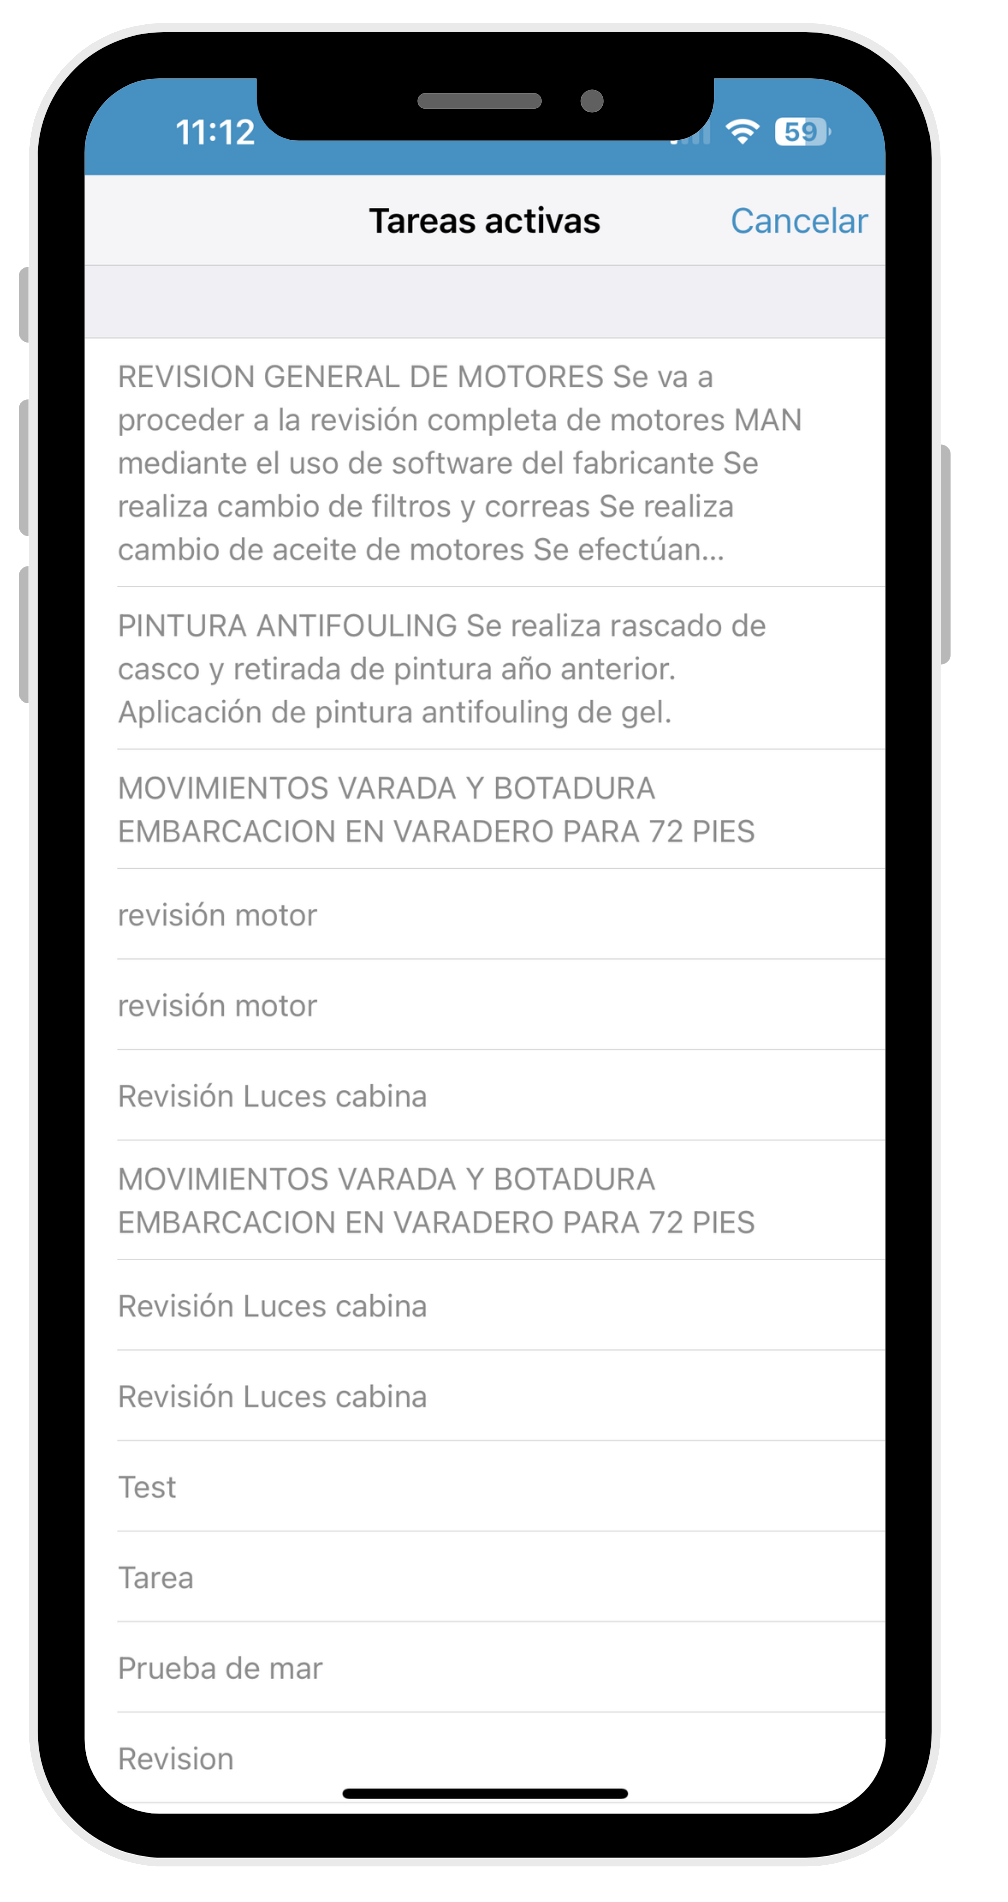
When you select the boat, a list of that boat’s pending tasks will pop up, so you can pick which task you want to log your hours against.
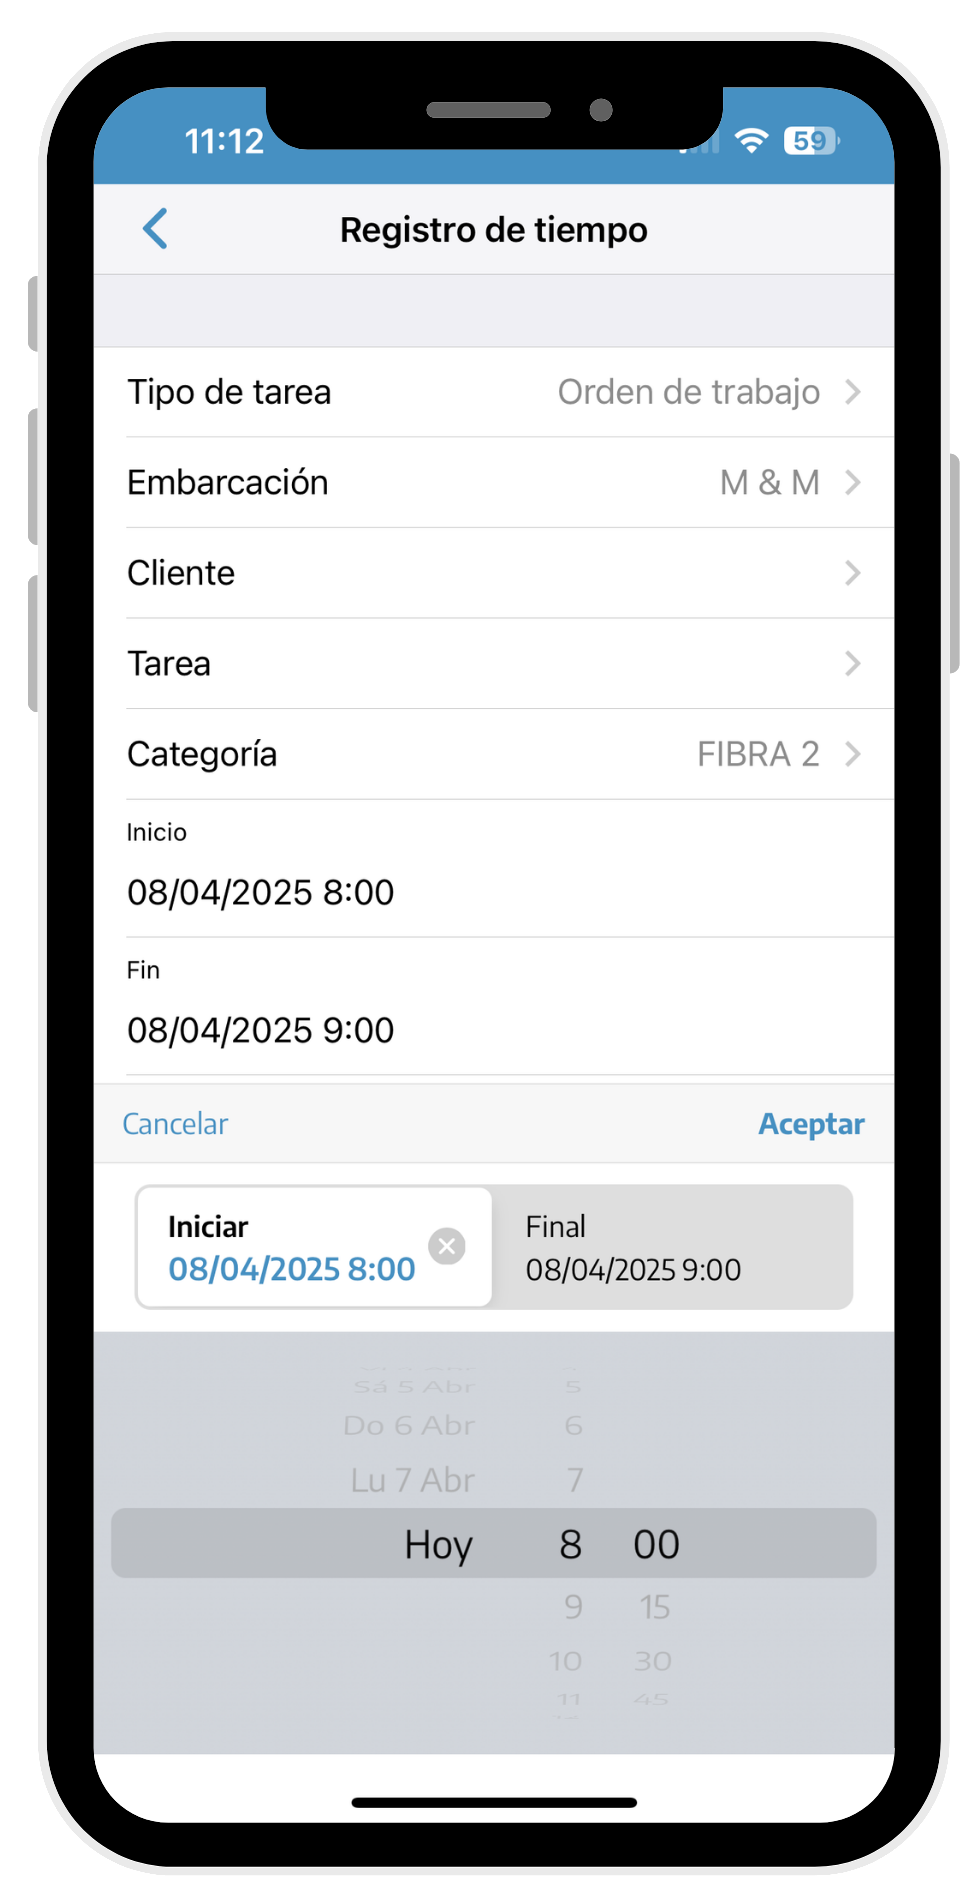
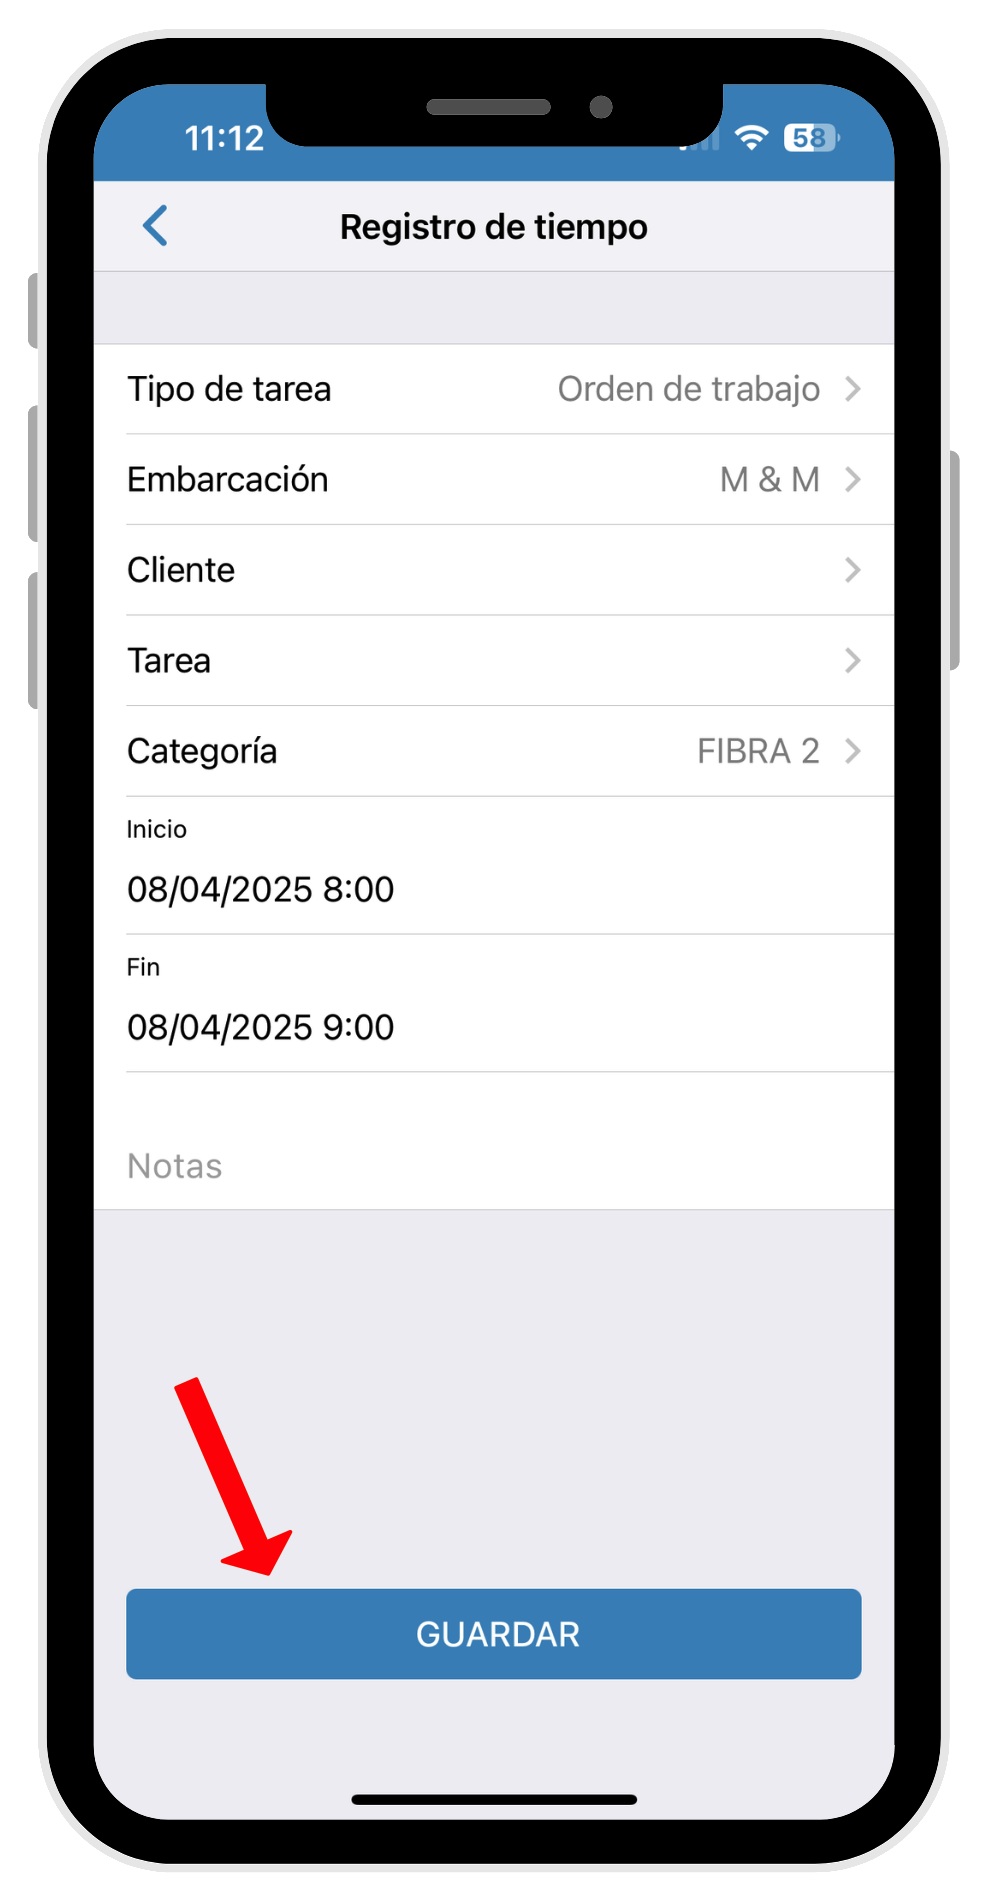
Once you’ve chosen the task to log your worked hours, just record the time spent on that task.
Enter the start time and finish time, then hit ACCEPT.
If anything comes up during the work, the worker can write an extra comment. After entering the hours, just hit SAVE.
When you hit the save button, the following POP UP will show up.
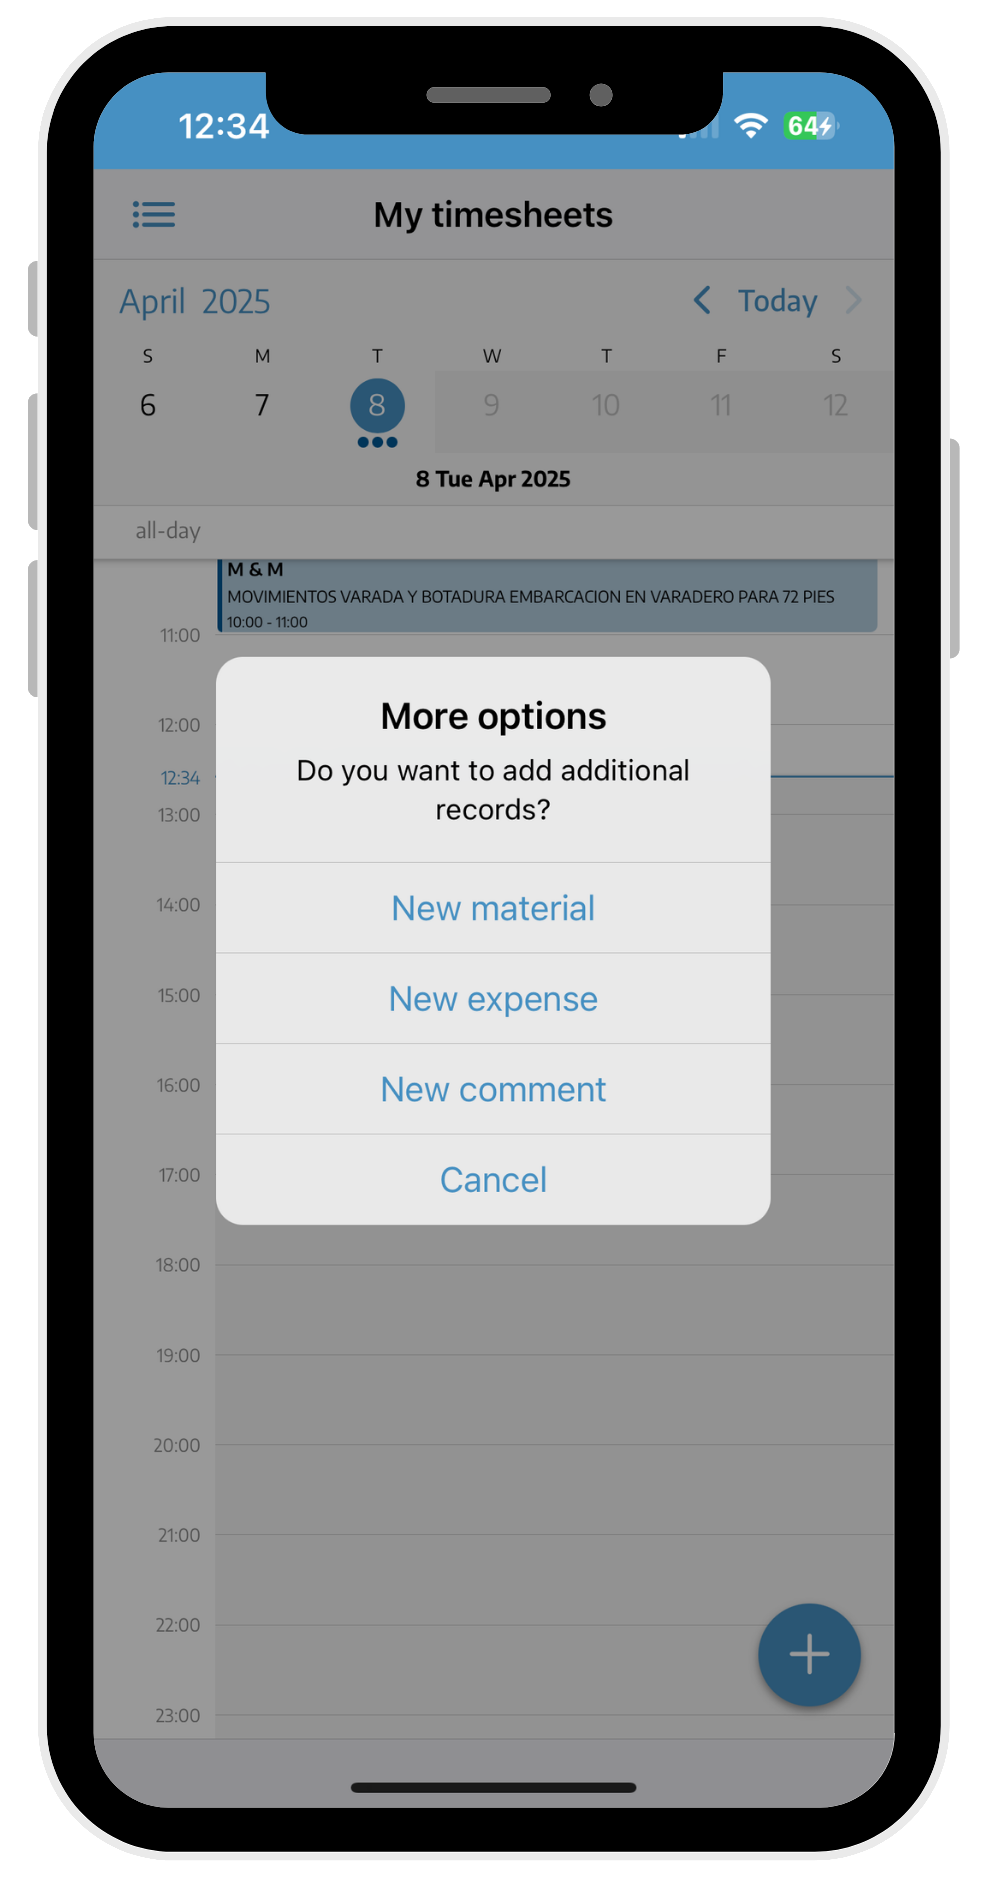
By selecting the new material option, we can add new materials either by writing them or scanning the QR code.

In comments, a chat opens up where you can make comments, take photos or upload them from your mobile library.