On the bar on the left we have the CLIENTS tab.
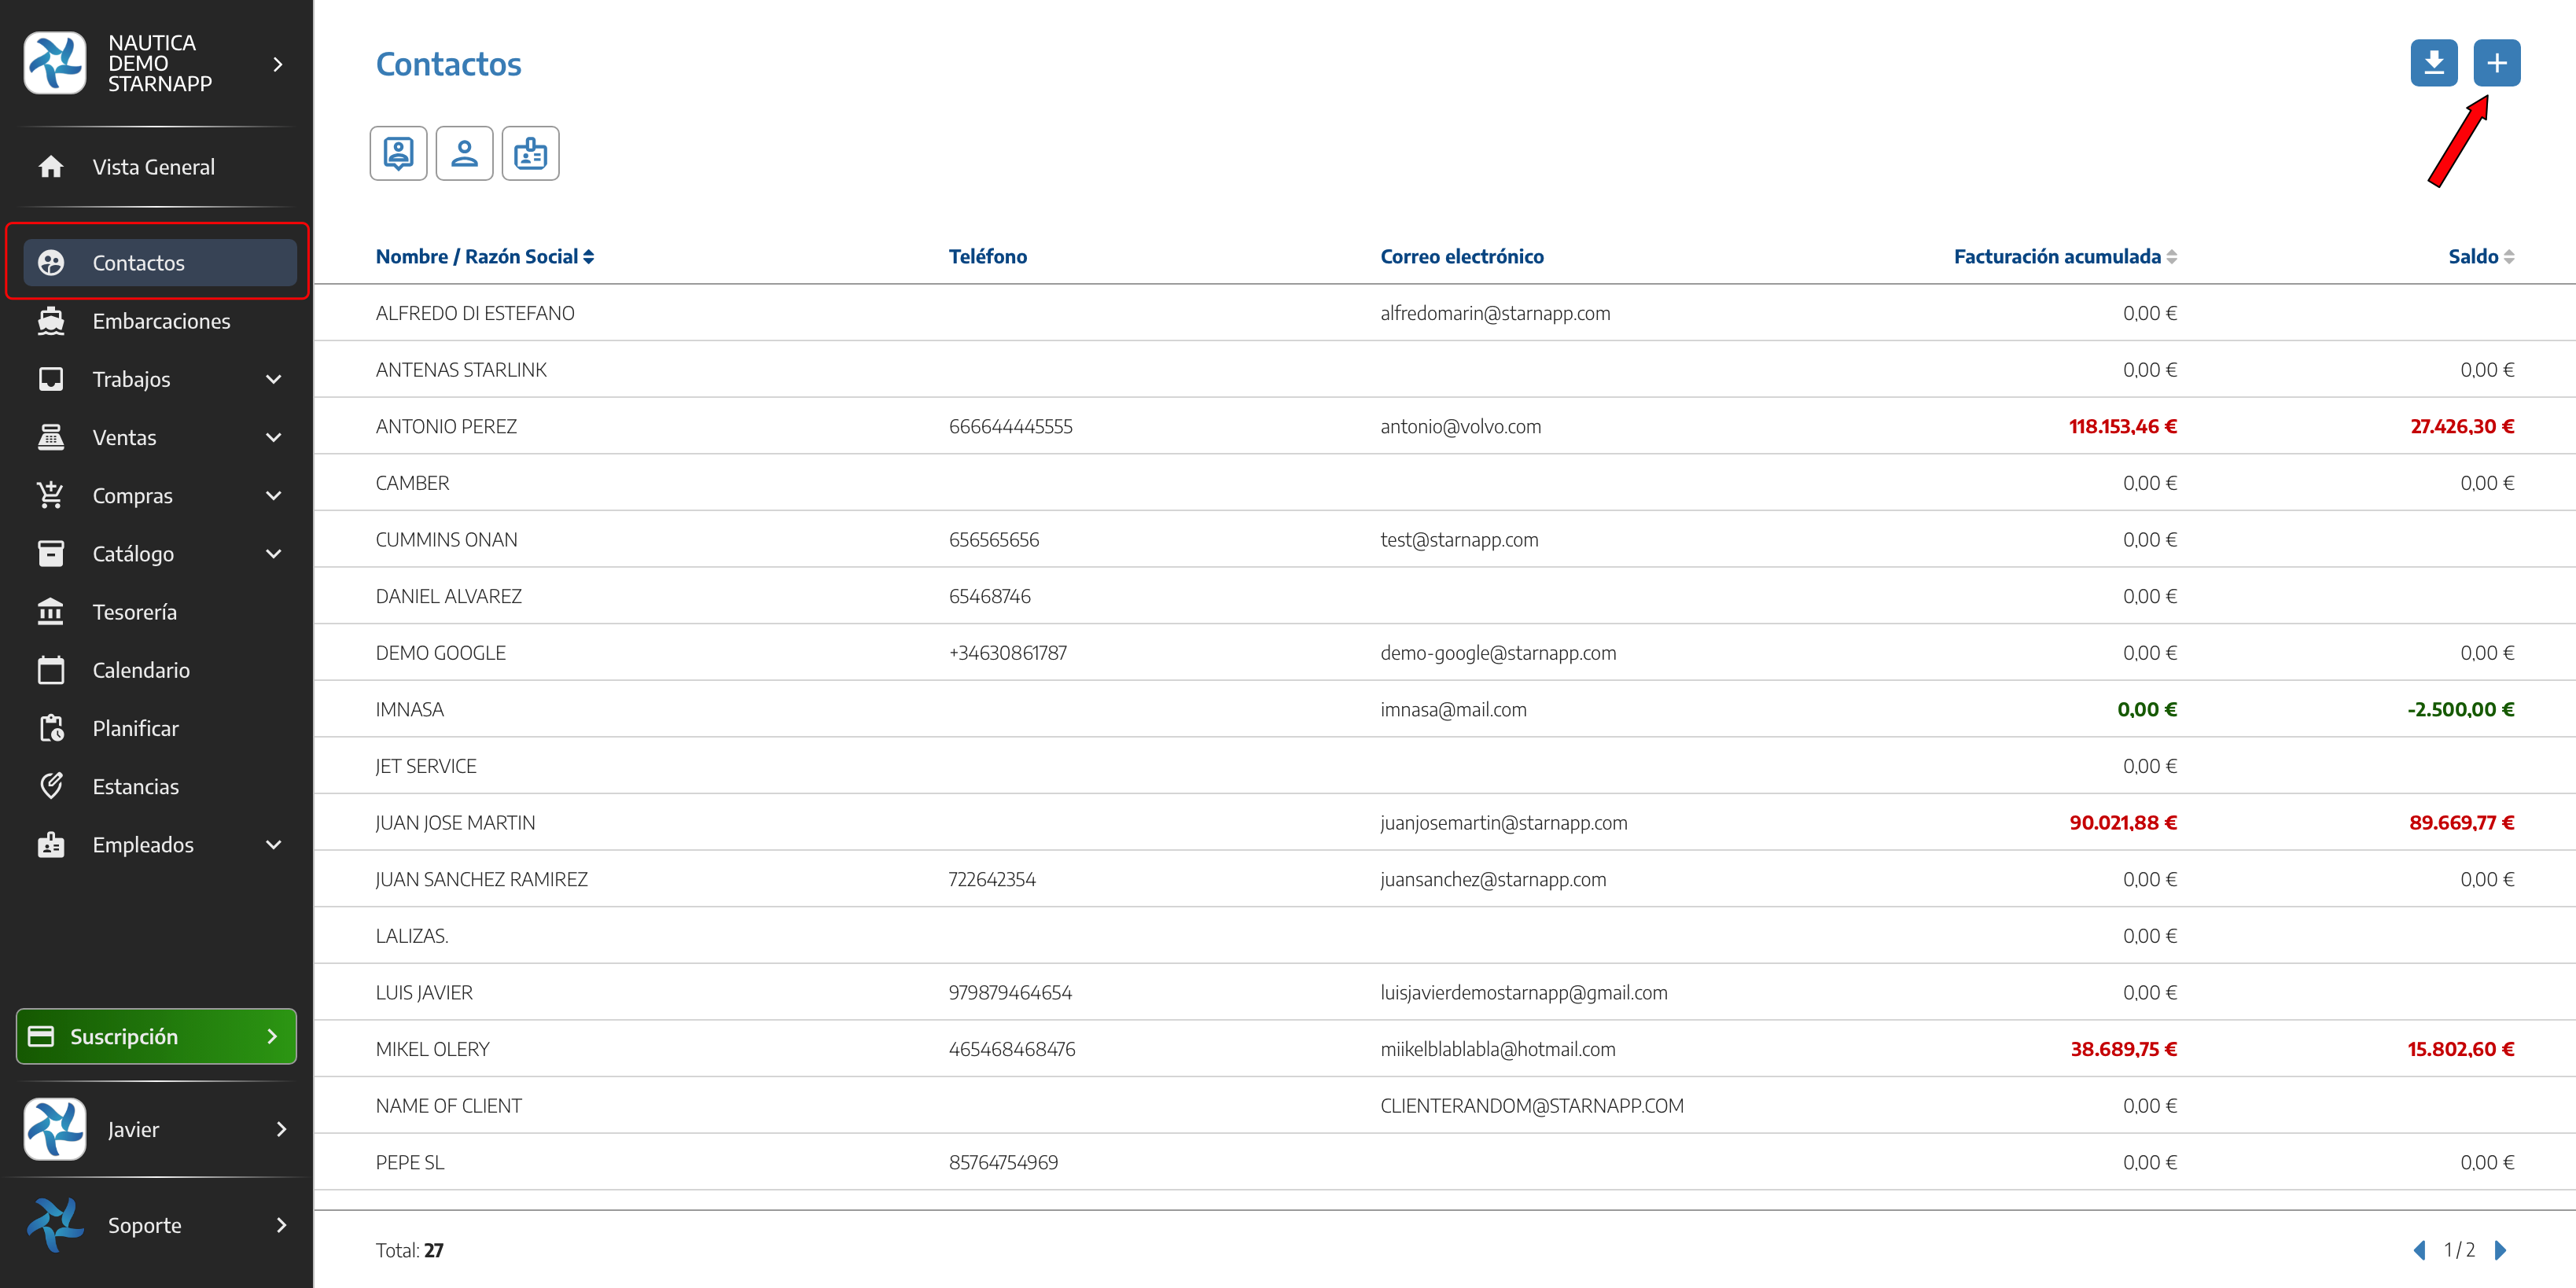
The top button on the upper right will let us create new clients.
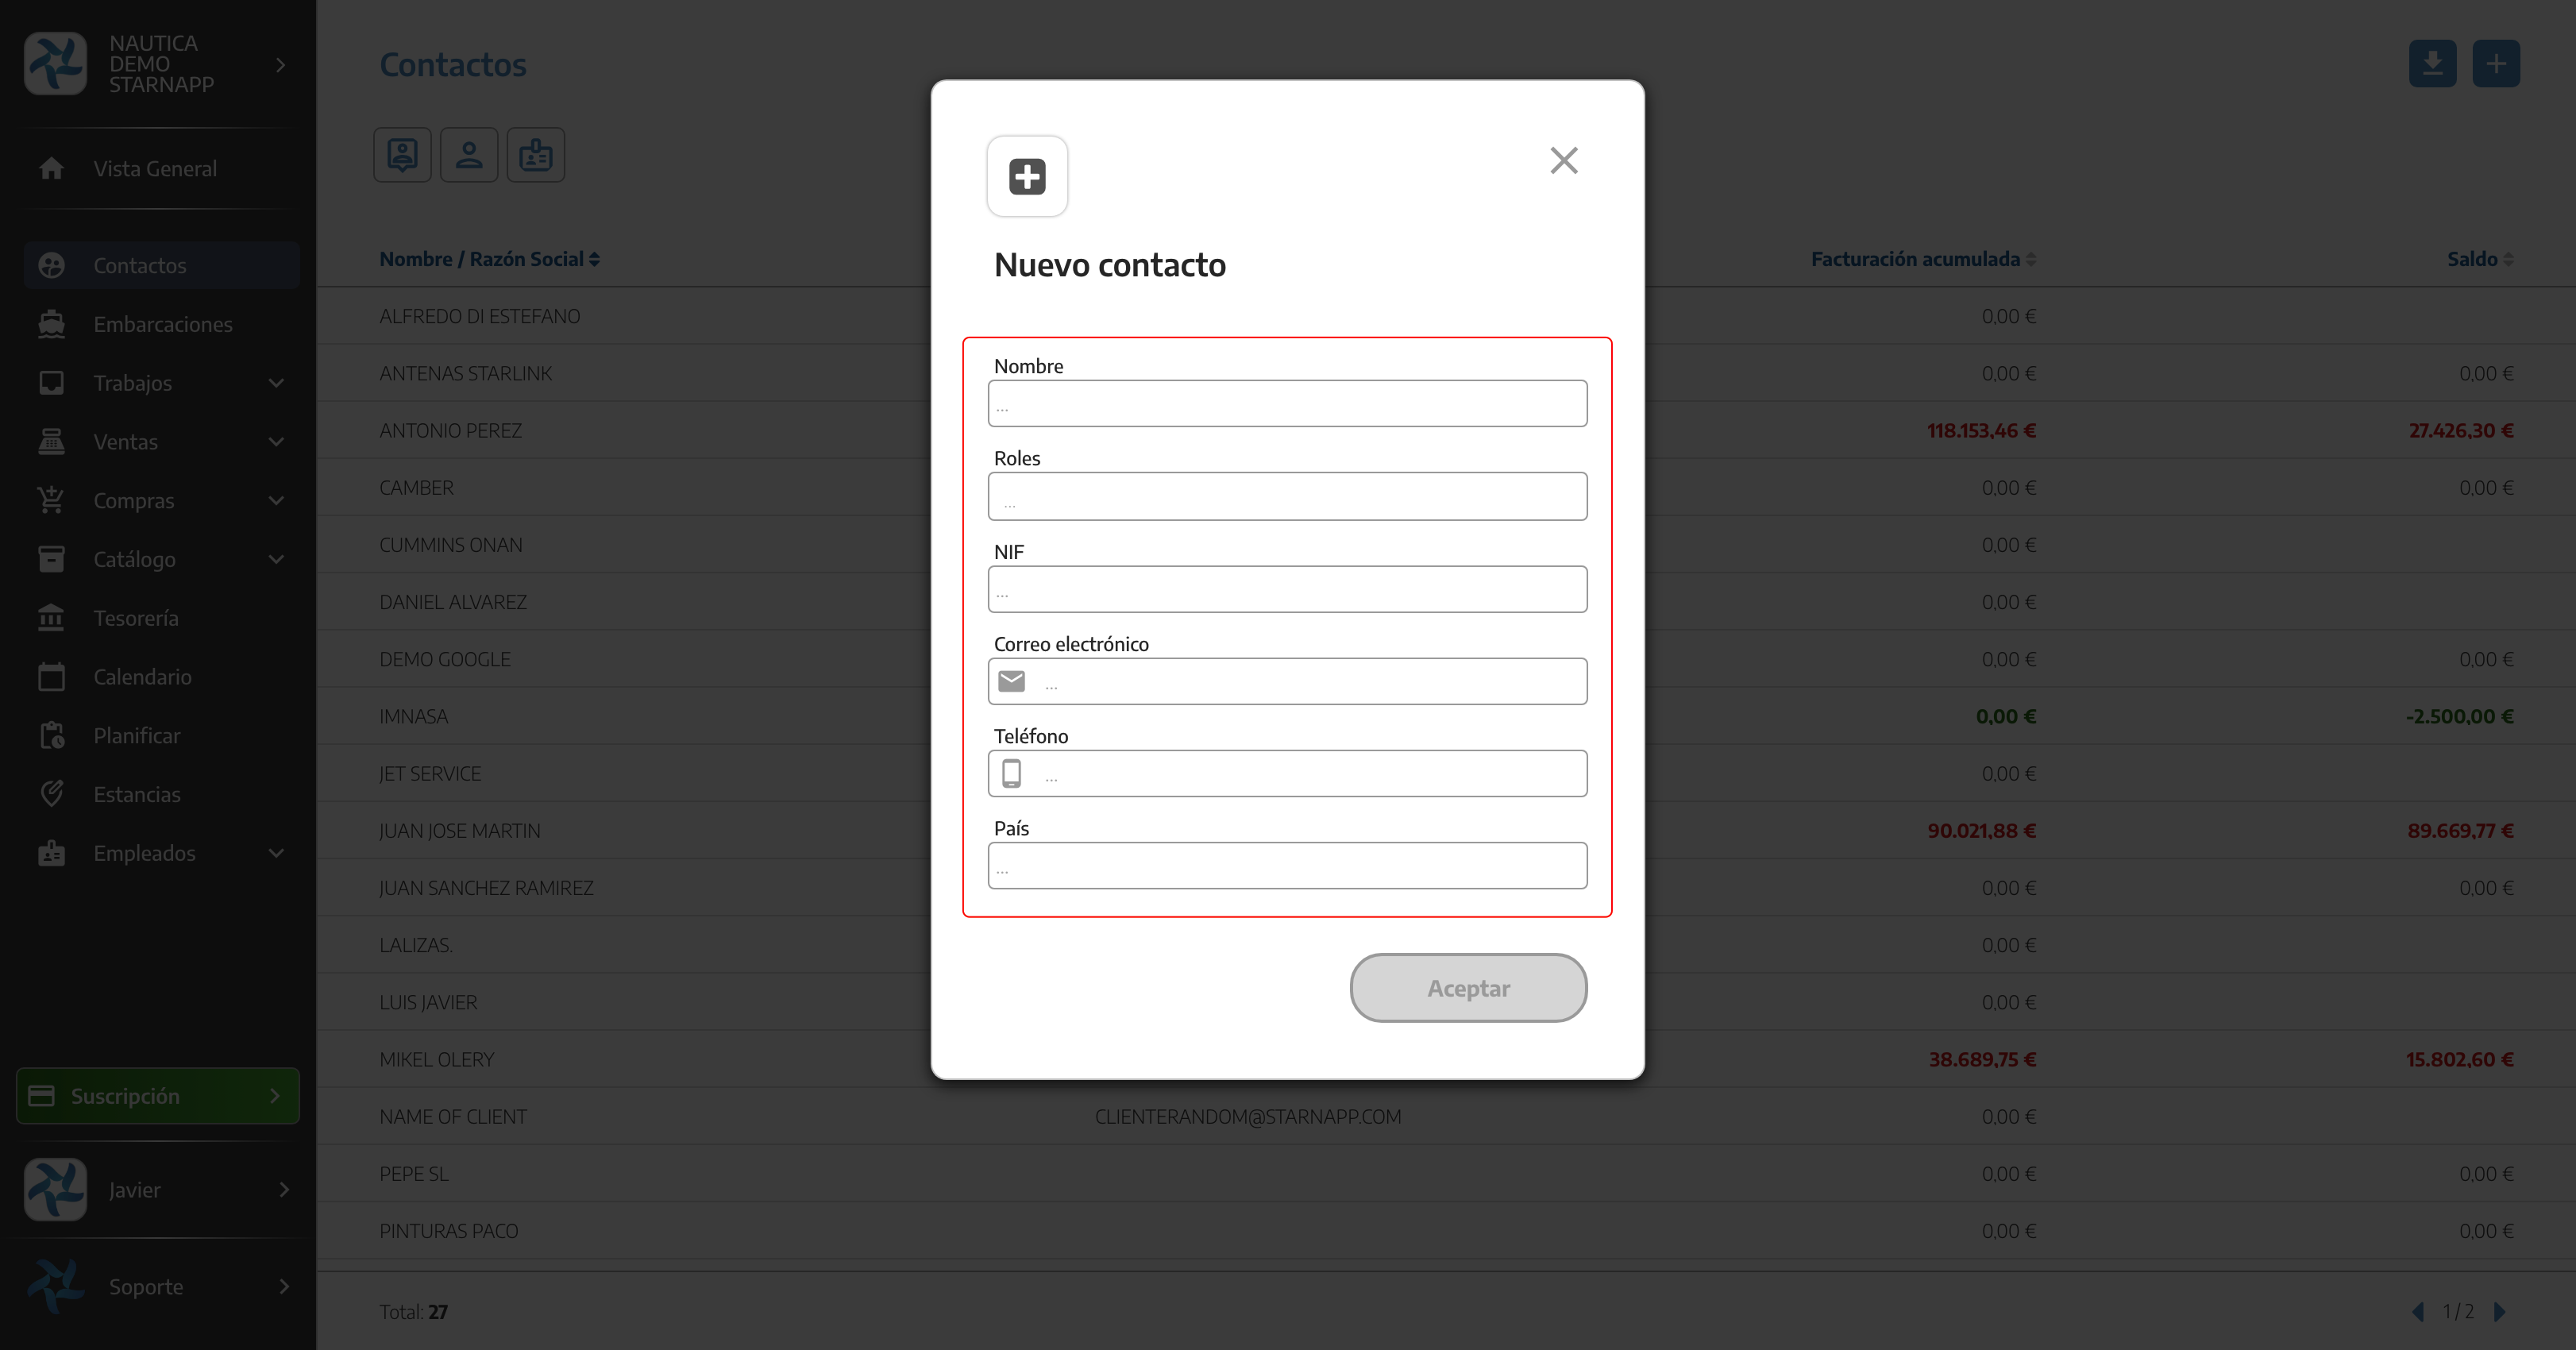
Fill in all the details you have for your client and you’ll then have them available in your contact list, and you’ll also be able to assign to this client the vessels you keep adding in the software.
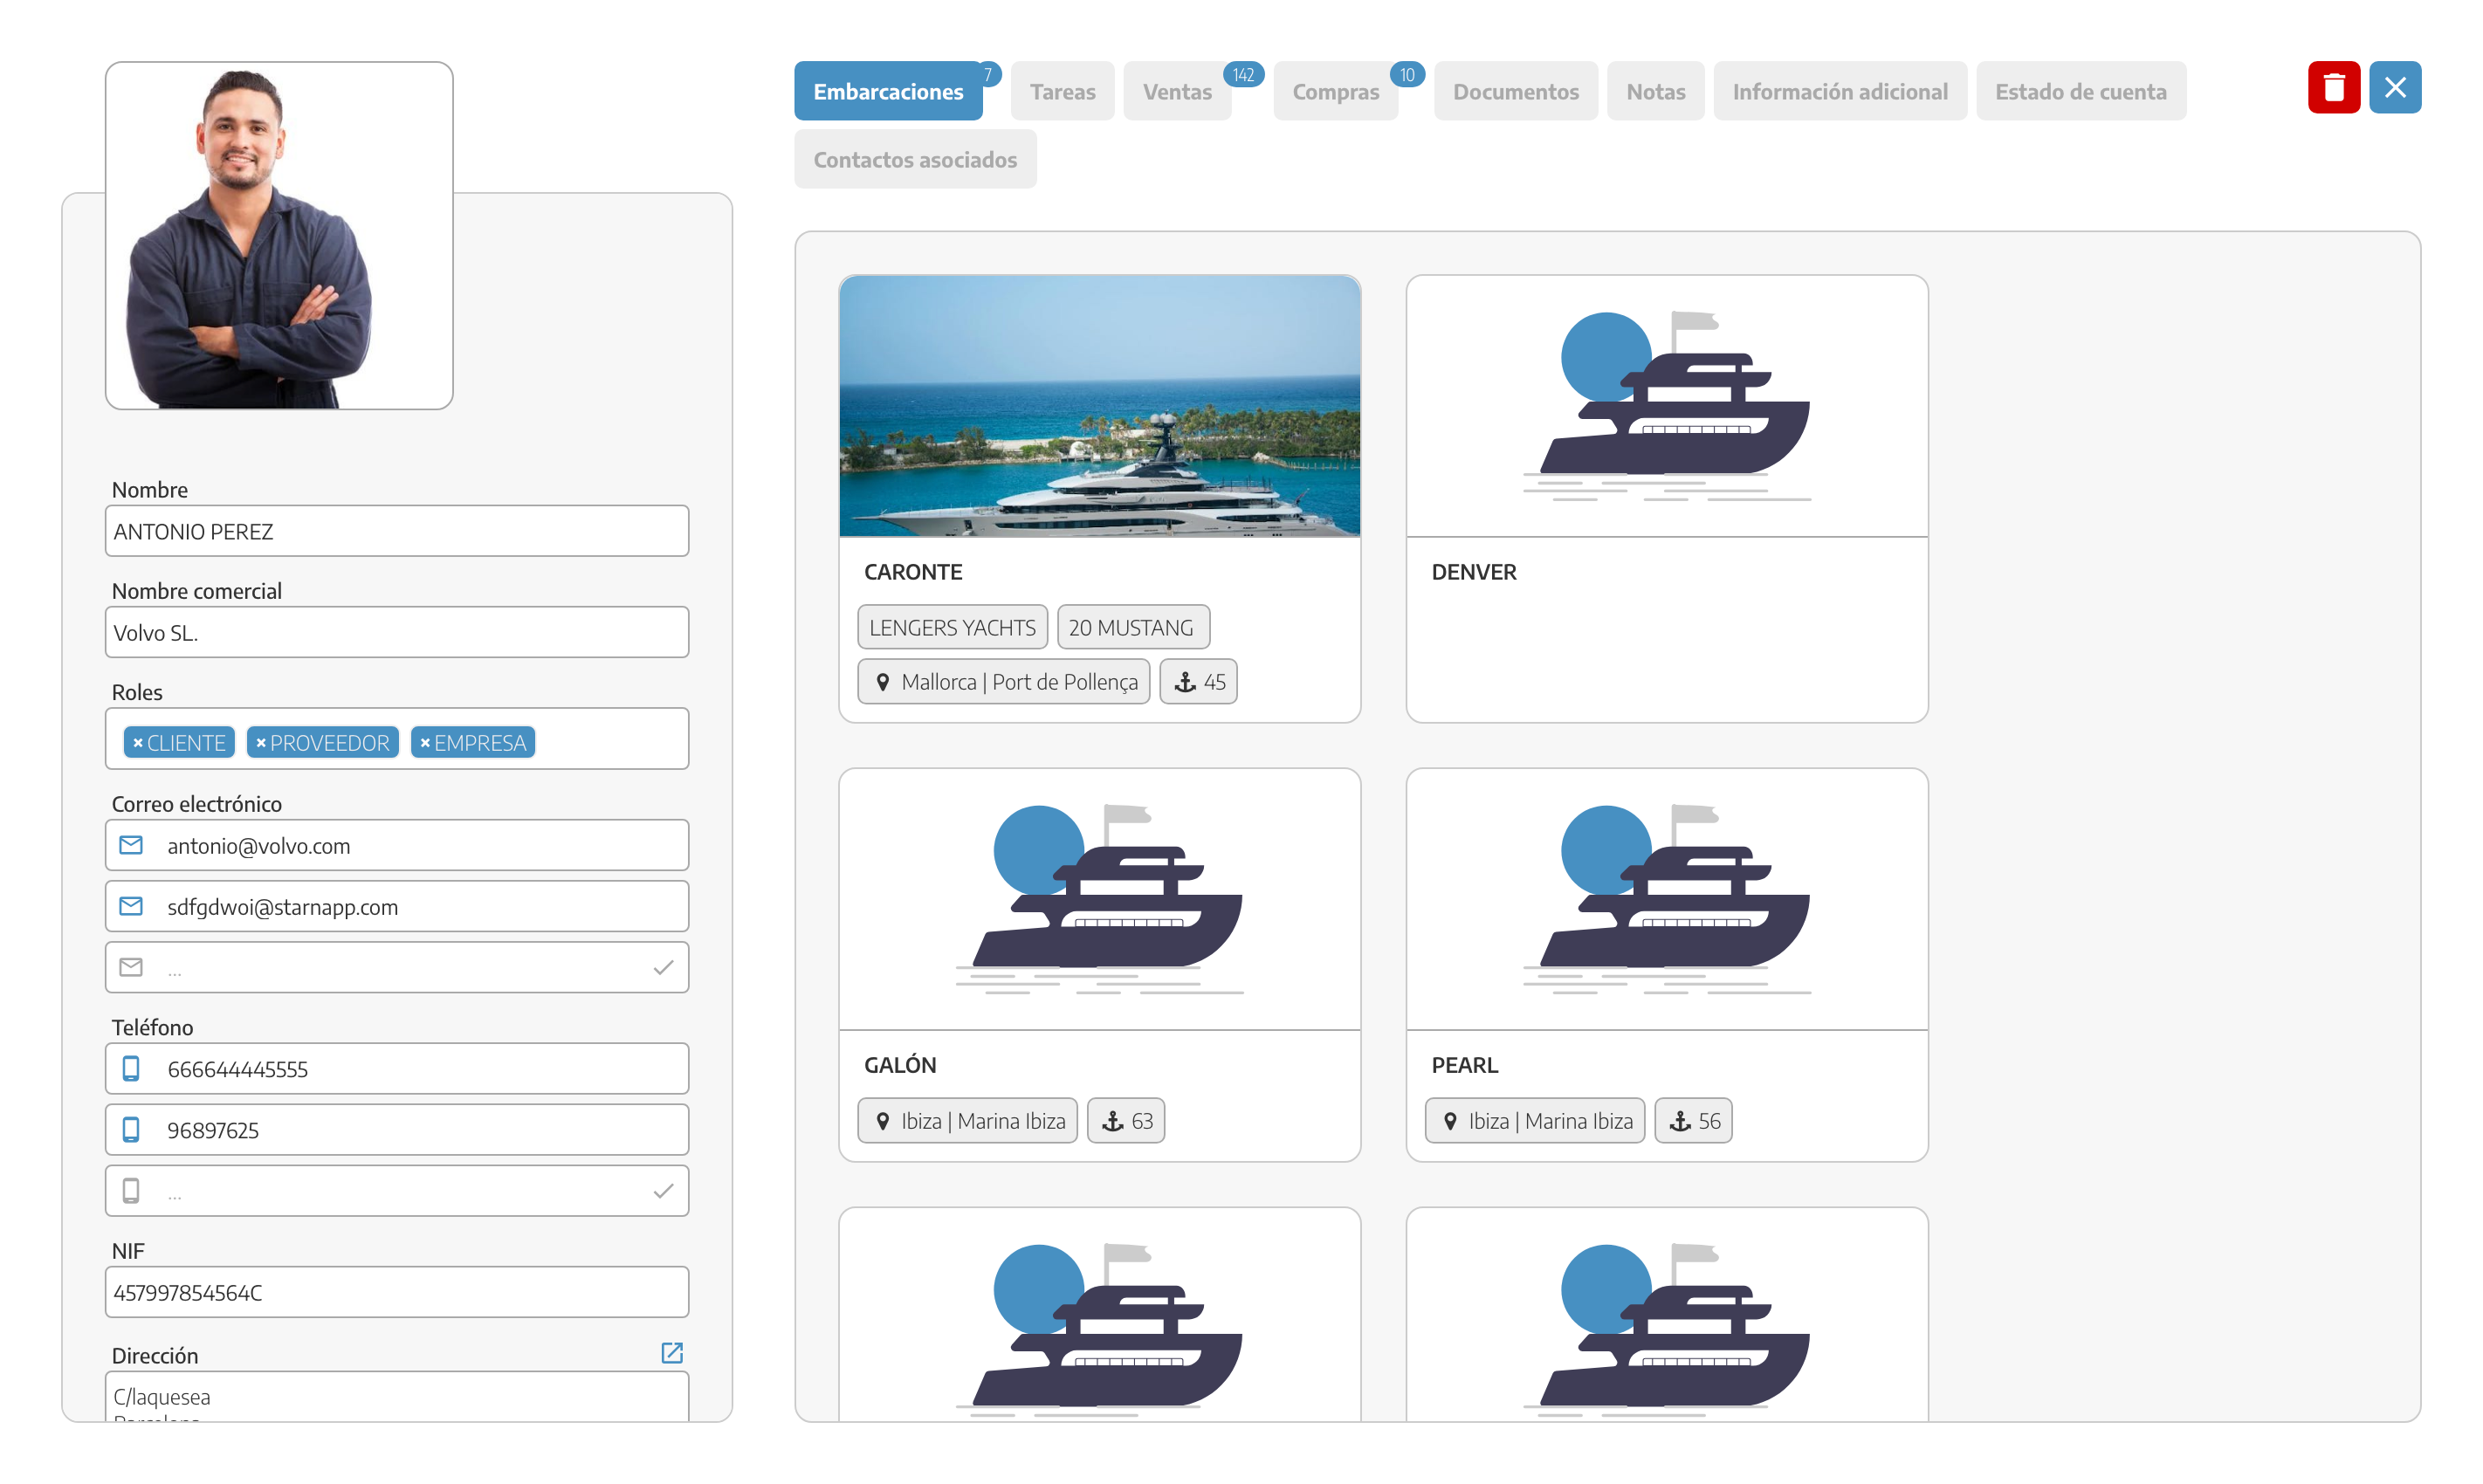
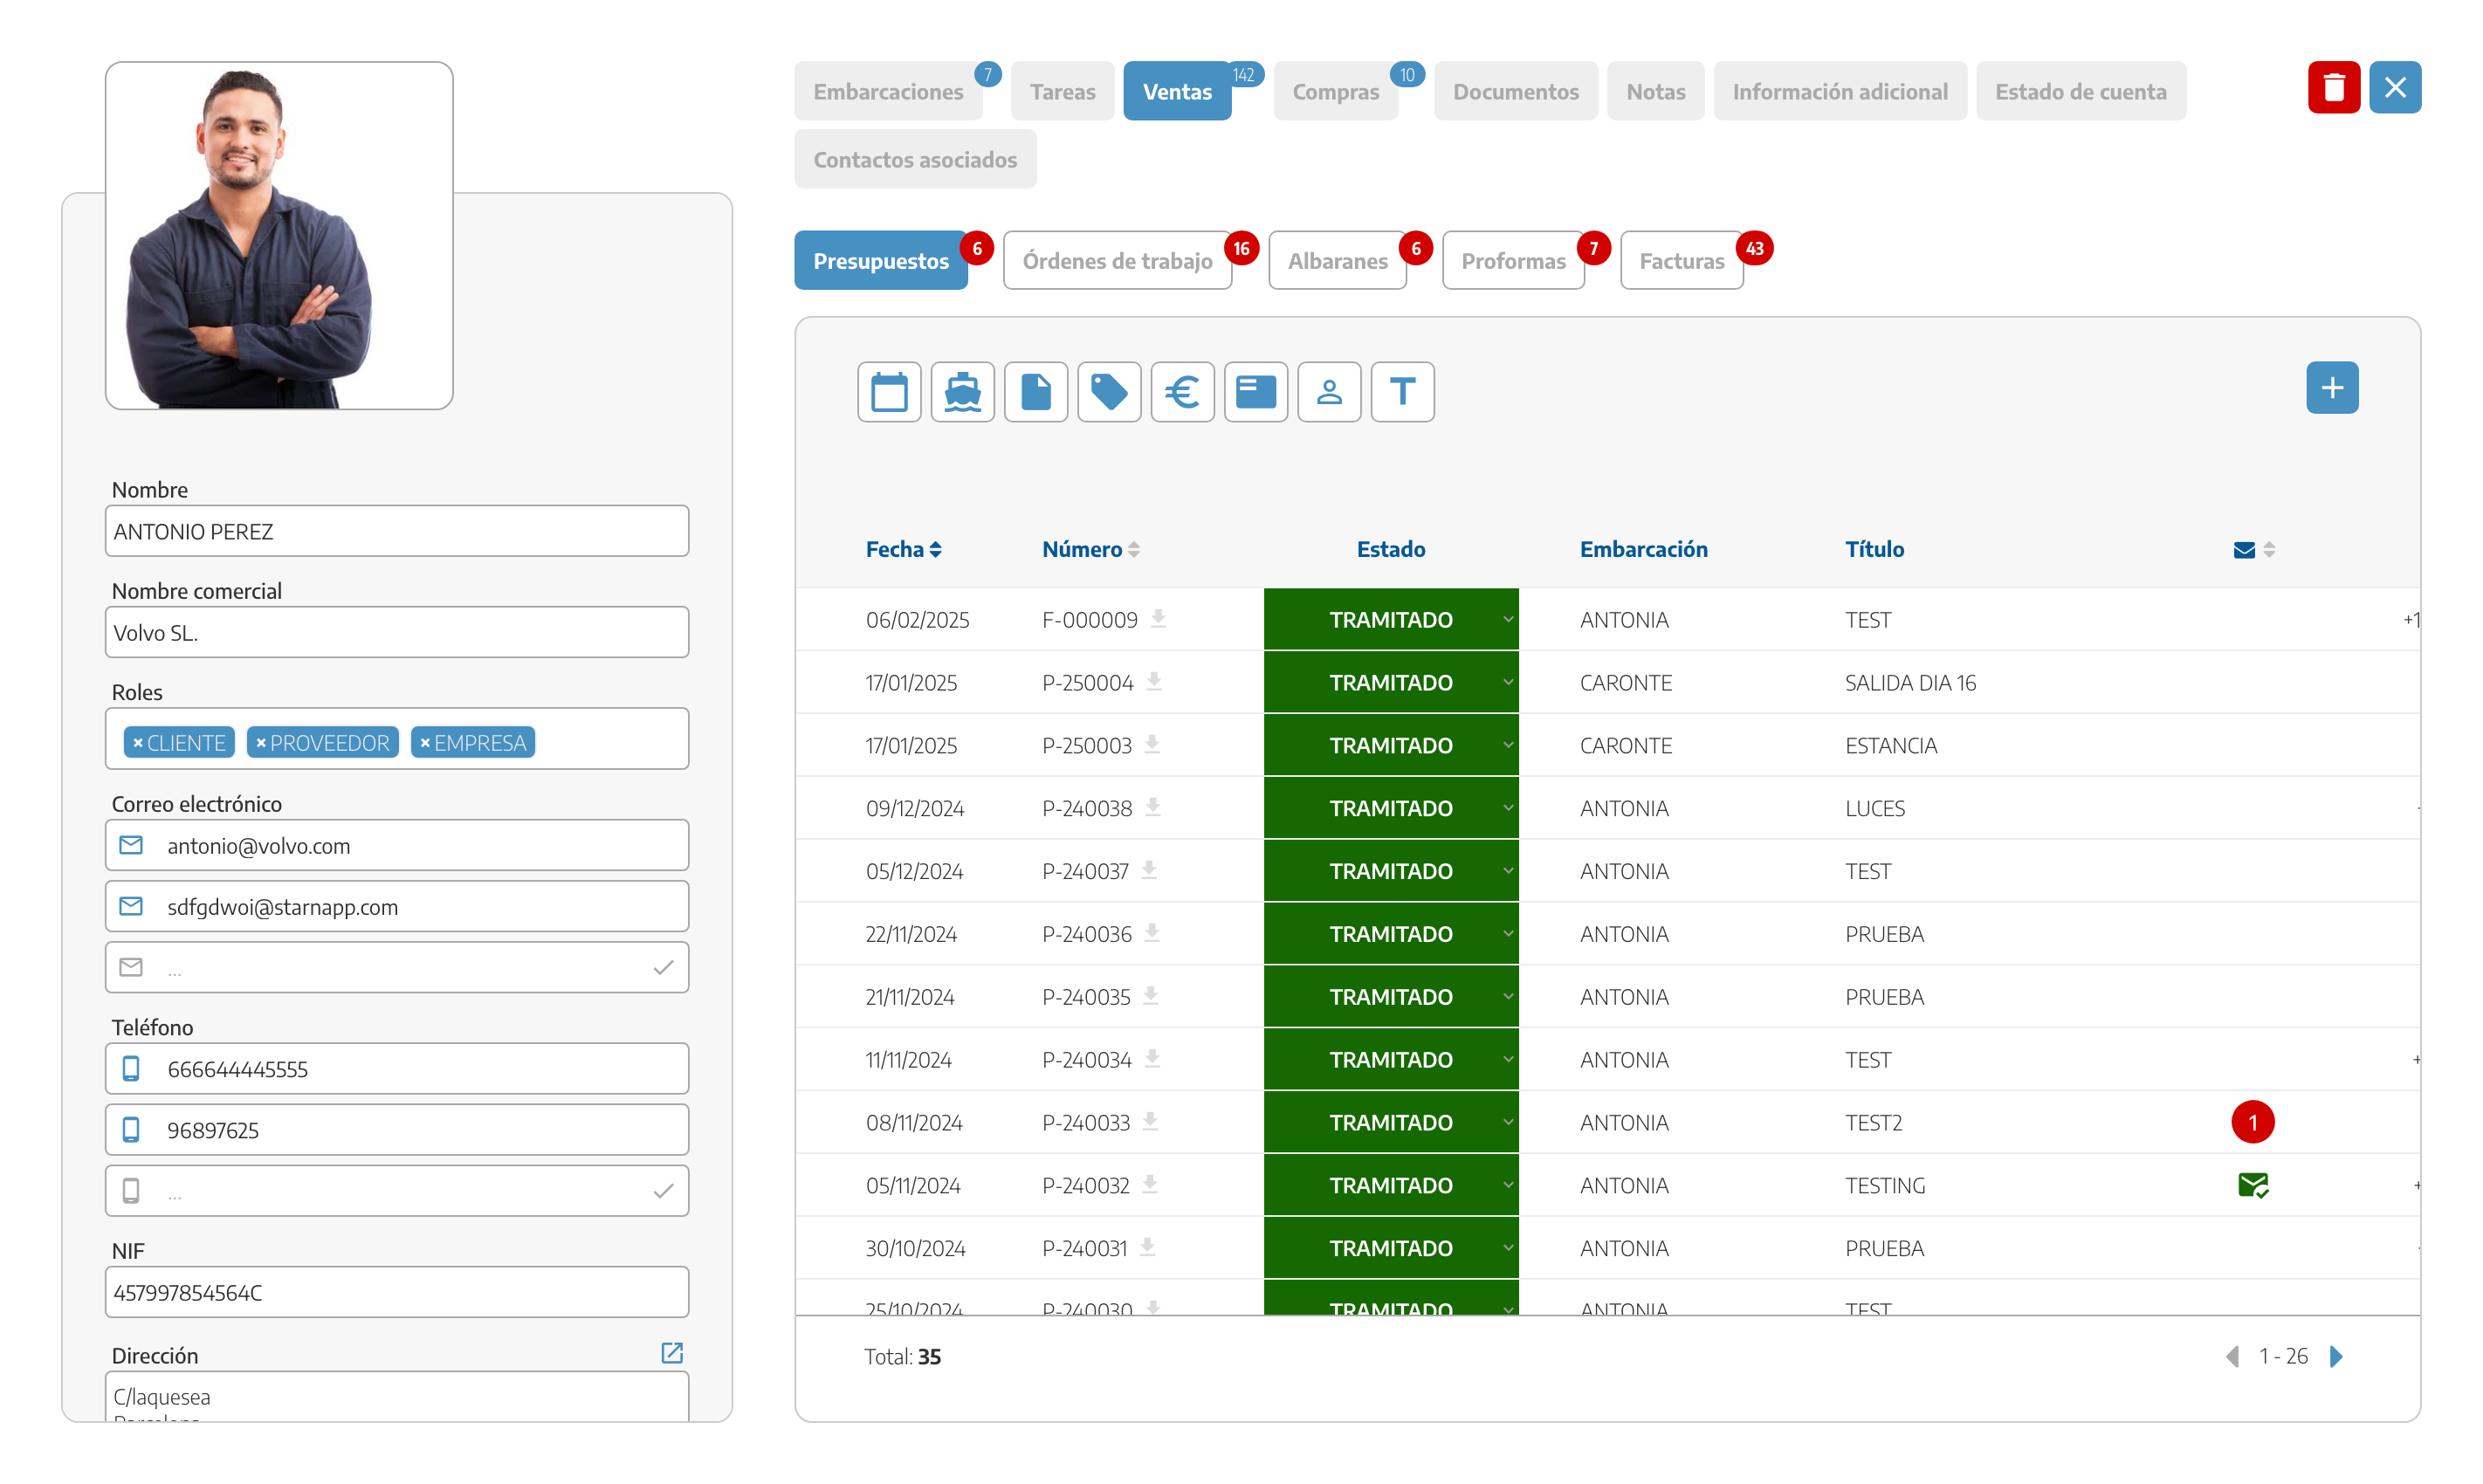
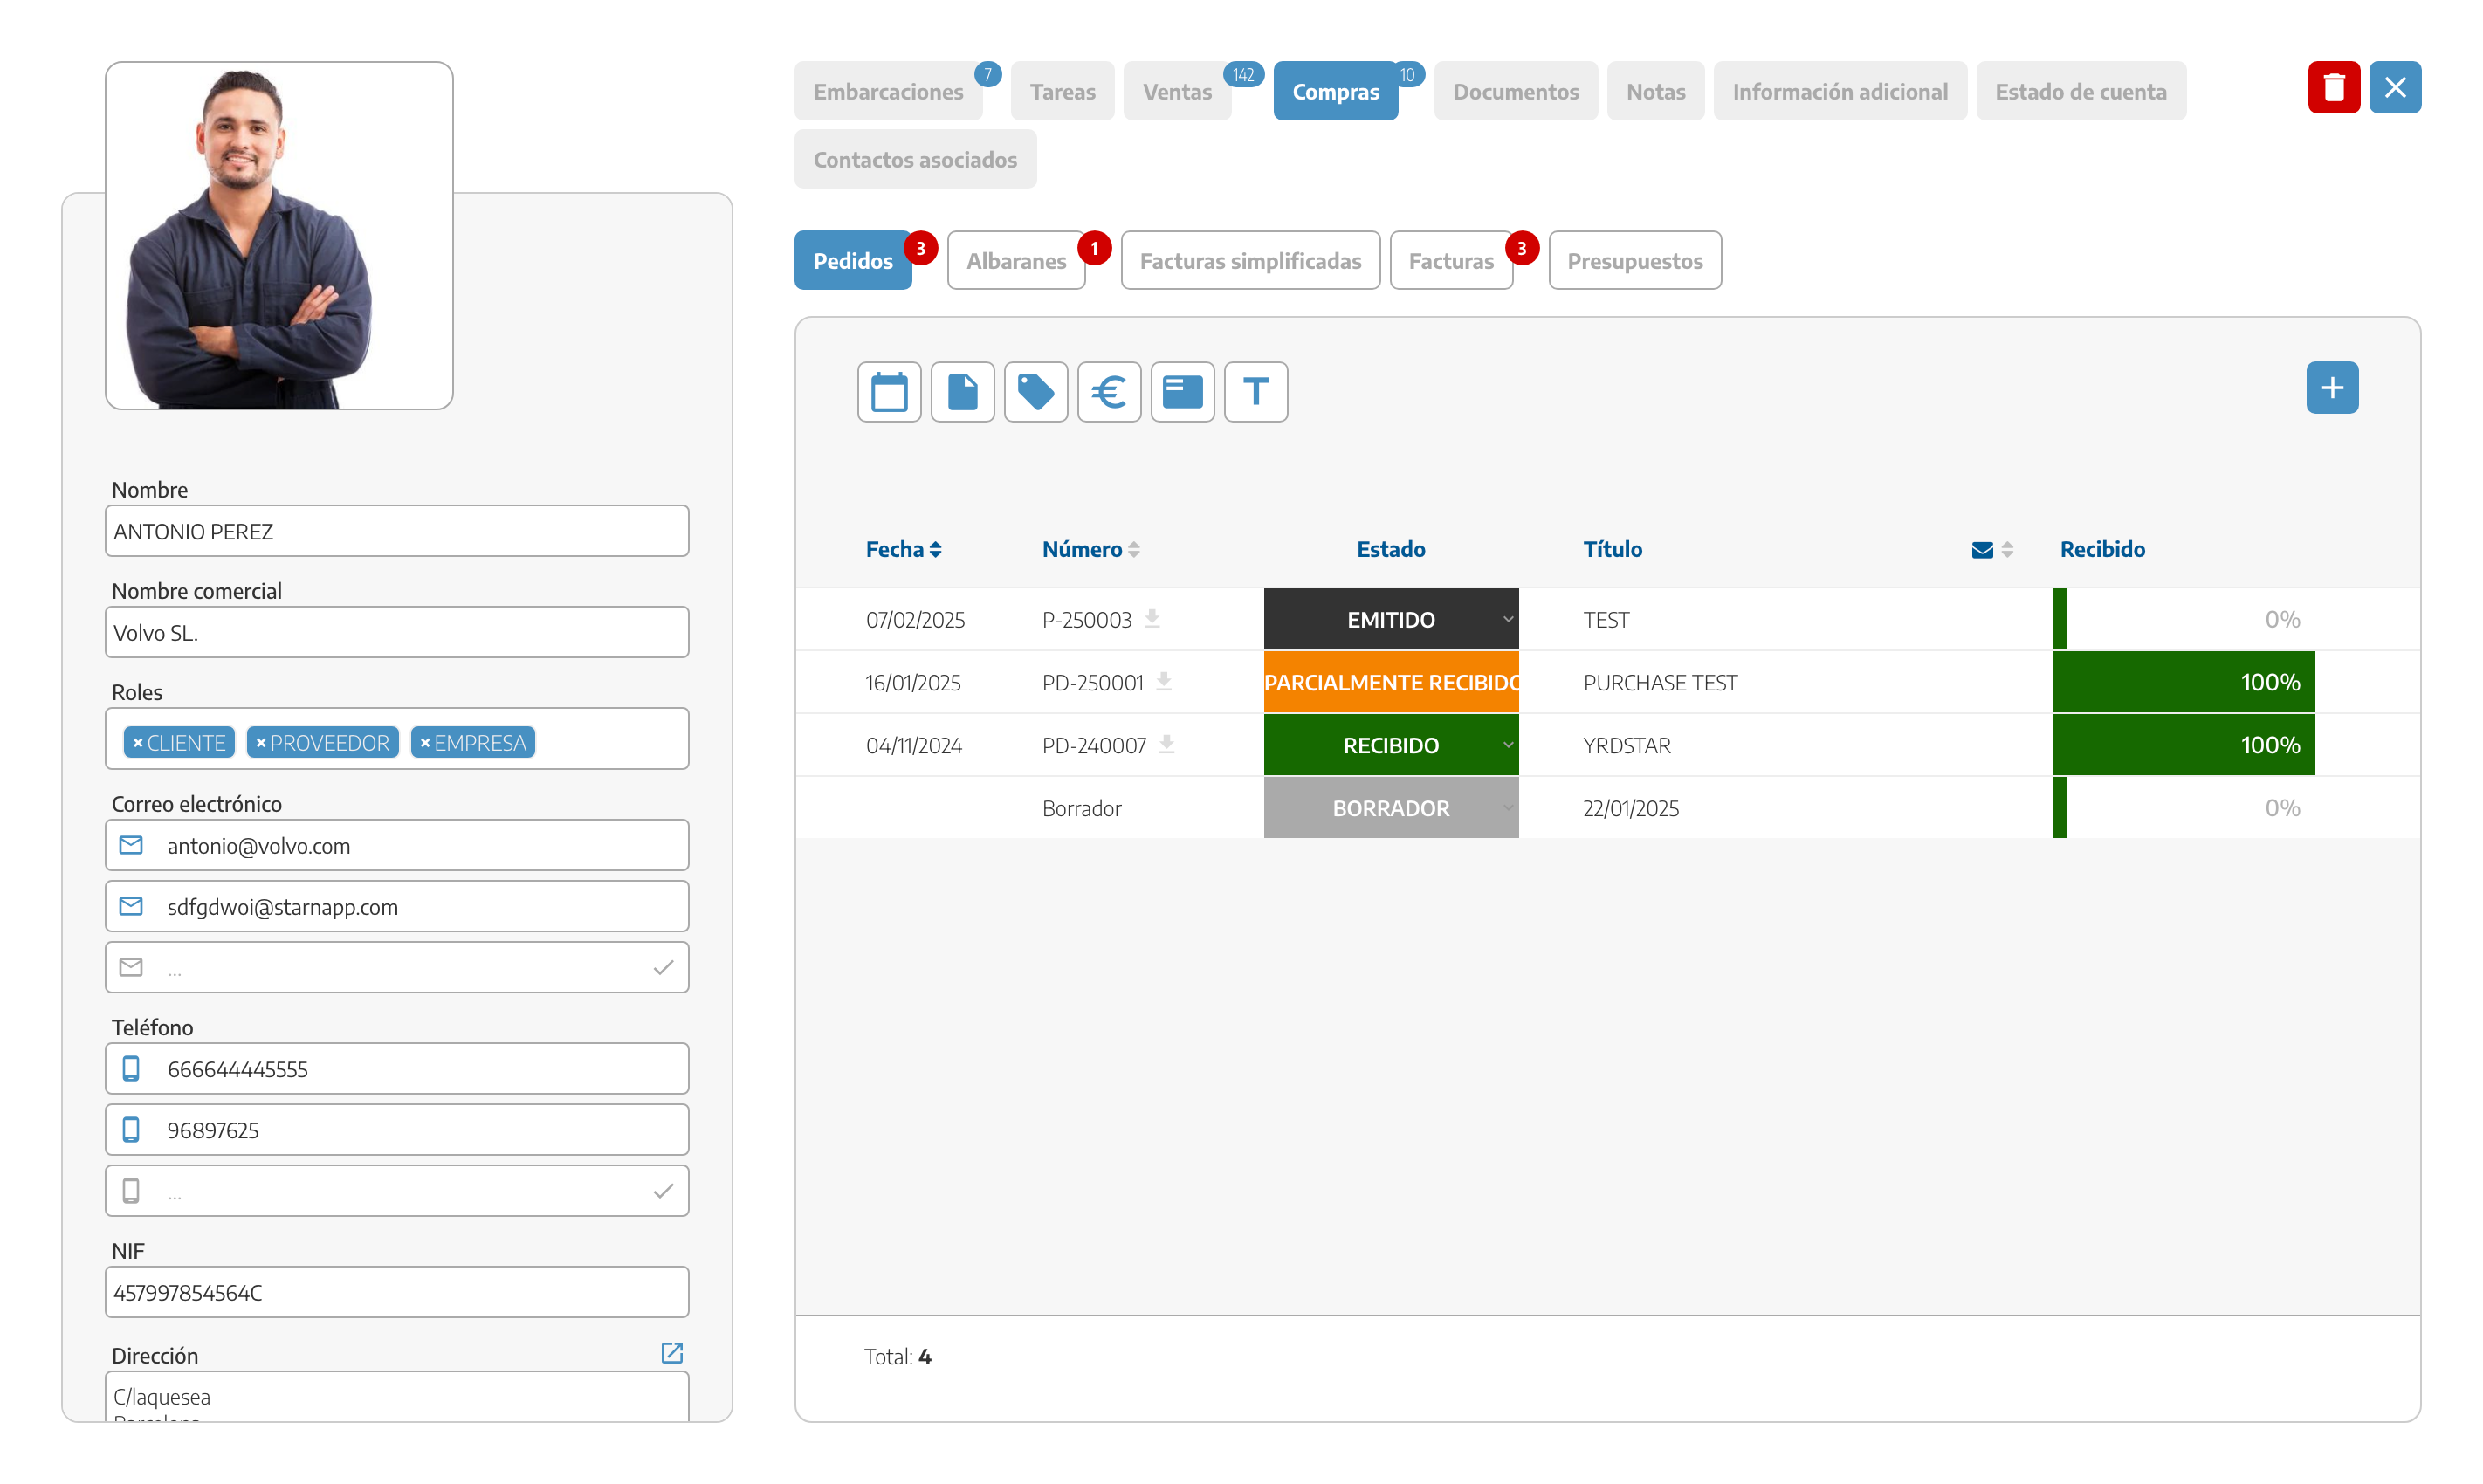
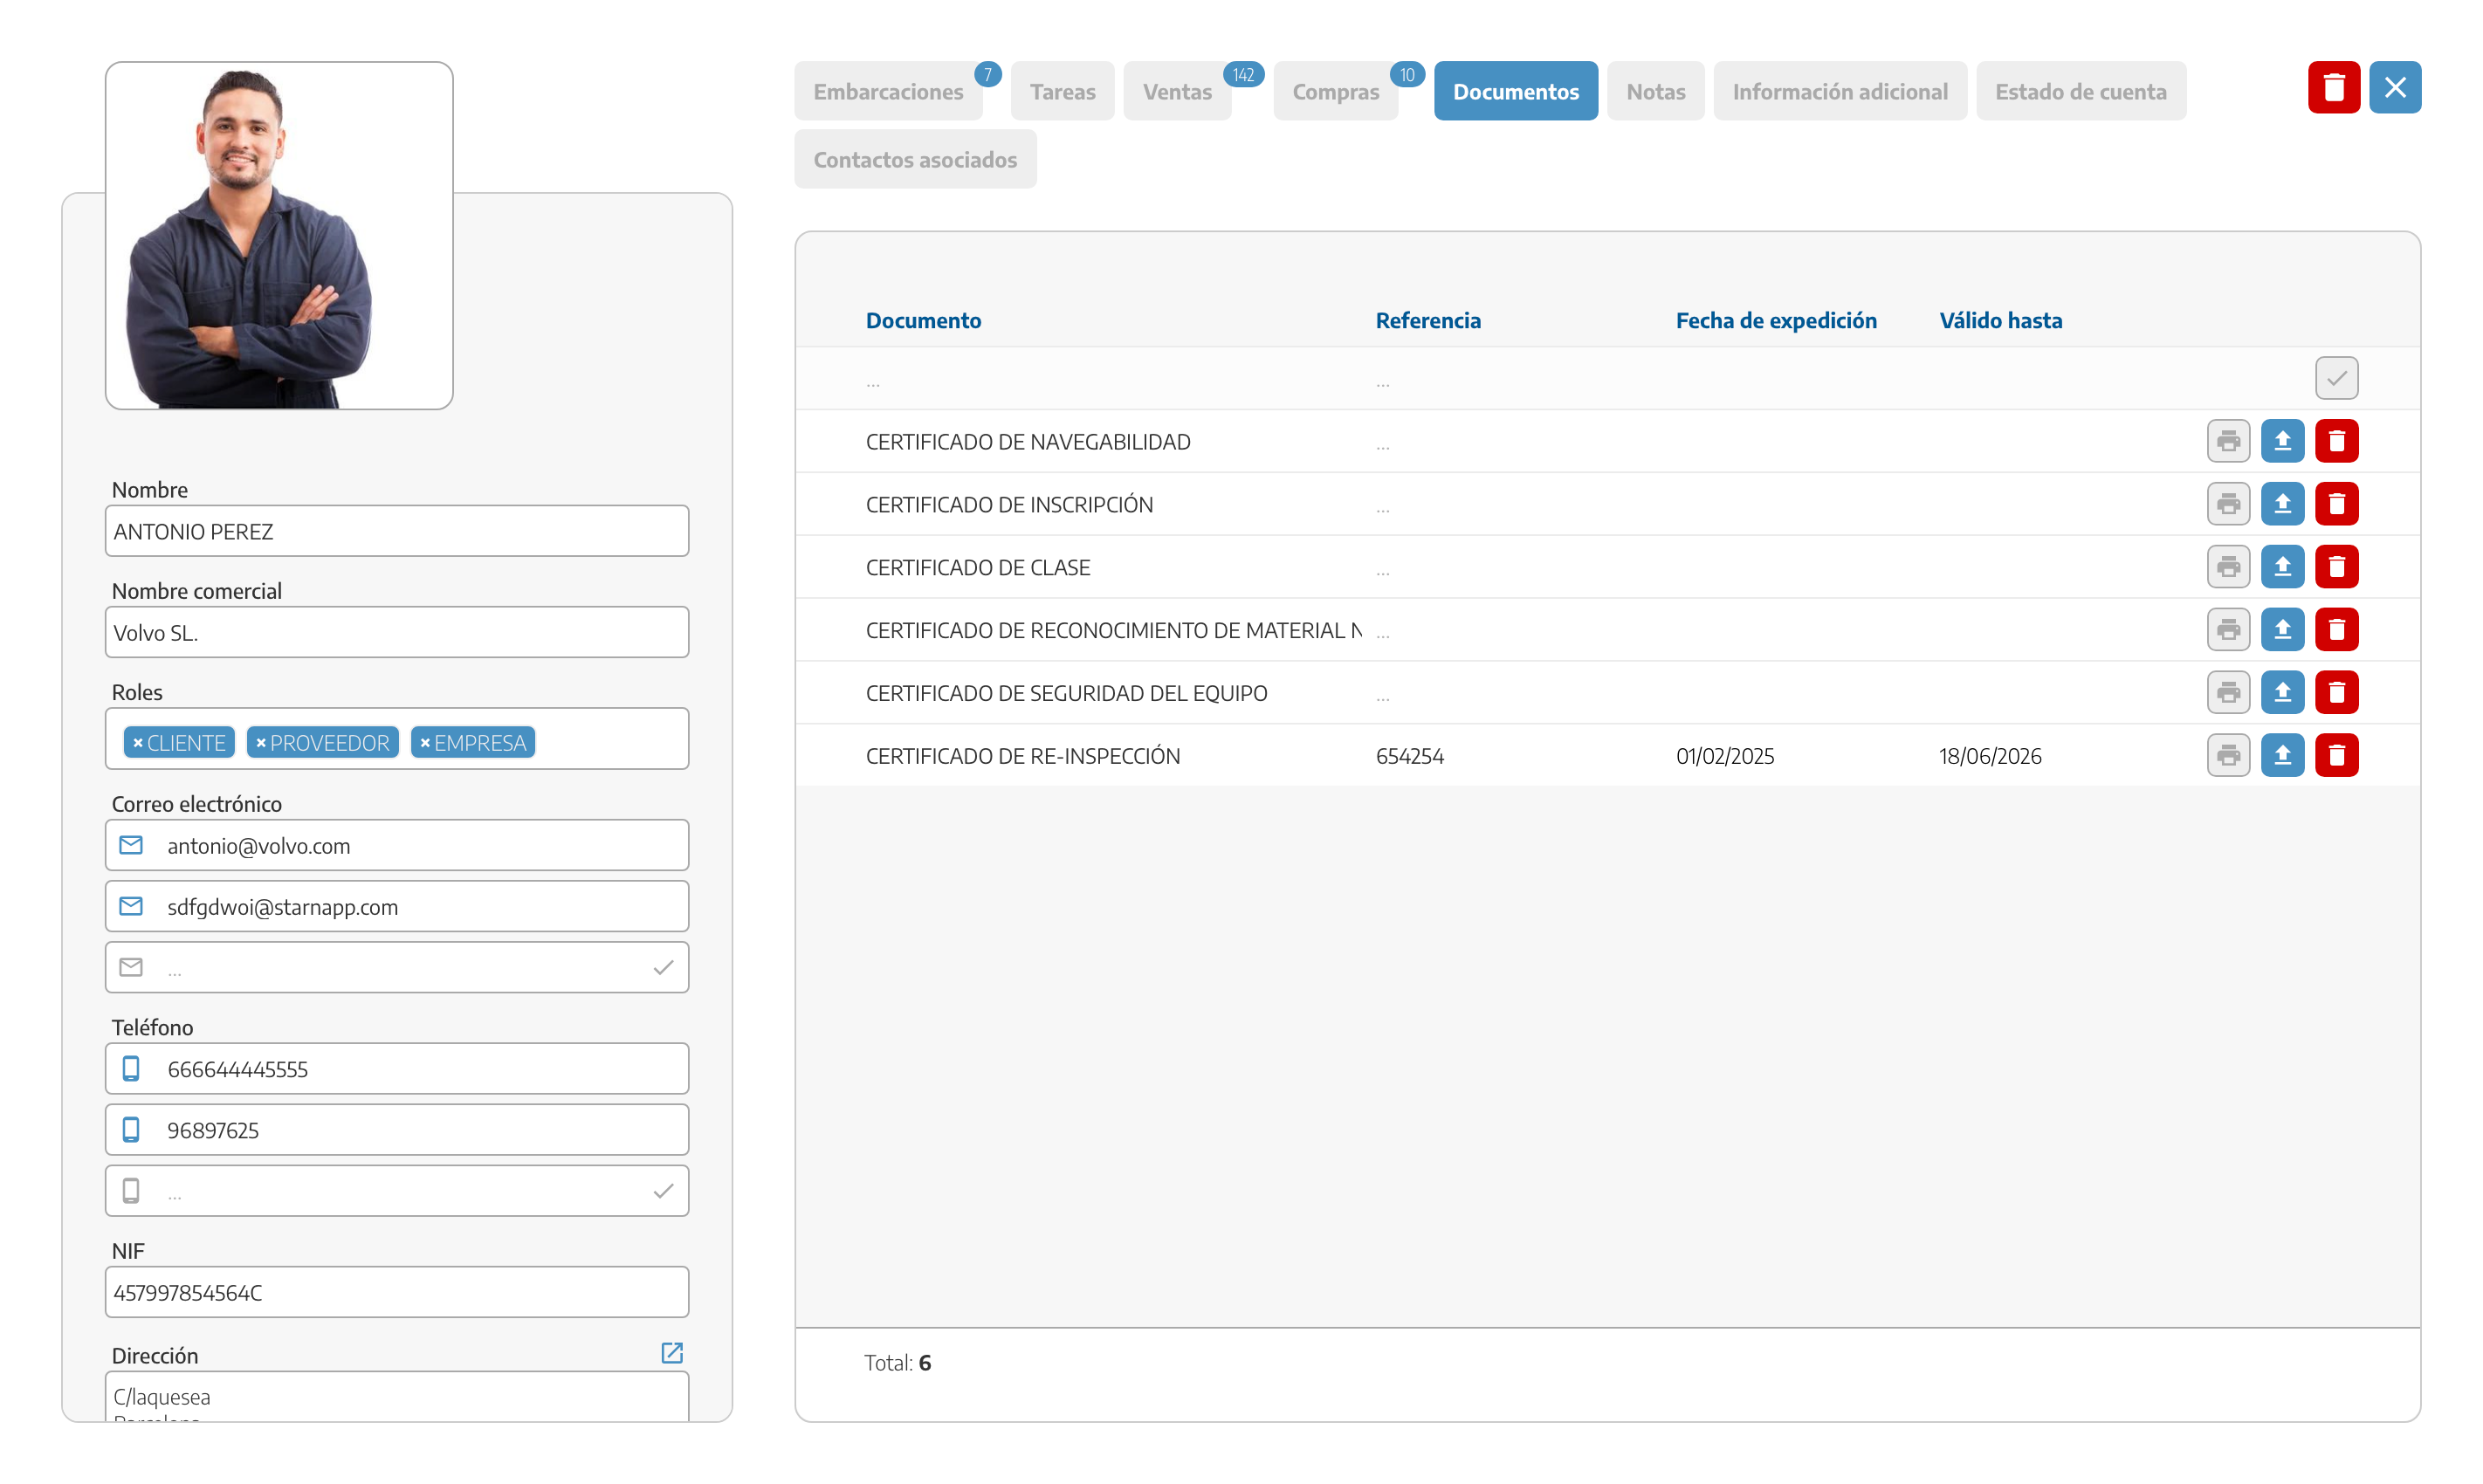
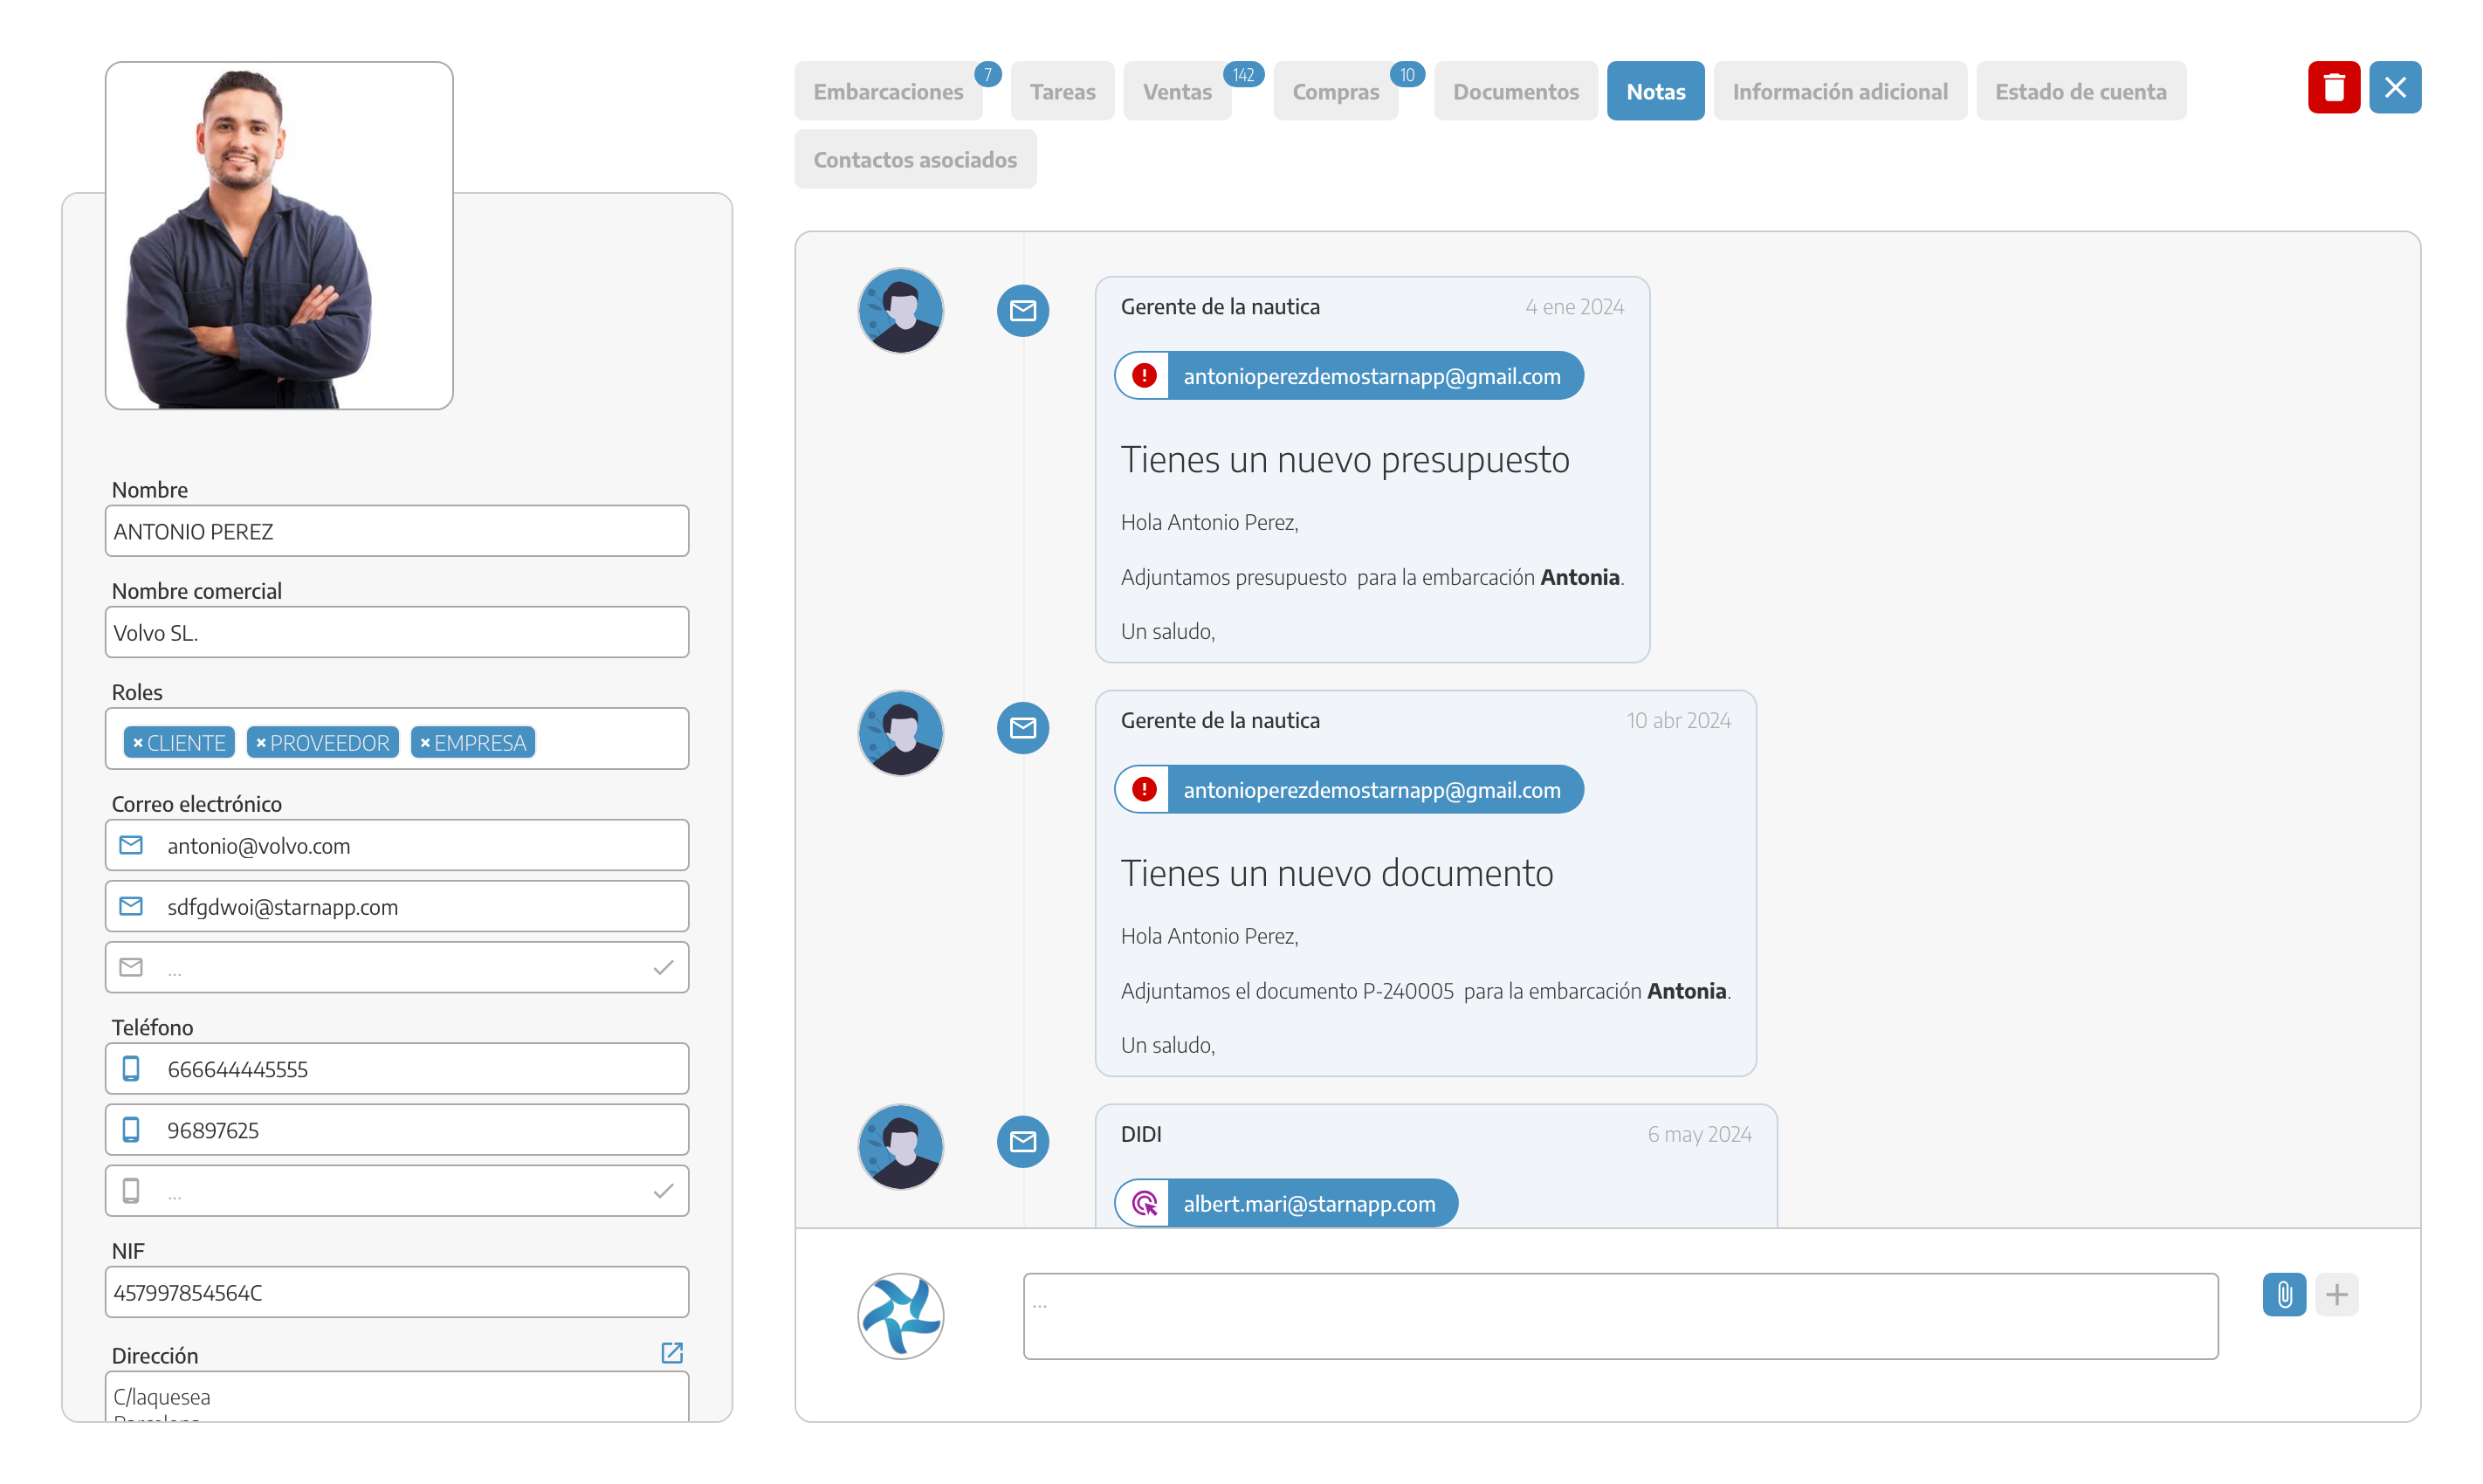
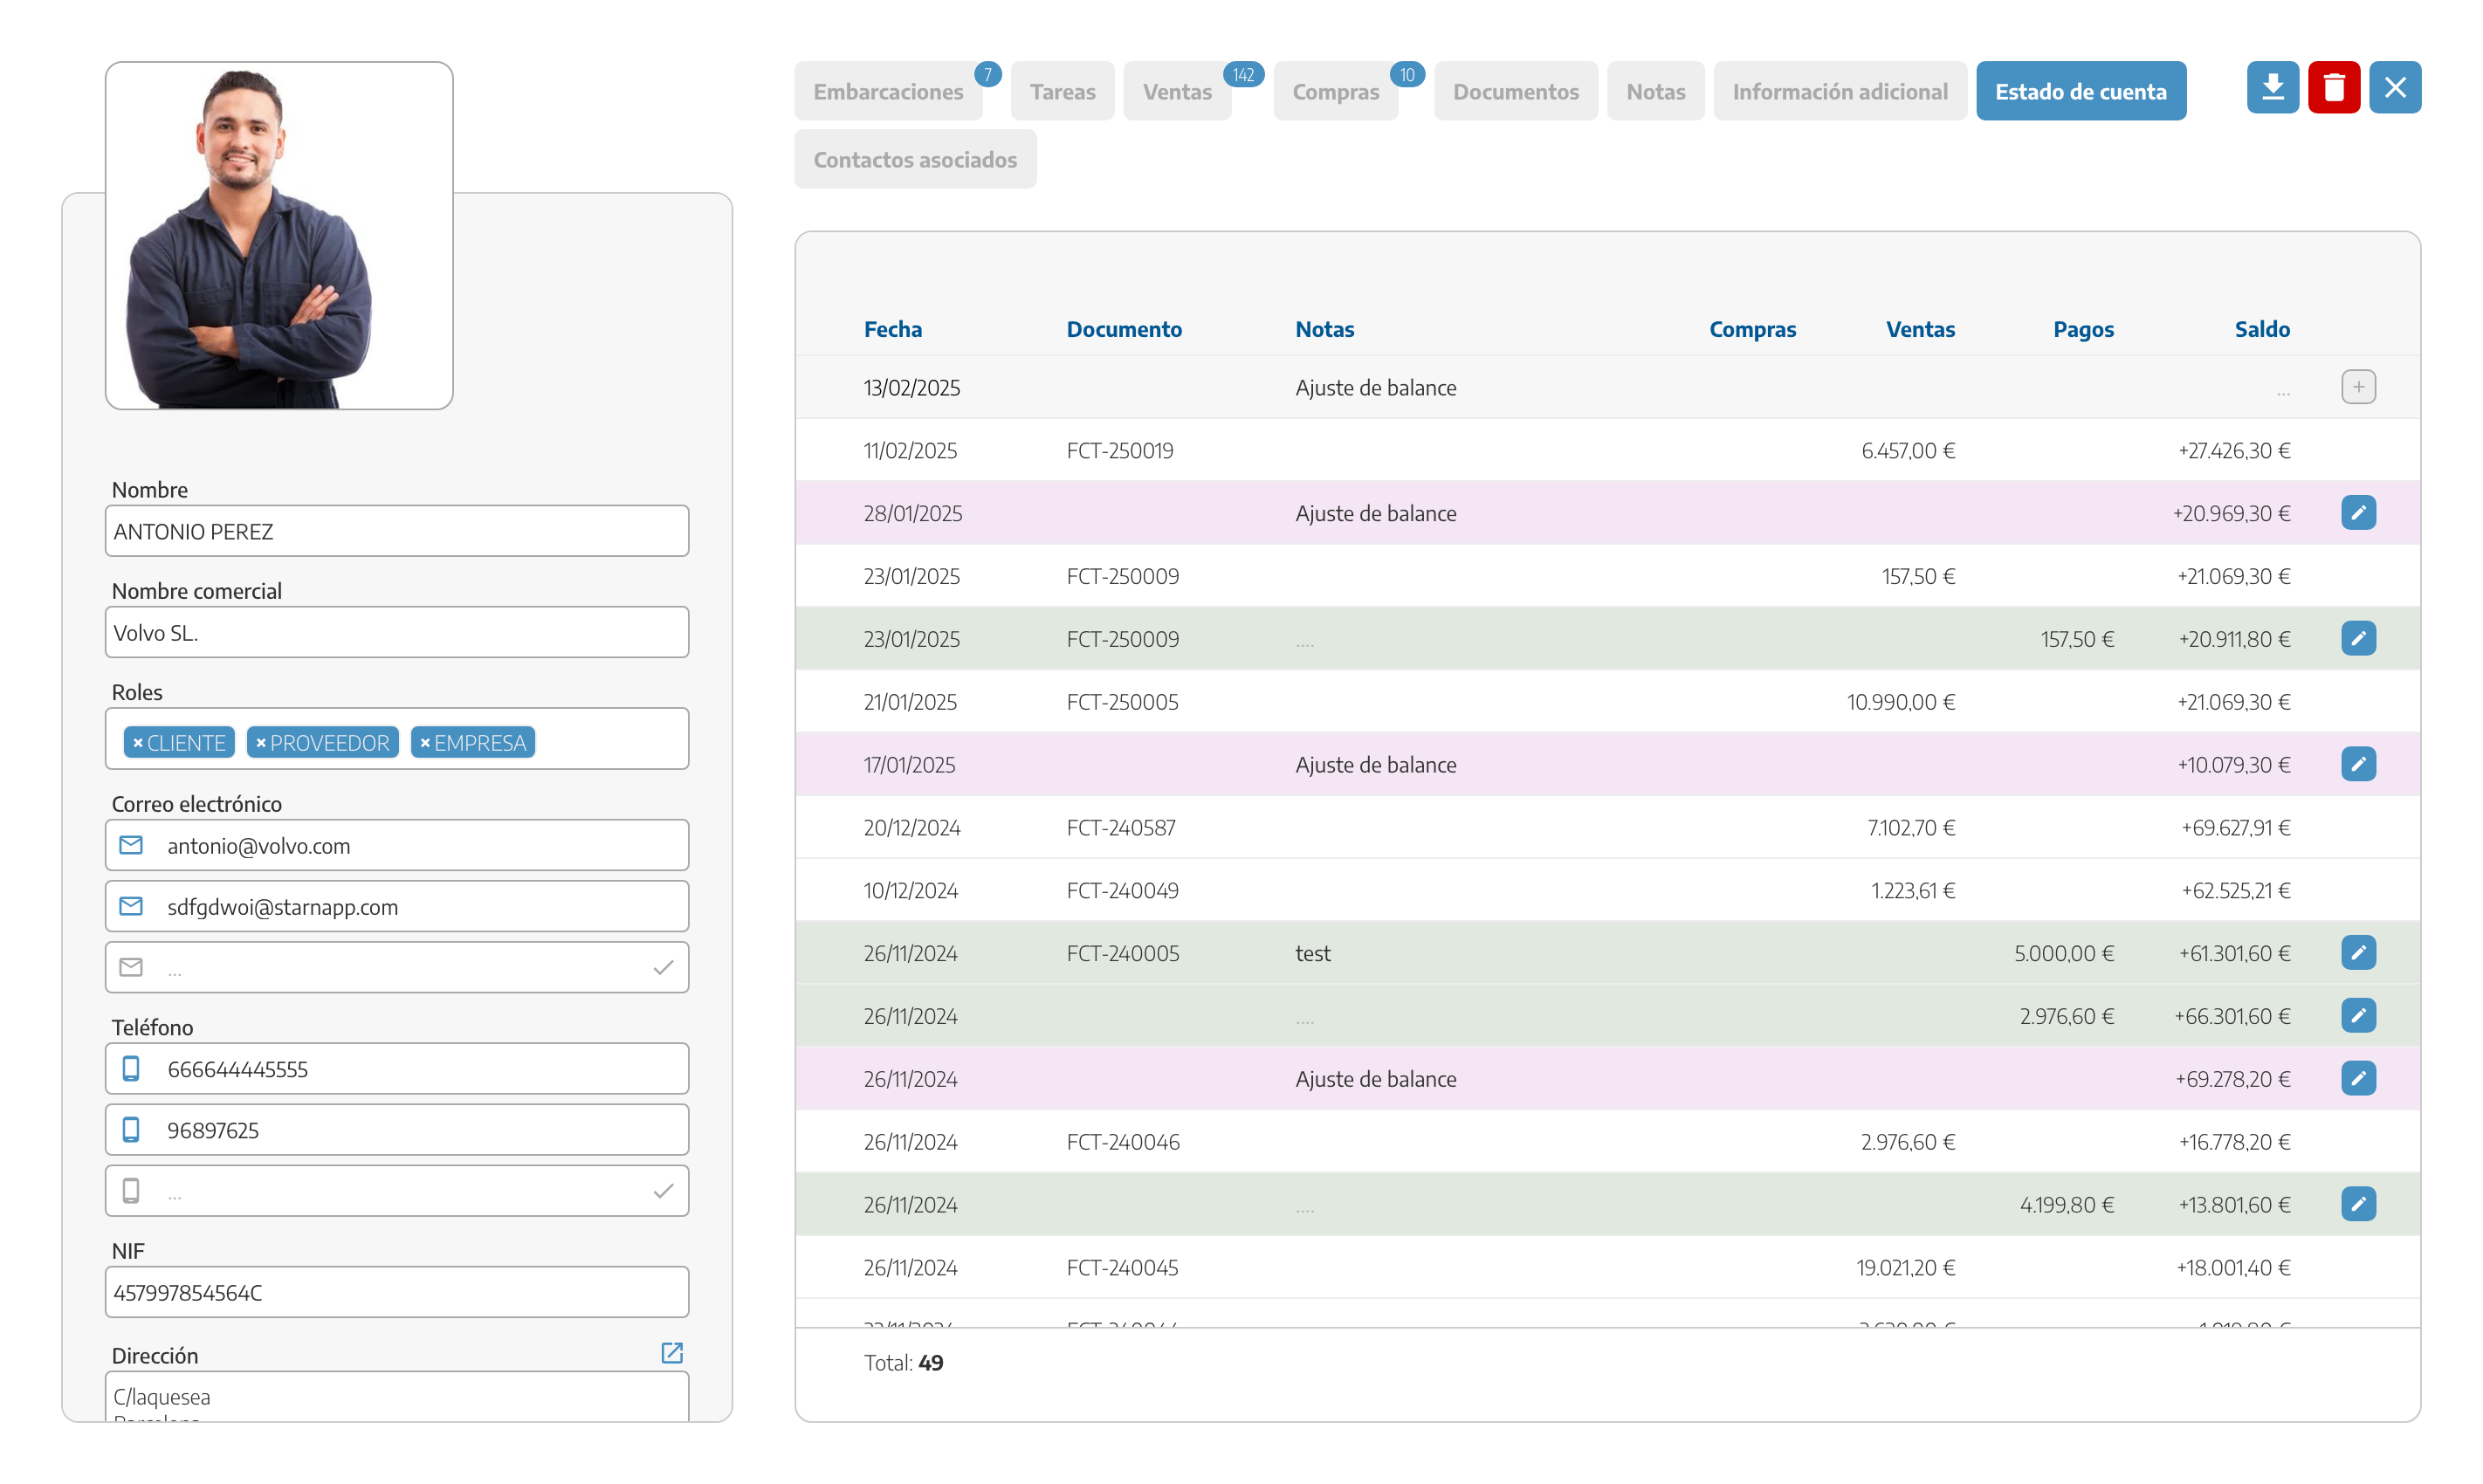
Once the client is created you’ll be in the client’s general overview tab window
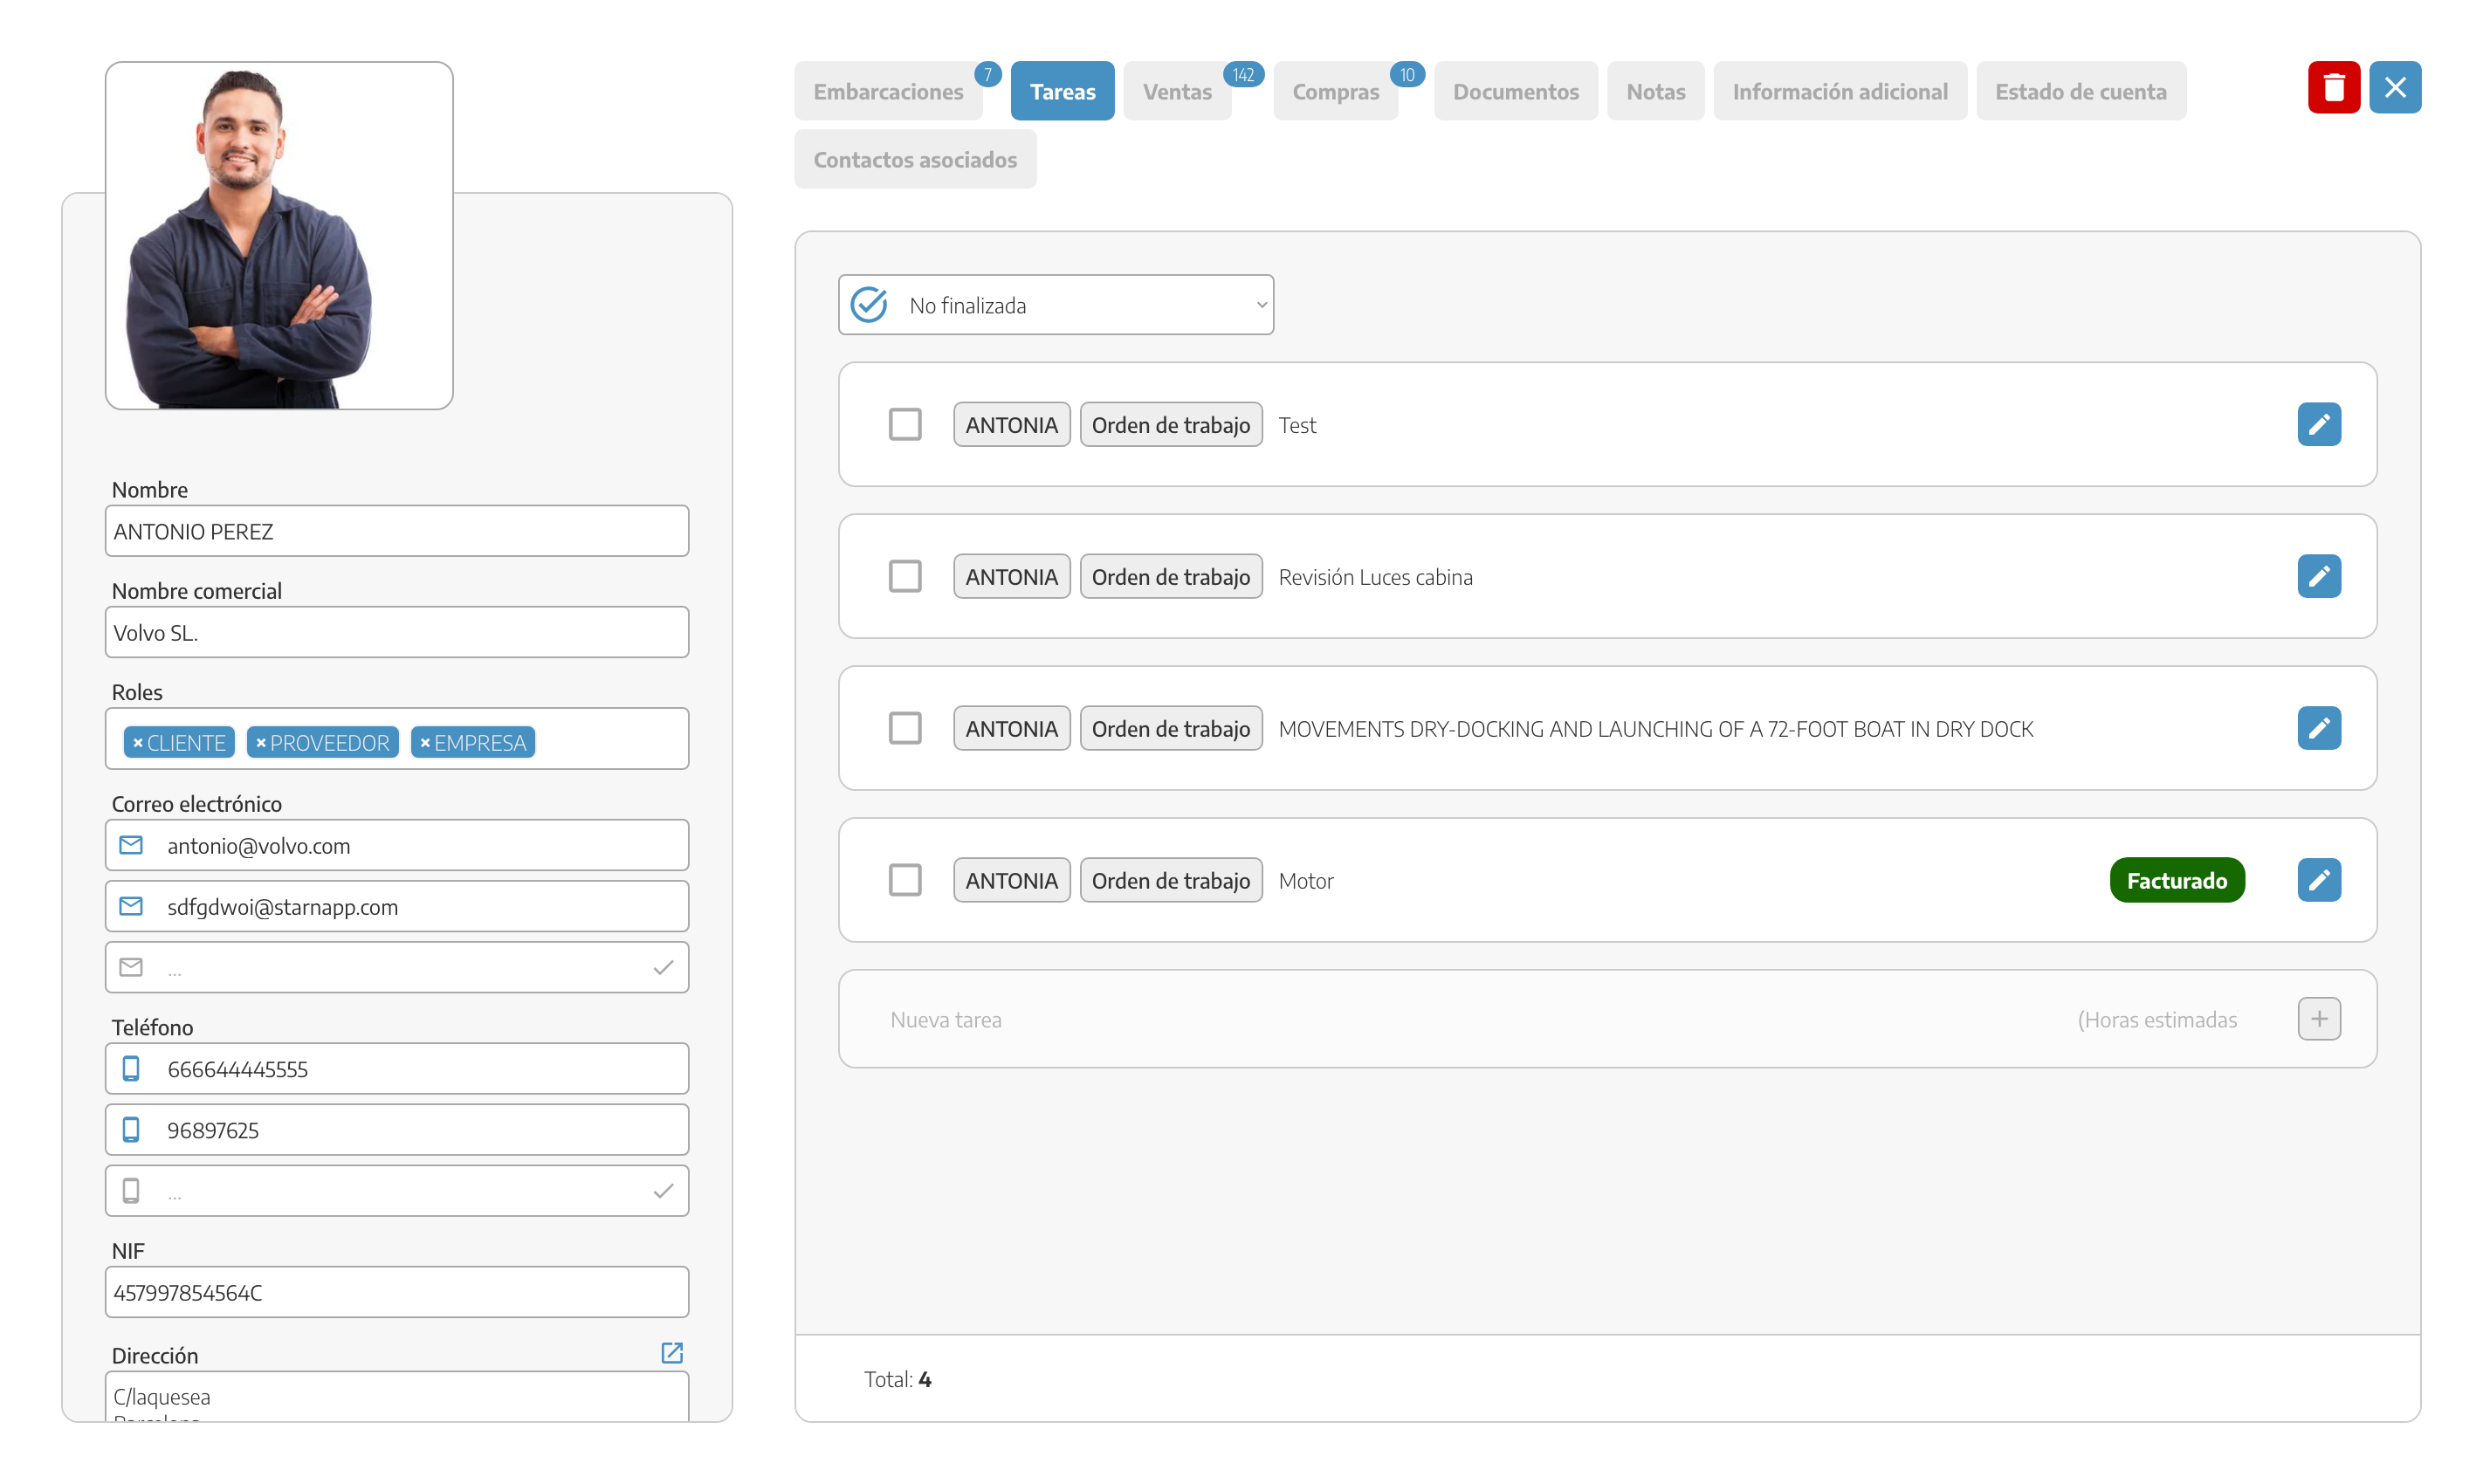
In this window you can use the following views:
Boats: Where the boats associated with the customer will appear.
Tasks: here you’ll see all the tasks related to this customer’s boats.
Sales: Here you’ll see all the sales documents that have been issued to this customer.
Purchases: Just like in sales, you can see all the purchase documents that have been issued to this customer.
Documents: Here you’ll see all the documents that are related to the customer or to their boats.
Notes: All the notes added in the different documents will appear in this section, and you can add them from here as well.
Additional information: you can add important extra information like the default discount applied to the customer or their bank details.

Account statement: Here you can see all the transactions related to this customer and adjust balances if needed.
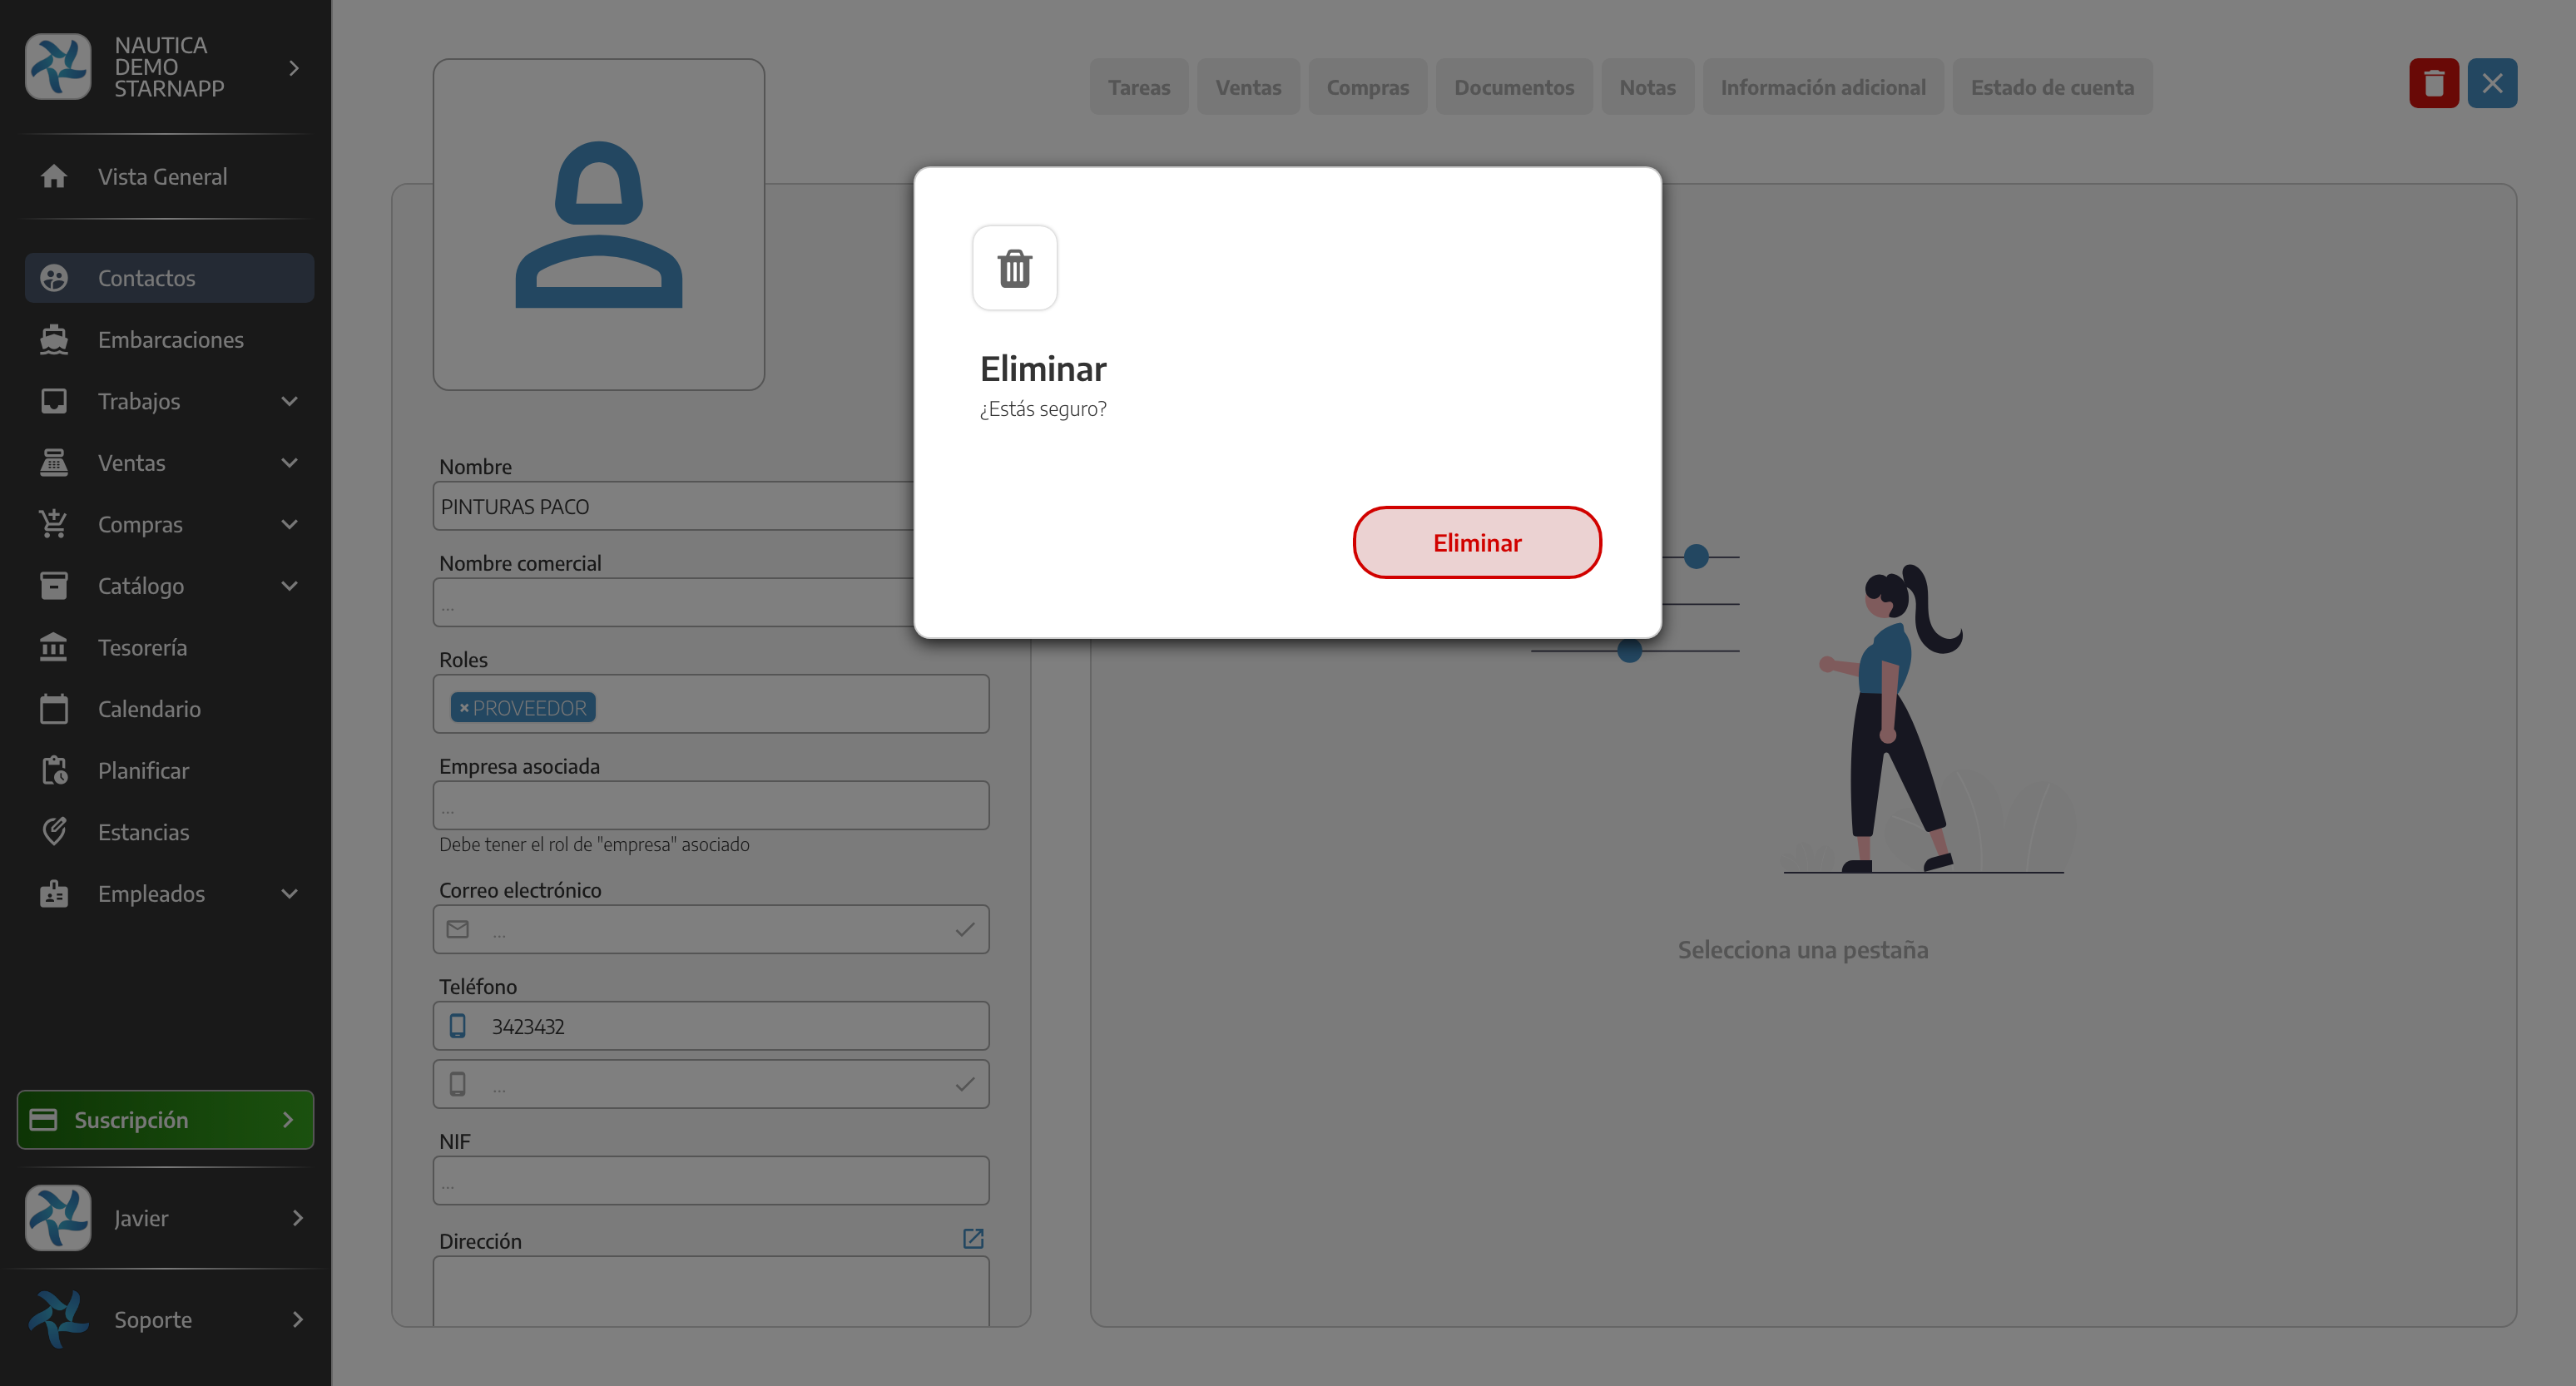
If we want to delete a client, at the top right we have the trash icon to do it *Warning when deleting this client we won’t be able to recover them. To edit them we just click on the client’s name and in the bar on the left we can edit all their data.

Lastly, we have the option to download the client’s account statement in “spreadsheet” format and then send it to the client or to their accounting firm for verification. *Warning in some fields when changing any data it will tell us to confirm with the check we have on the side.
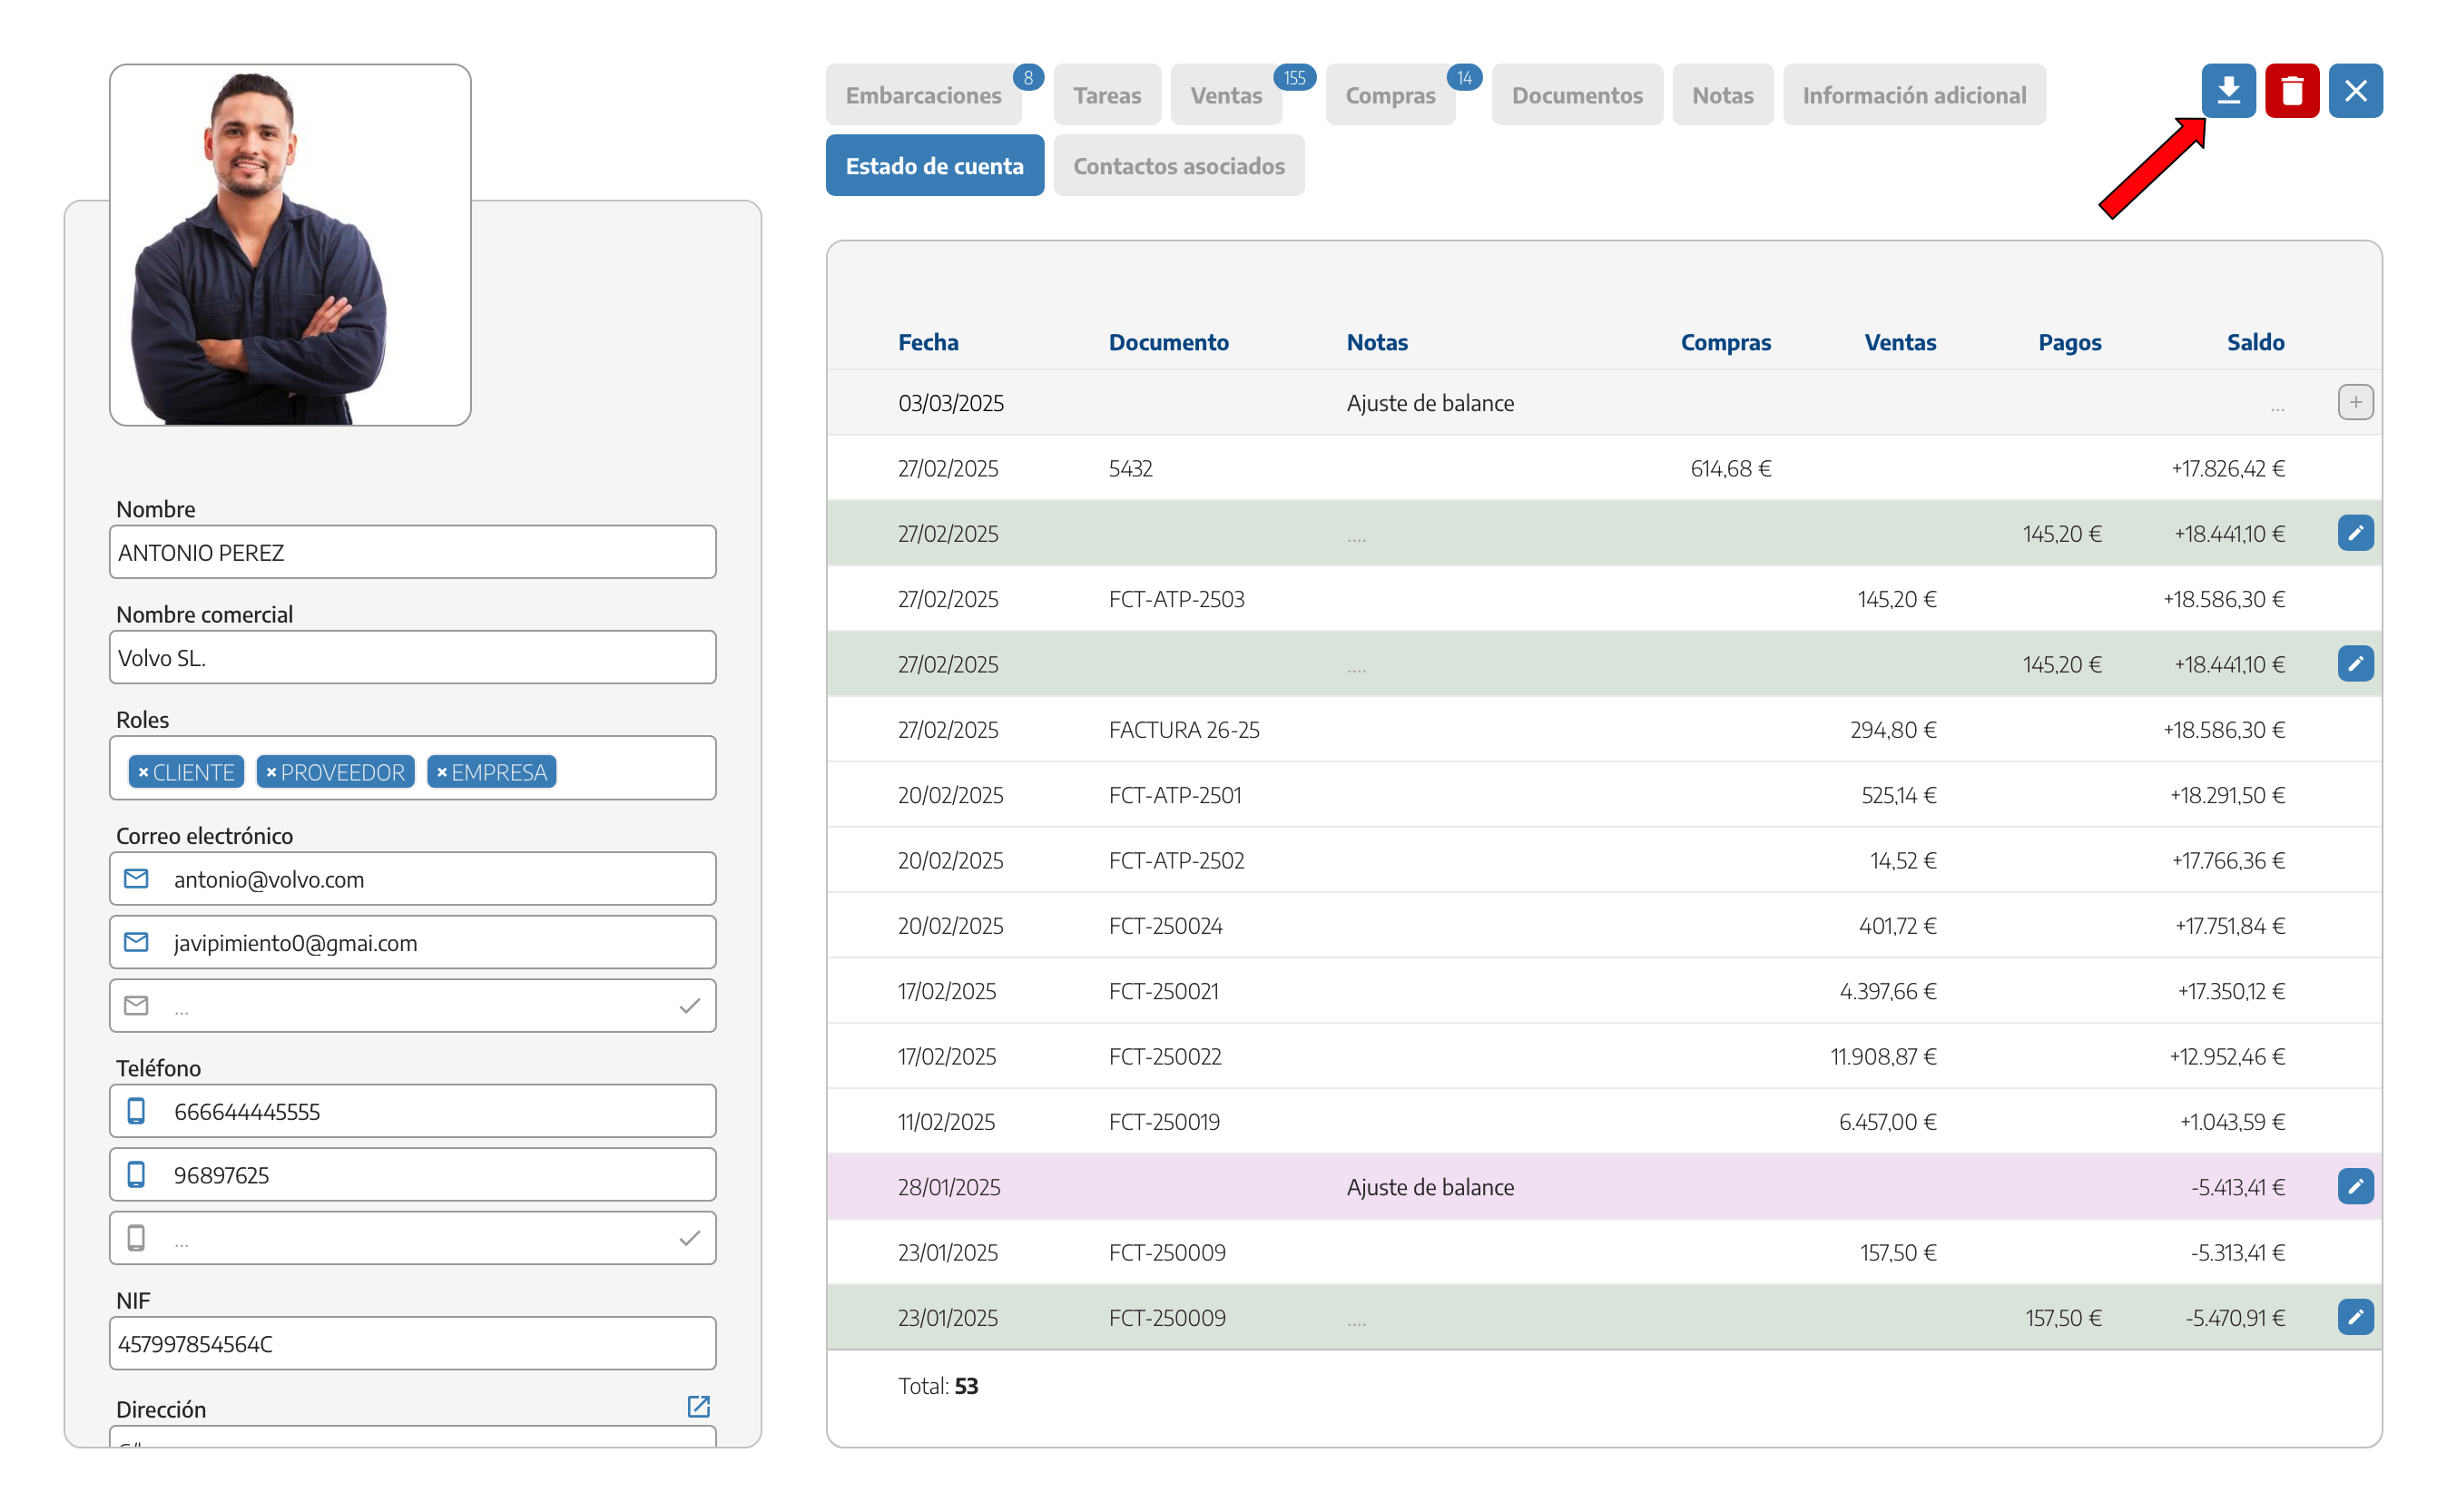
This file can be shared with any other management software, sent to the accounting firm to control the issued invoices, or sent to the client themselves, where it can be viewed with any program like Excel or programs designed for spreadsheets.